Configuration - Augnito
Follow the configuration instructions to ensure your voice recognition software is enabled for the users who need it.
Core Cris
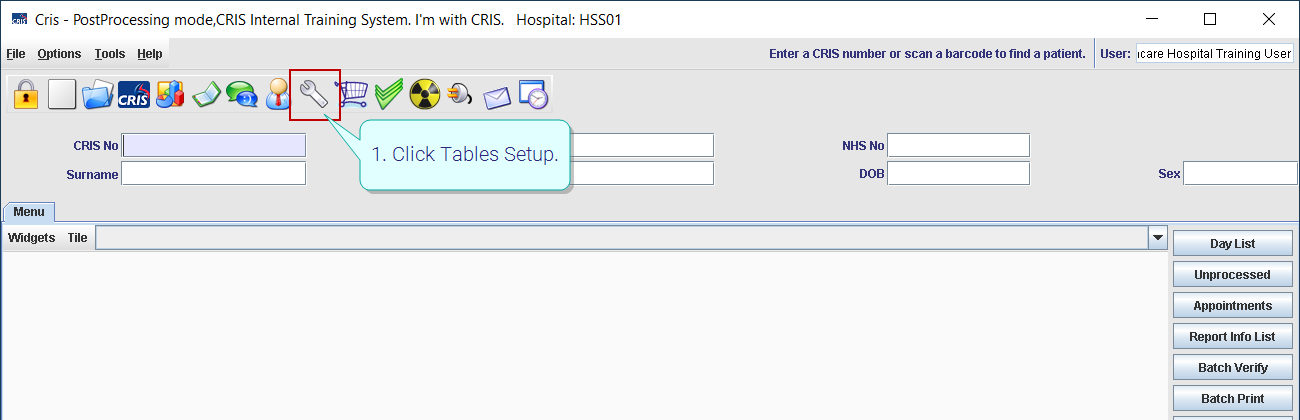
- Click Tables Setup

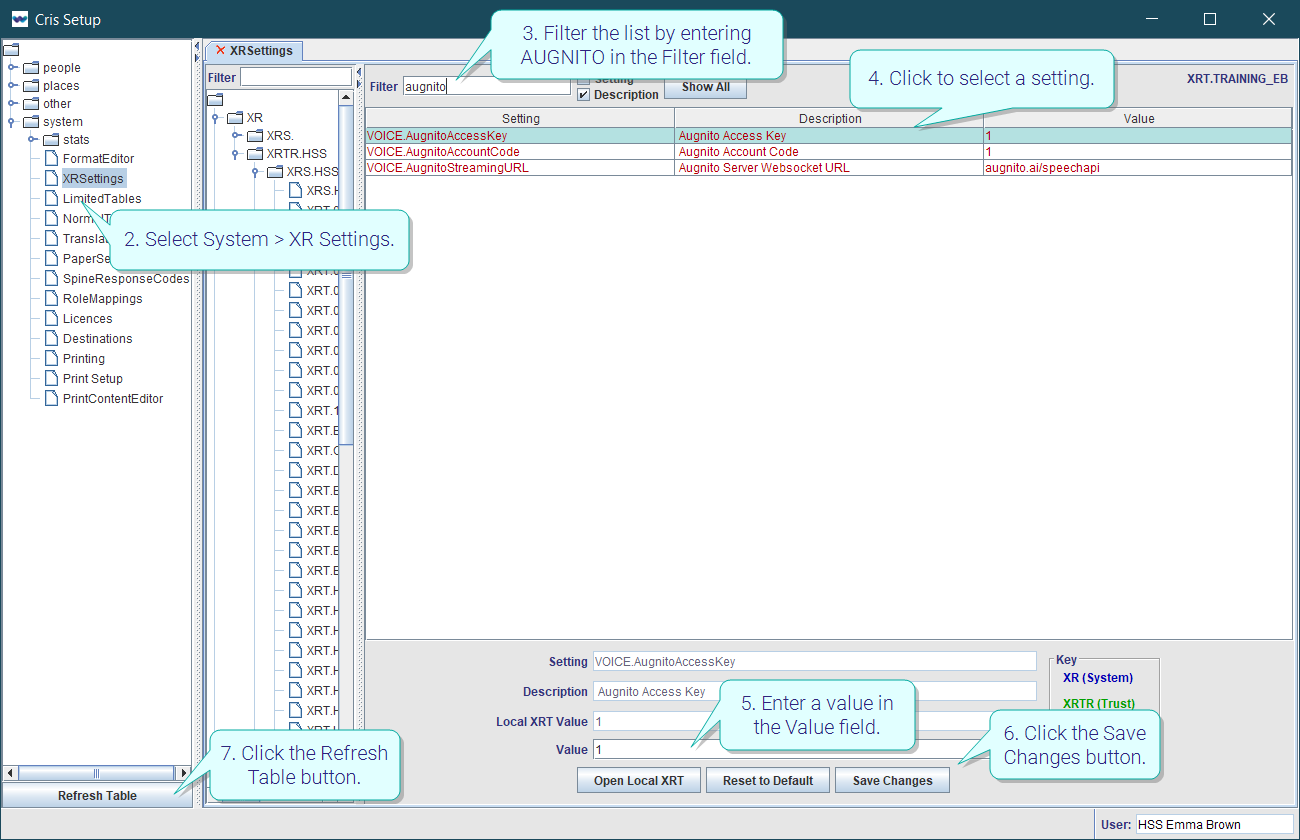
- Select System > XR Settings.
- Filter the list by entering AUGNITO in the Filter field.
- Click to select a setting.
- Enter a value in the Value field.
- Click the Save Changes button.
- Click the Refresh Table button.
OR
Double-click the Value field then double-click to select a value from the options.
Note:
Augnito can be used in versions 2.12.12 (core Cris) and 1.14 (new Cris) and above.
Tip:
Shut down and restart Cris after changing this table / setting.
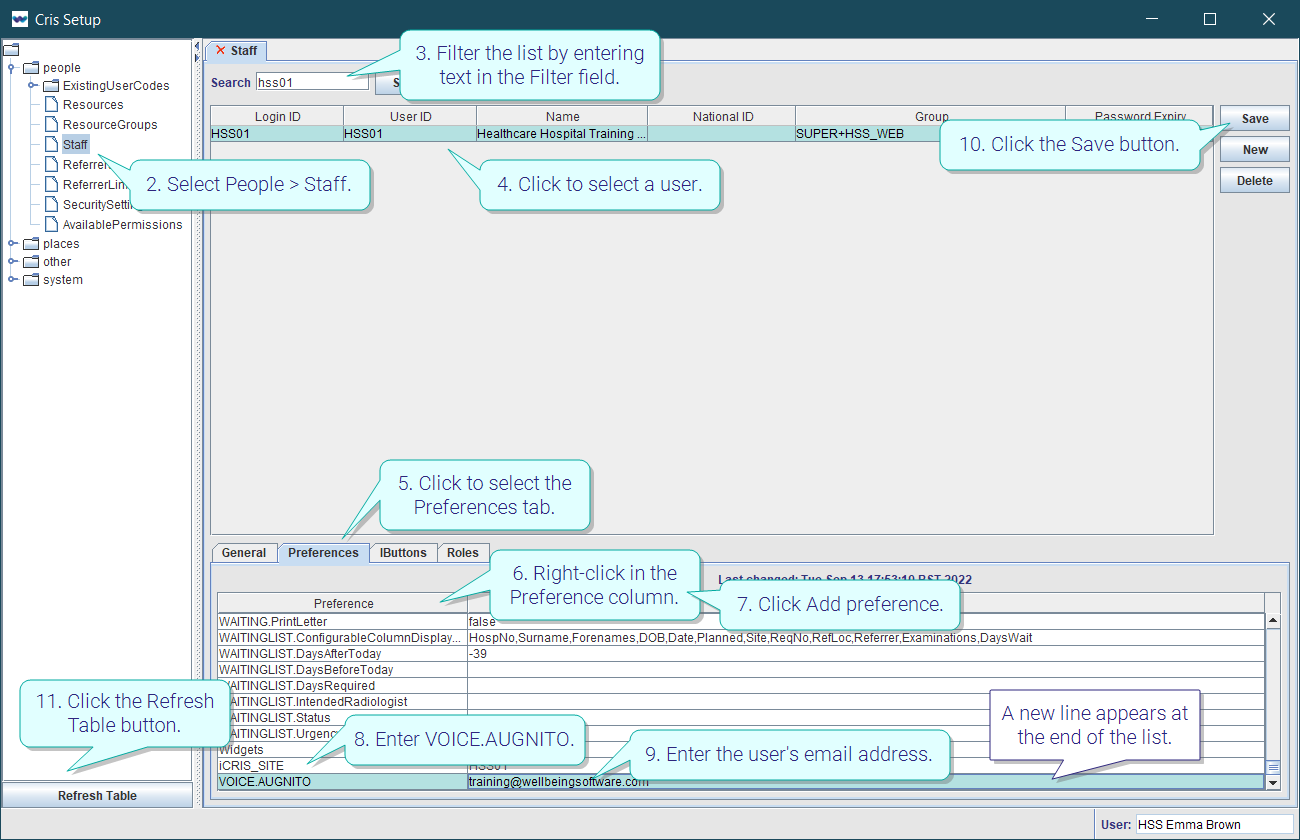
- Click Tables Setup
- Select People > Staff.
- Filter the list by entering text in the Filter field.
- Click to select a user.
- Click to select the Preferences tab.
- Right-click in the Preference column.
- Click Add preference.
- Enter VOICE.AUGNITO in the Preference column.
- Enter the user's email address in the Value column.
- Click the Save button.
- Click the Refresh Table button.
A new line appears at the end of the list.
Note:
You cannot configure Augnito for your own account – i.e., Logged in user. Ensure any changes are made using a different account.
- Select Scribetech > Source.
- Select a microphone from the list of connected devices.
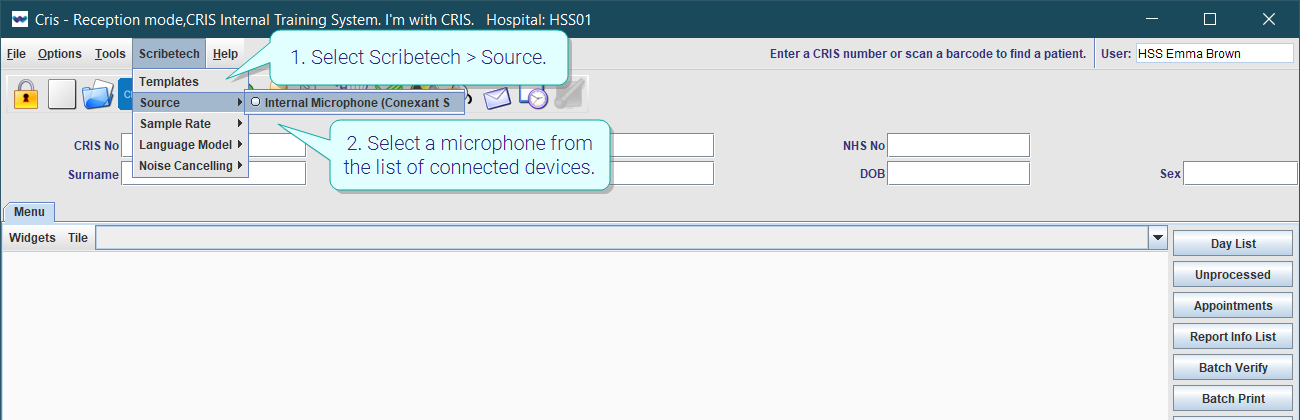
Note:
You may use a headset, SpeechMike, or internal mic. If you charge your phone at a workstation it will be seen as an available mic.
Sample rate is the number of sound samples recorded per second.
- Select Scribetech > Sample Rate.
- Select a number.

Choosing a speciality and language model helps Augnito recognise words you are likely to use, and how you might say them.
- Select Scribetech > Language Model.
- Select Radiology - [your preferred Language Model].
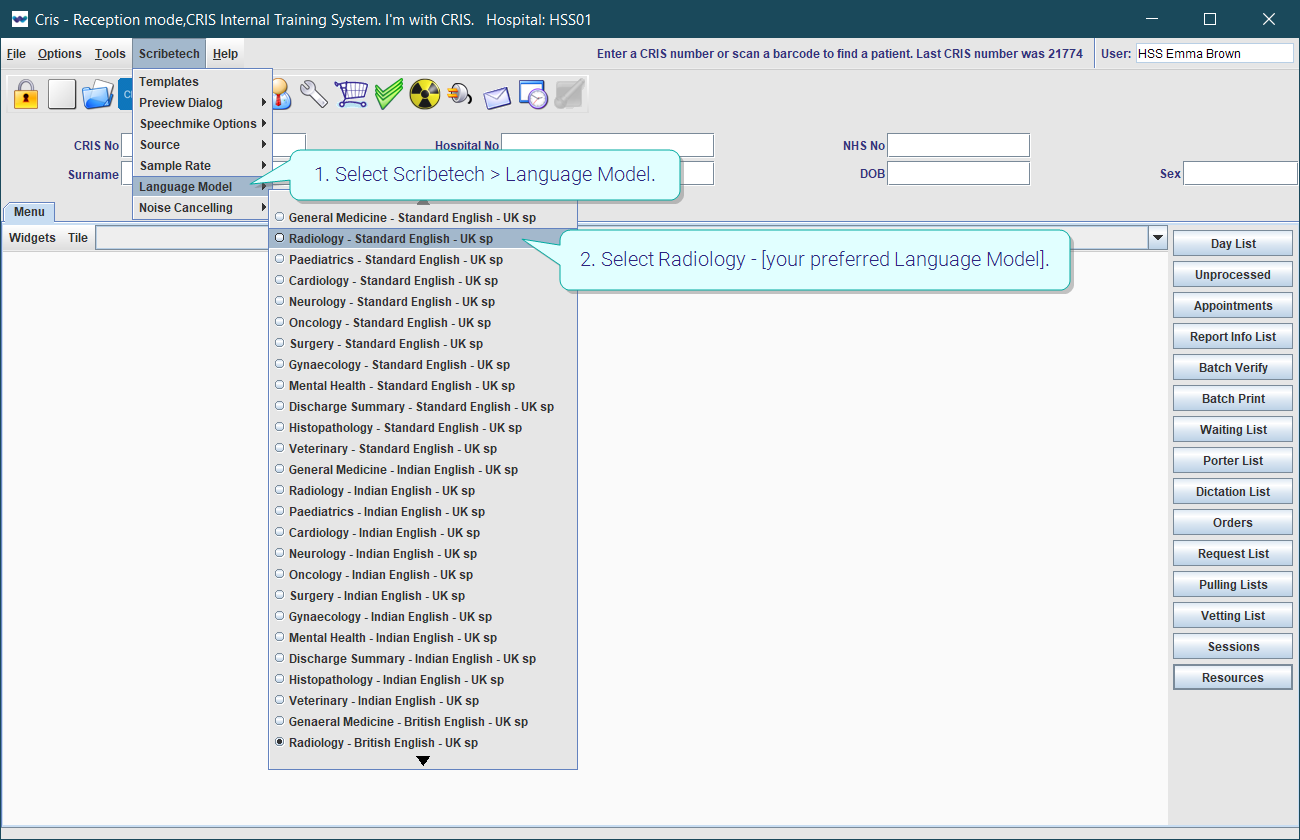
Note:
Choosing a speciality (vocabulary) and language model helps Augnito recognise words you are likely to use.
Apply noise cancelling when using Augnito in a noisy environment.
- Select Scribetech > Noise Cancelling.
- Select a number.
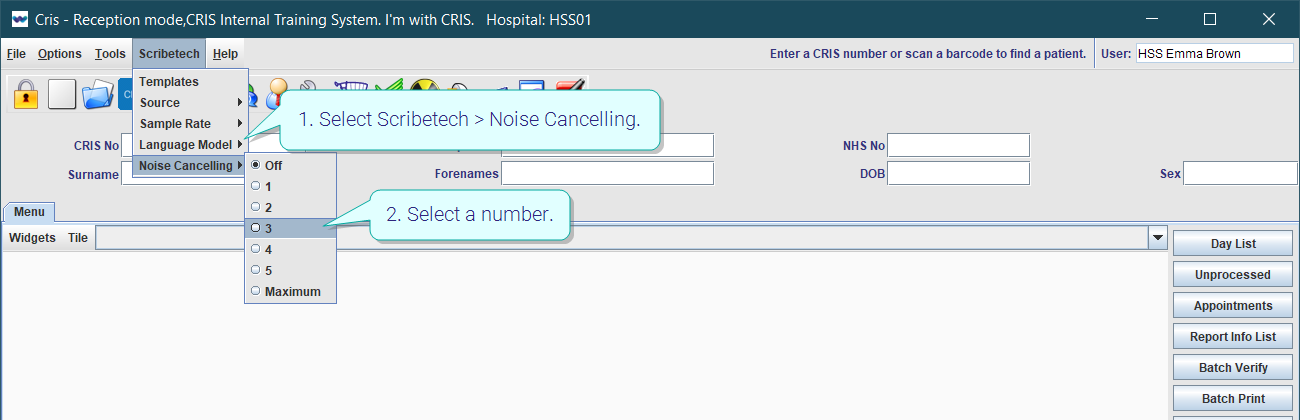
Note:
-
Noise cancelling reduces the microphone’s sensitivity to background noise.
-
Noise cancelling may be useful in a room with people; printers; or other background noise.
-
Most users will not need to use noise cancelling.
-
Some microphones have in-built noise reduction.
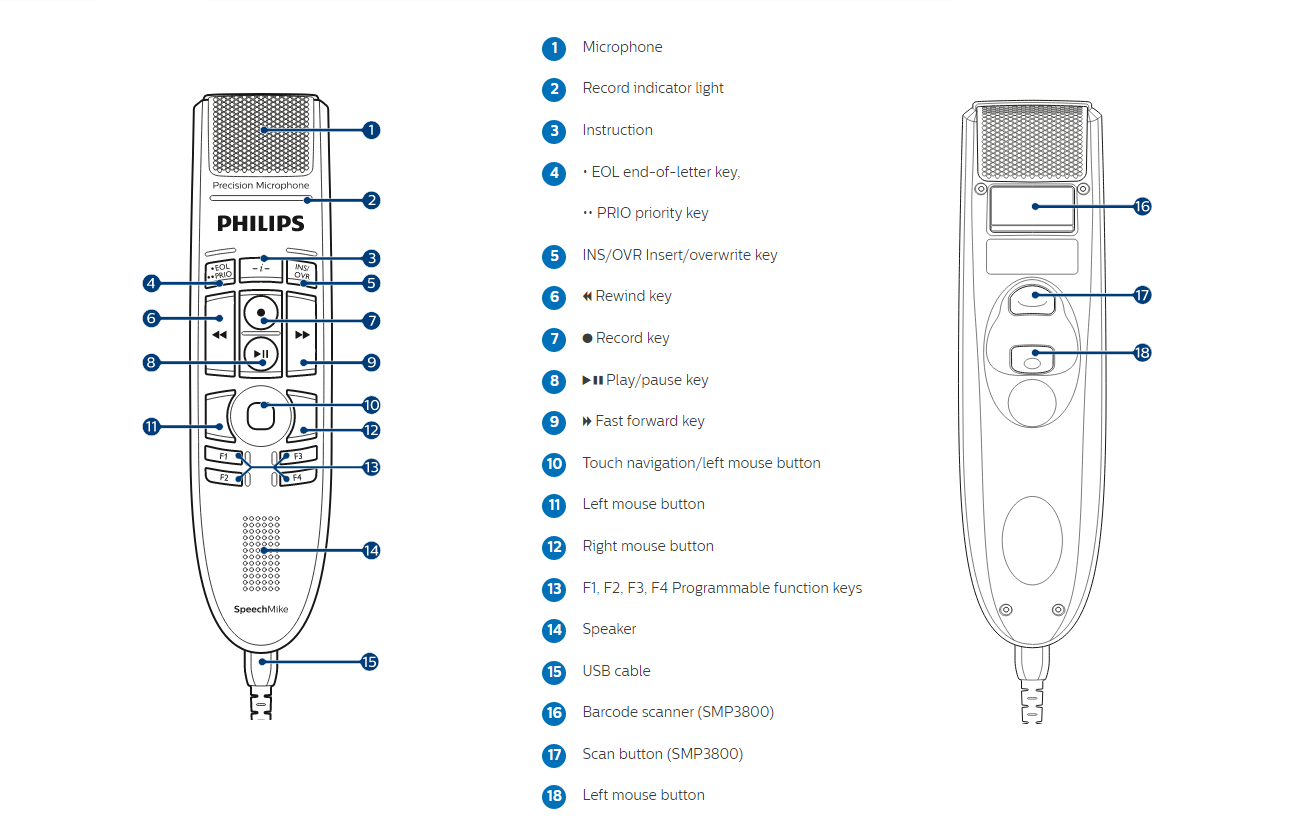
SpeechMike
With your SpeechMike, you can control various applications on your computer or in your browser. You have different button modes available for this purpose. For Cris Reporting, you will need Browser mode.
- Press EOL and INS / OVR simultaneously for 3 seconds.
- Press F3.
All corresponding LEDs will start flashing.
The F3 LED will light up to confirm the new button mode setting.

These are the button actions in Browser mode:
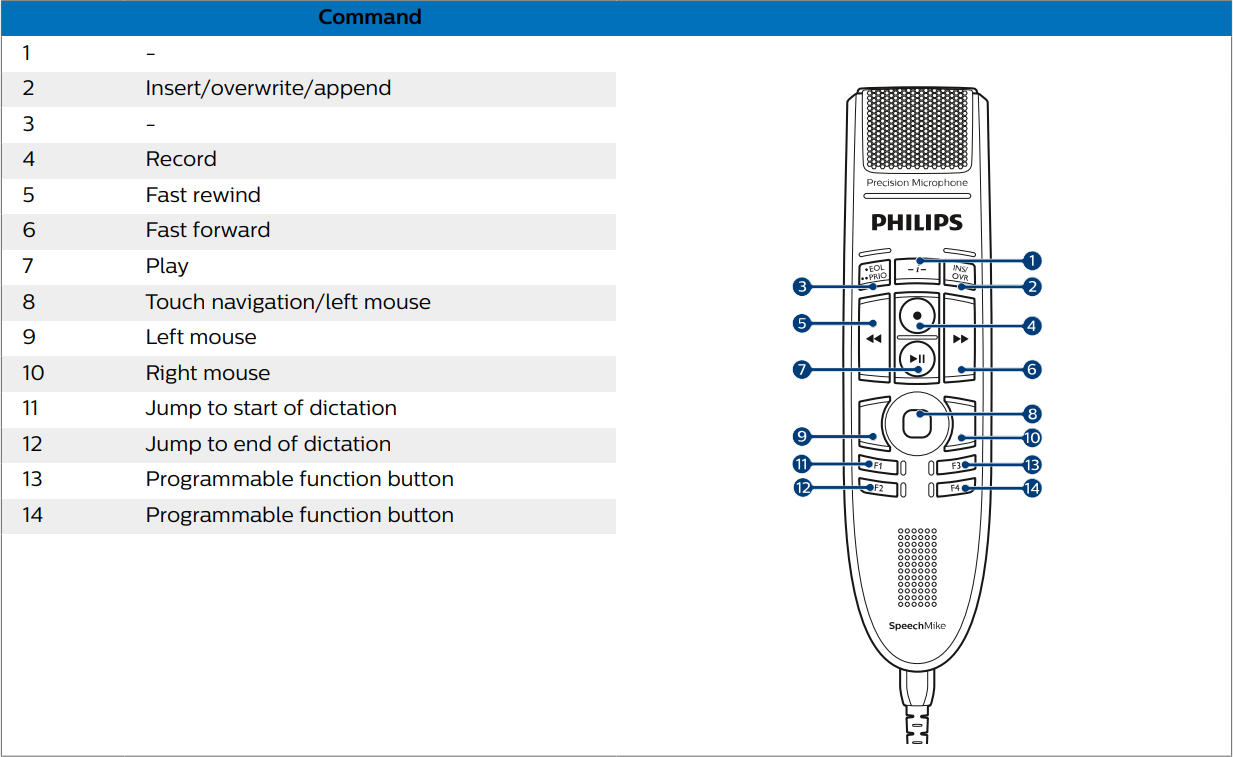
Note:
If LEDs do not start flashing, your mic does not support Browser mode, or the firmware version is not compatible. See System Requirements. Older SpeechMikes can instead use Hotkeys.
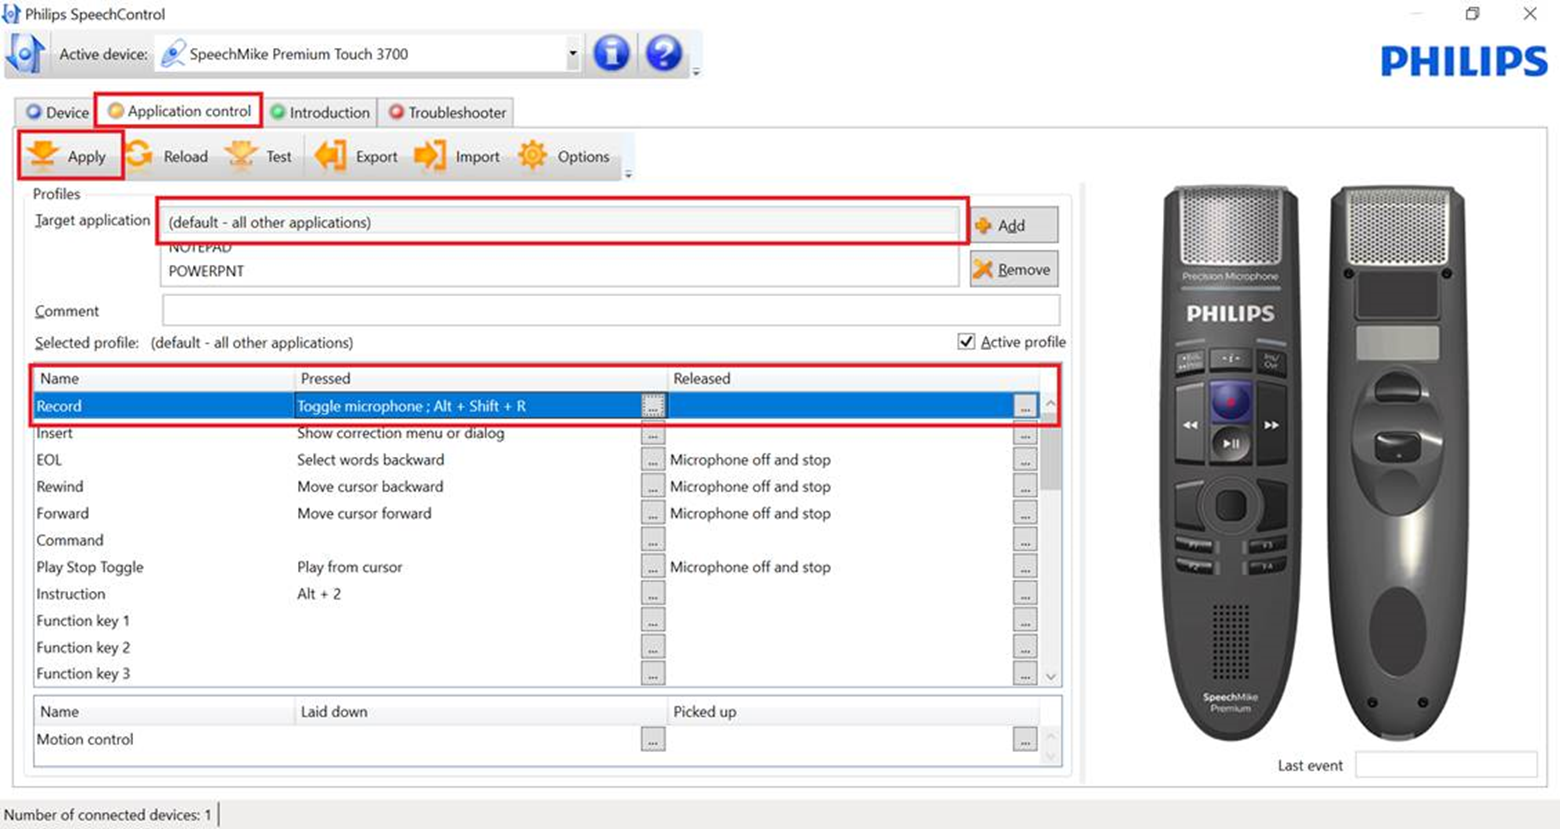
- Install Philips Speech Control.
- Connect the SpeechMike to the PC.
- Open Philips Speech Control.
- Select the Application Control tab.
- Select (Default – all other application).
Example:
Add Alt + Shift + R as the hotkey for Record:
-
On the Record line, in the Pressed Event column, click the ellipsis “…”.
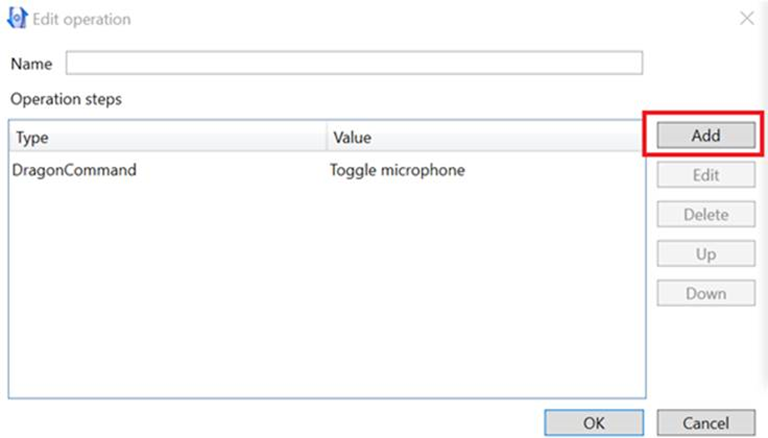
-
In the Edit operation window, click Add.
-
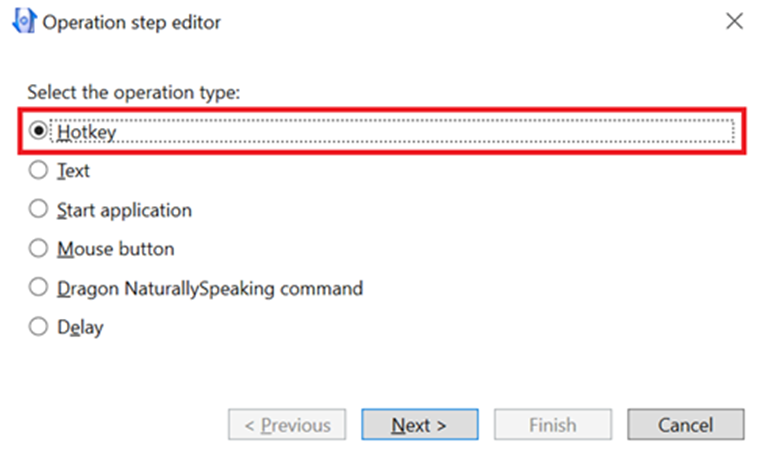
In the Operation step editor window, select Hotkey.
-
Click Next.
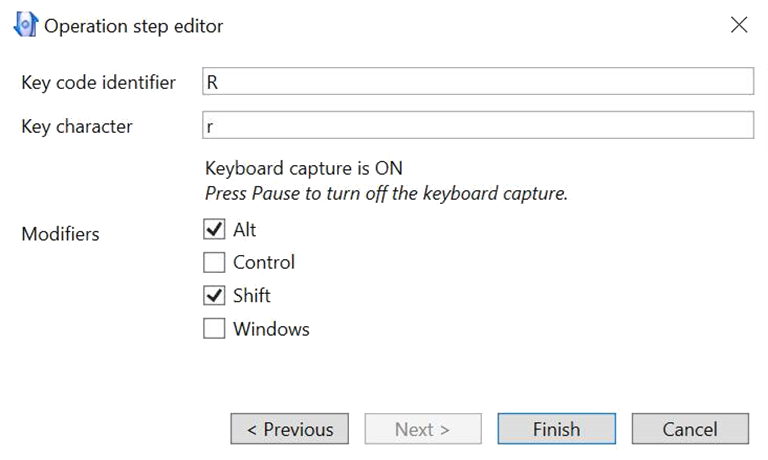
-
Press R for Key code identifier.
-
Select Alt and Shift modifiers.
-
Click Finish.
-
In the Operation step editor window, click OK.