Filter profiles
With a Filter Profile you can apply the filters and columns you need in any worklist with just two clicks.
Create a filter profile
-
Open a worklist.
-
Click the New button.
-
Enter a name and description.
-
Select User from the Level field.
-
Click the (first) Save button.
-
Enter U for ultrasound in the Modality field.
-
Right-click the table header.
-
Select Configure Table Filters.
-
Select the operator contains for Vetting Status.
-
Enter a comma-separated list of codes.
-
Click the Save & Apply New Columns button.
-
Click the (second) Save button.
The current filter profile is shown here.

The Add filter profile window opens.

For this example, we want to see ultrasound requests and orders which are awaiting vetting.


Filters have been applied.

Your new filter profile is saved.

Warning:
You can select All lists and the filter profile will be available in all worklists, but it may give inaccurate results if the fields or columns in other worklists do not match those in the original list where you made the filter profile. For example, Modality is usually present in all lists, whereas Vetting Status is unique to the Vetting List.
Note:
You can only apply filter profiles at System or Site level if you have the user permission.
Summary of how to create a filter profile:

|
Click New. |

|
Enter a name. |

|
Click Save. |

|
Select filters. |

|
Click Save. |
Tip:
Close and re-open the worklist if your filter profile does not appear straight away.
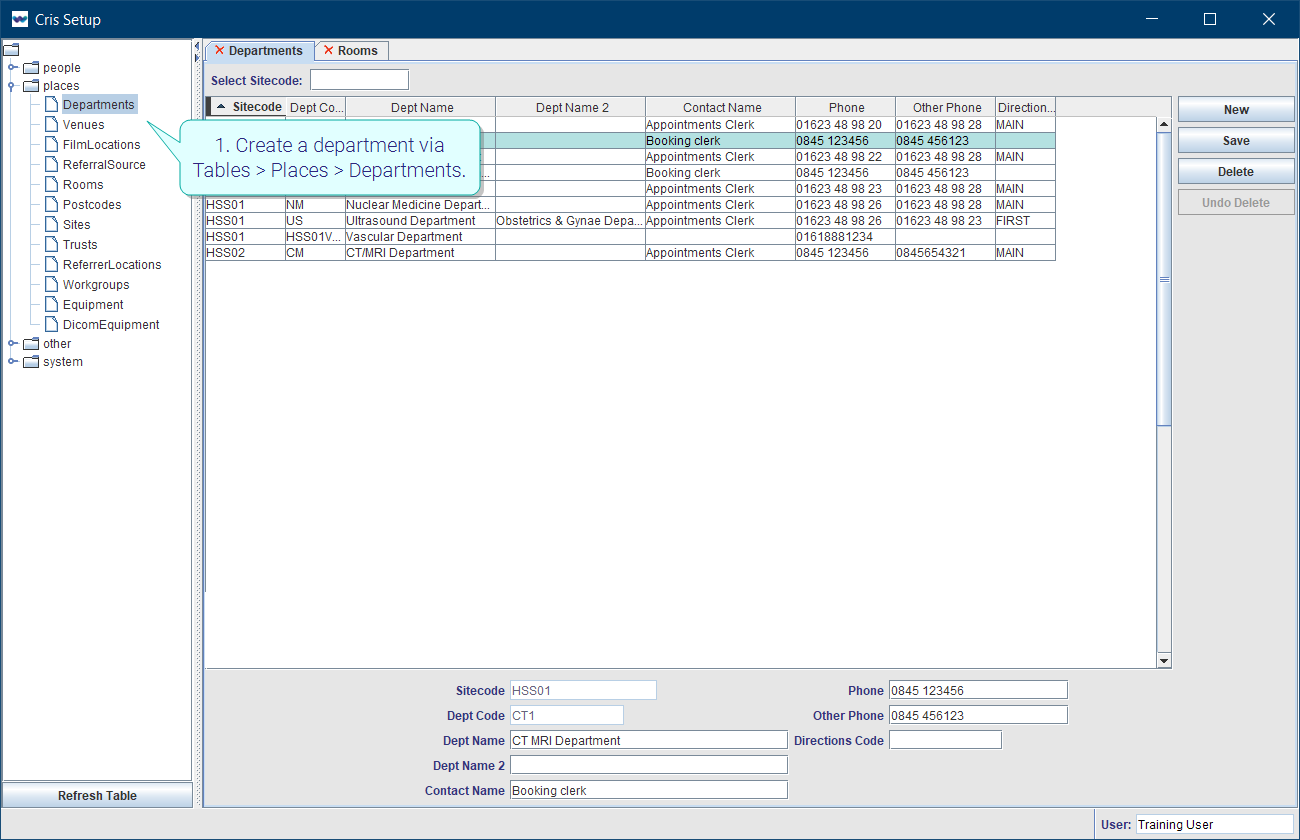
Tip:
-
Create a department via Tables > Places > Departments.
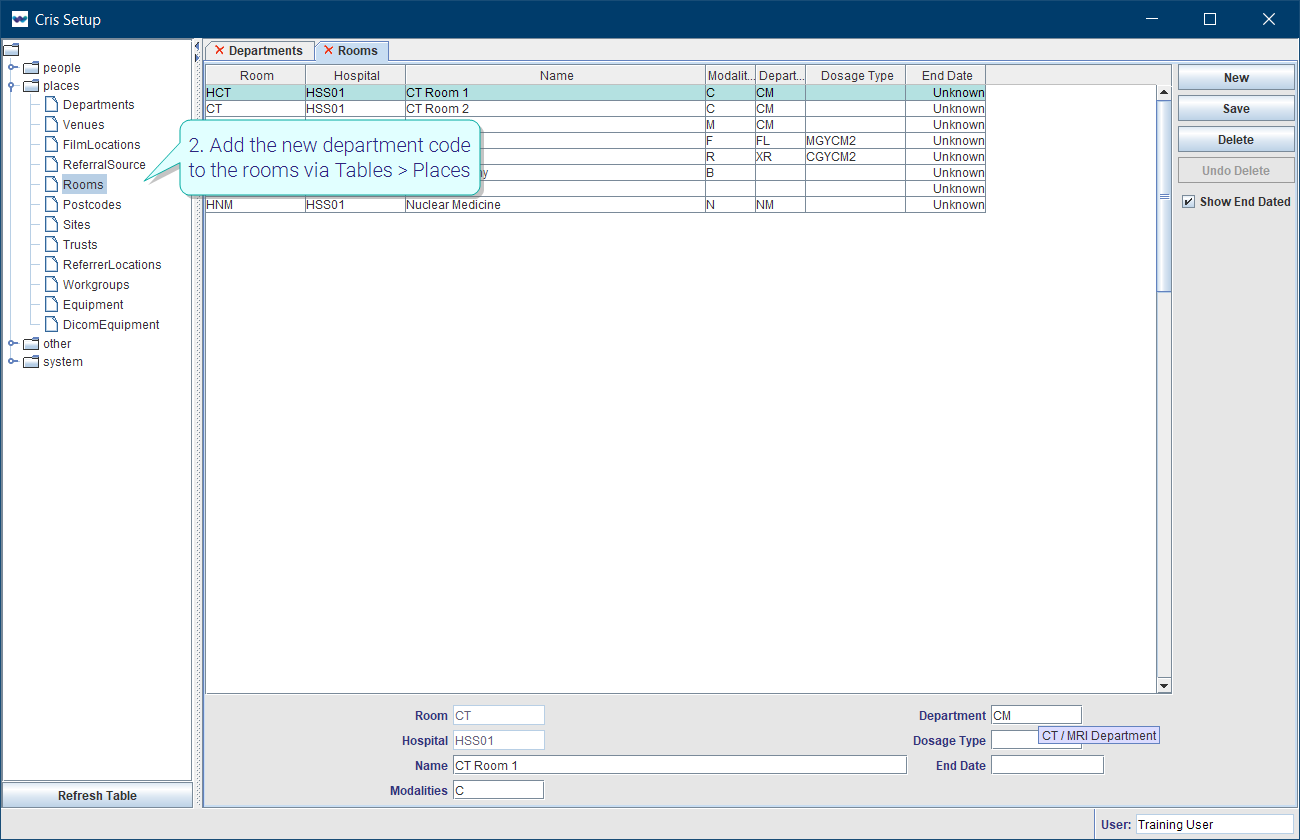
-
Add the new department code to the rooms via Tables > Places > Rooms.
-
Filter worklists by the Department field to see multiple rooms.

Restore default layout
Remove column and filter selections by right-clicking the table header.
-
Right-click the table header.
-
Click Reset to Default Columns.
-
Right-click the table header.
-
Click Remove all filters.
Columns return to the default layout.
Note:
Only filters applied that were applied via the right-click menu will be removed. Any filters in the fields at the bottom of the screen remain in place.

Tip:
Create a 'blank' filter profile with no filters in the fields at the bottom of the screen and no column filters applied. You can switch to this profile to clear all column and filter selections in one action.