
Vetting worklists
Cris Vetting worklists are set up on deployment, in consultation with the Trust. Subsequently, a system administrator is able to create, edit, and assign worklists.
- Click the Admin button.
- Click the required tab.
- Click the logo
 to return to the front page.
- Select the Filters tab.
-
Check existing filters using the Search
 field before creating a new one. You will not be able to
create a filter if the query already exists.
field before creating a new one. You will not be able to
create a filter if the query already exists.
- Click Add New Filter. As you make choices, they will be displayed at the top of this window.
- Enter a name. Click Next.
- Enter a description. Click Next.
- Select a field to query.
- Click the Not toggle
 if you want to exclude this item (include all values that are not this one).
 - Click Next.
- Select a value.
- Click the Not toggle if you want to exclude this item (include all values that are not this one).
- Click Next.
- Click Save.


A filter can contain one or more items. You may wish to create filters for items that are commonly grouped together.
Note:
By default filters return events from the trust where they were created. To see events from all trusts, create an "All Trusts" filter, and use this filter when building worklists to be shared across the consortium.
Example:
To build a filter for "Assigned to Me" worklists (will only show events assigned to the logged-in user):
- Enter a name: "Assigned to User".
- Enter a description: "Show events assigned to the current logged-in user".
- Select a field: "Assigned".
- Select a value: "Logged in user".
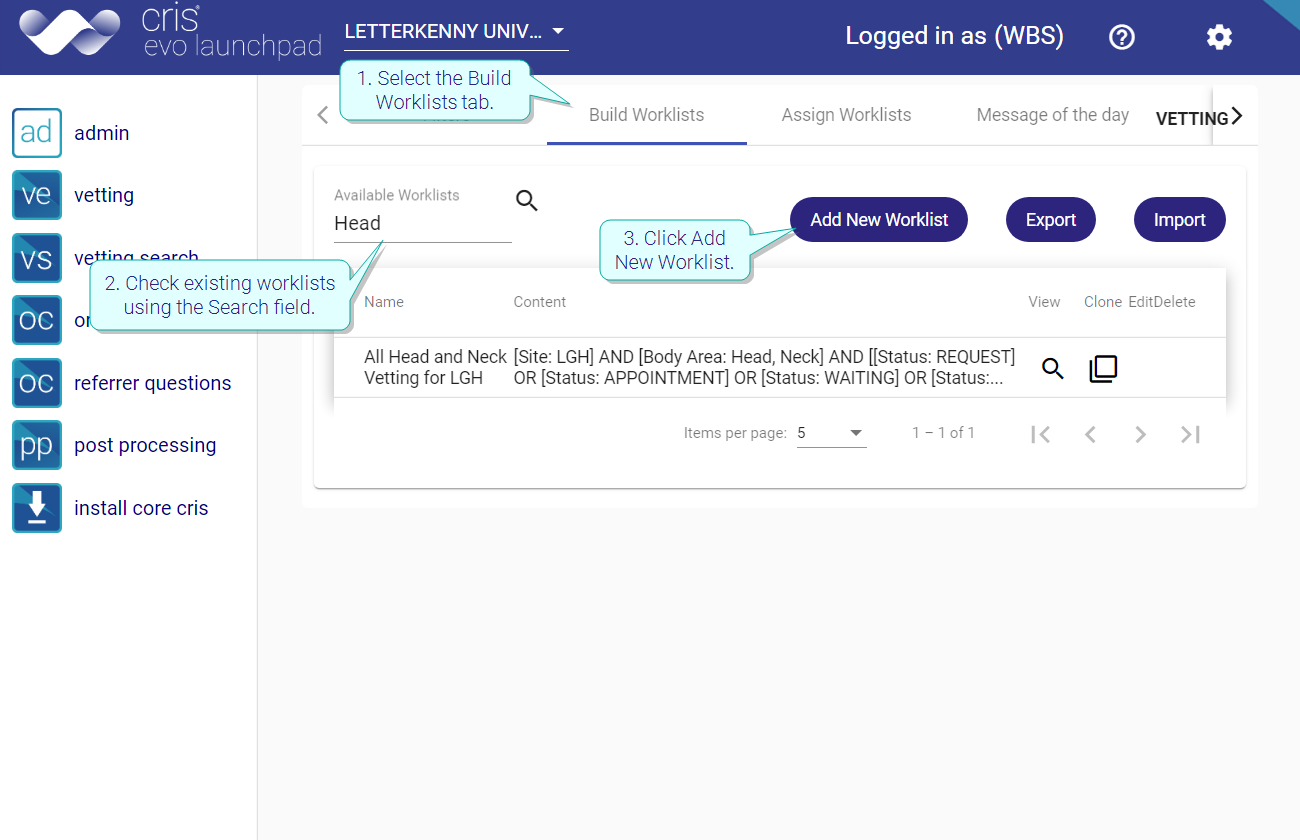
- Select the Build Worklists tab.
- Check existing worklists using the Search field before creating a new one. You will not be able to create a worklist if the query already exists.
- Click Add New Worklist.
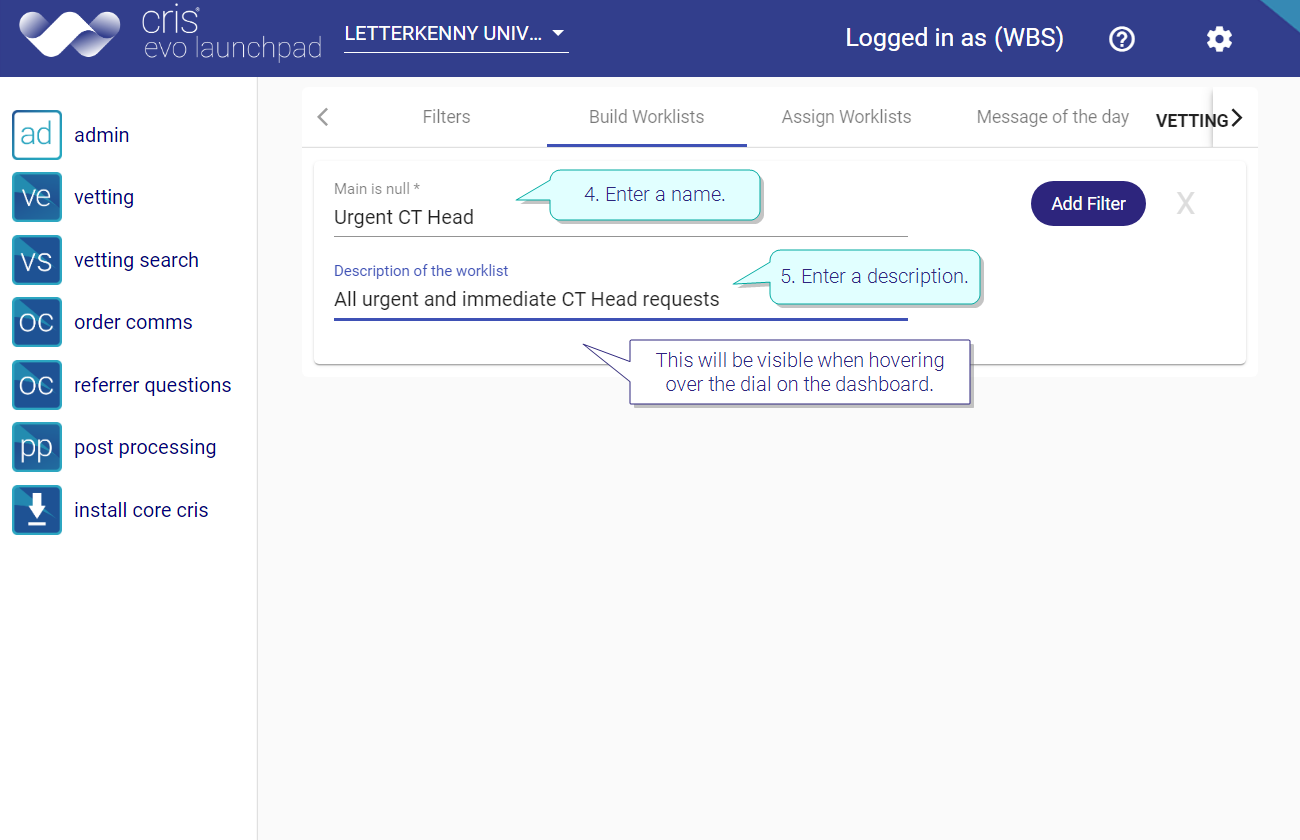
- Enter a name.
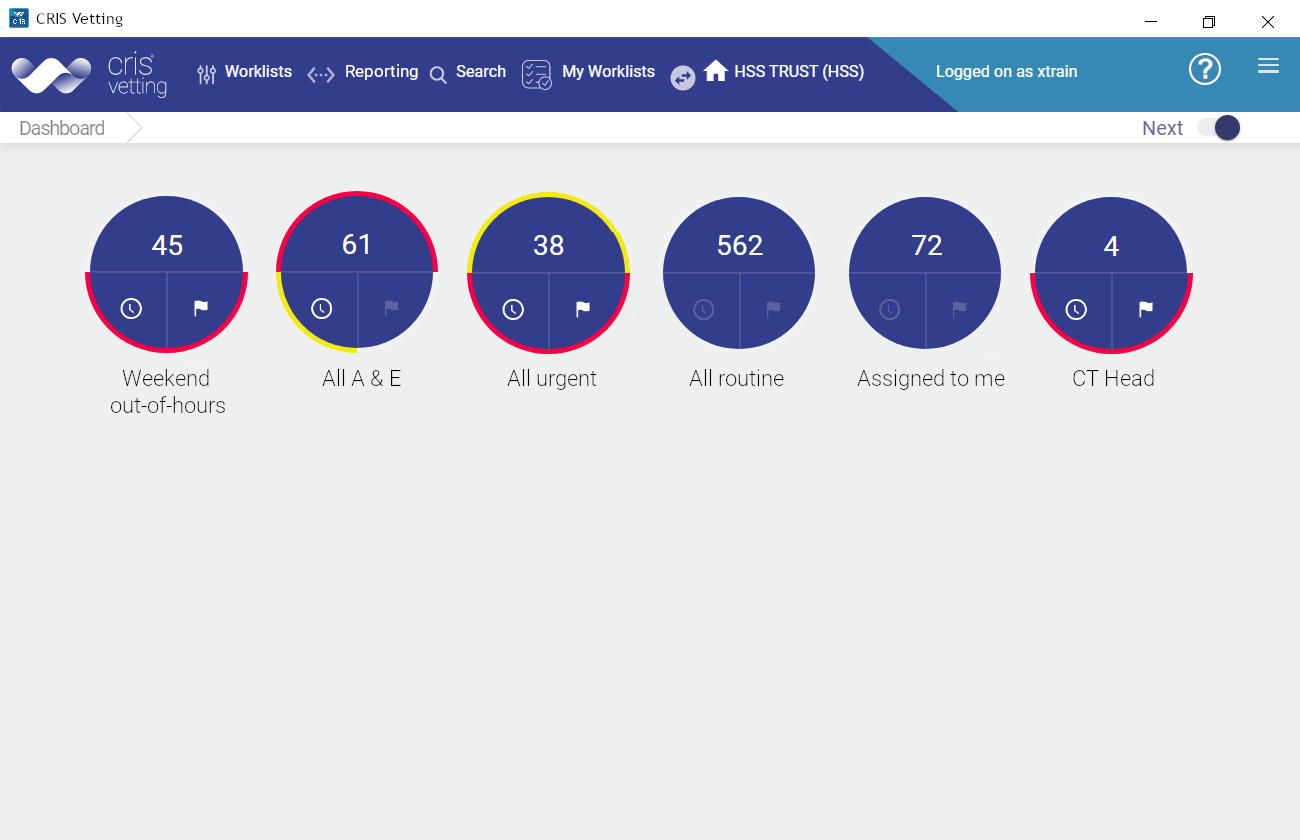
- Enter a description. This will be visible when hovering over the dial on the dashboard.
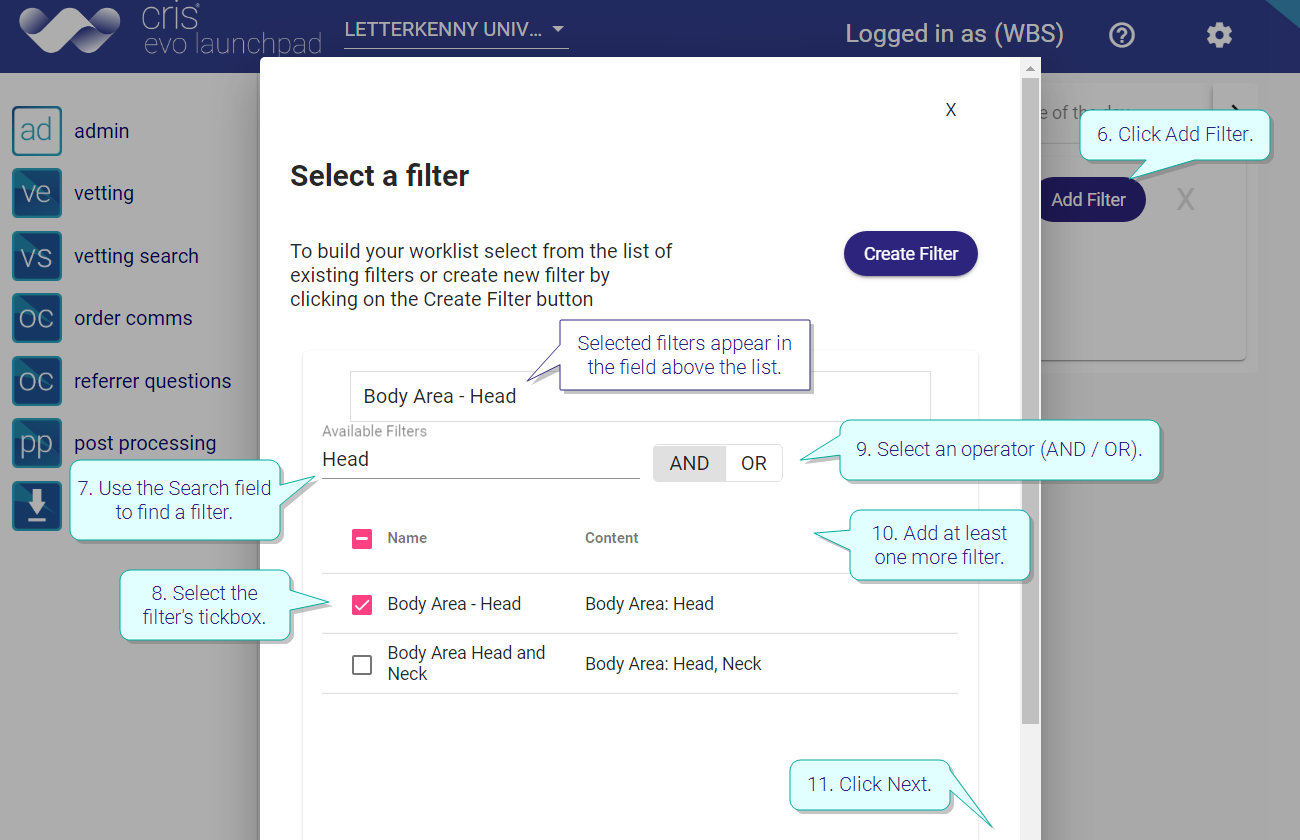
- Click Add Filter.
- Use the Search field to find a filter.
- Select the filter's tickbox.
- Select an operator (AND / OR).
- Add at least one more filter.
- Click Next.
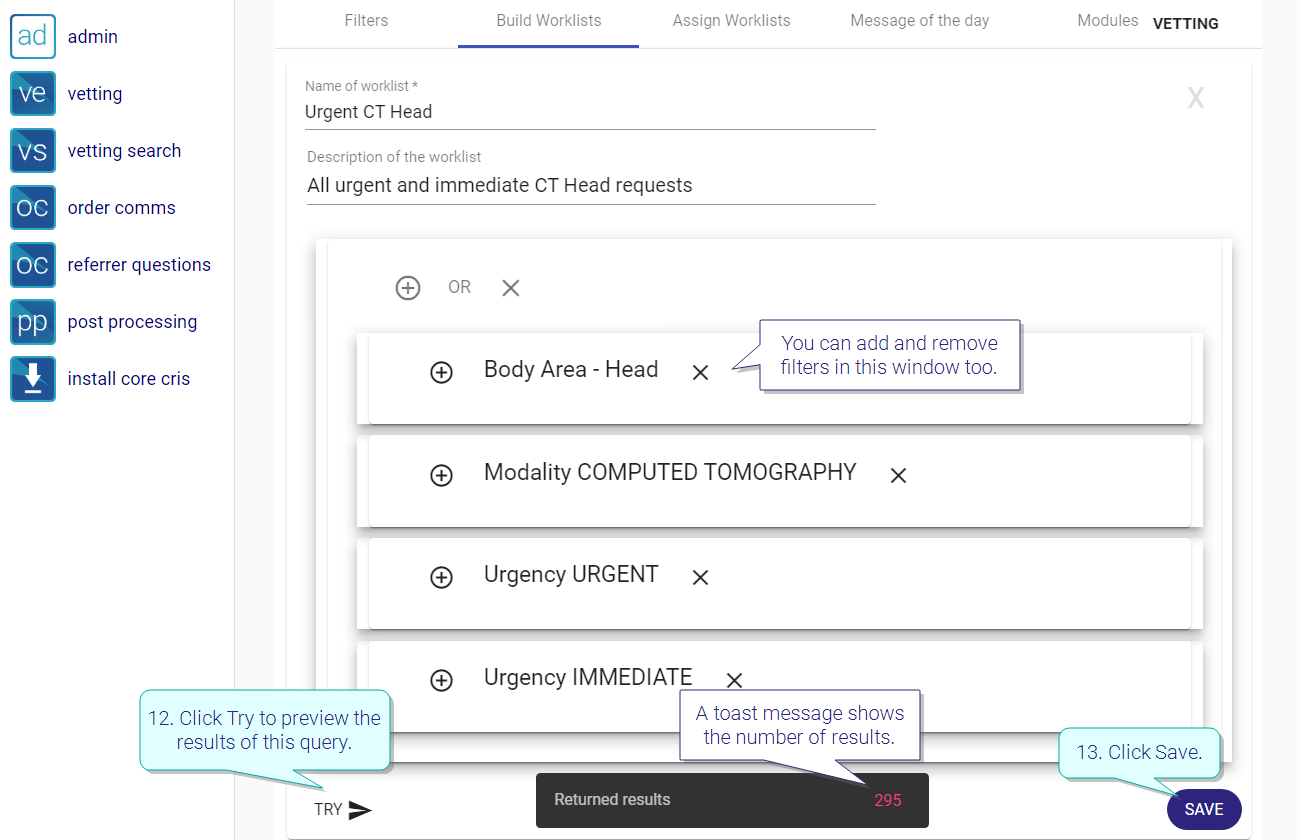
- Click Try
 to preview the results of this query.
 - Click Save.
Selected filters appear in the field above the list.
You can add and remove filters in this window too.
A toast message shows the number of results.
Note:
By default filters return events from the trust where they were created. To see events from all trusts, create an "All Trusts" filter, and use this filter when building worklists to be shared across the consortium.
Example:
We recommend you make your worklists by selecting all the AND filters first, then adding OR filters as required.
- To create a simple worklist, for example All Inpatient CT, select the AND operator, then add both Modality: CT and Patient Type: Inpatient.
- To create a more complex worklist you can add more filters, for example another patient type:
- Click Add
 next to Patient Type.
 - Use the search field to find Patient Type filters.
- Select Patient Type: A & E Attender.
- Select the operator OR.
- Click Next.
Example:
To build a worklist for All Paediatric Vetting, you could use one or more of the following filters:
- Born: Younger than 18 years old.
- Modality: [modality] - this will return all requests with an examination code marked as [modality] in Cris.
- Assigned to: In list - add all the relevant vetting clinicians.
- Status: Not Arrived - patient has not attended the event.
- Vetting Status: Awaiting Vetting.
OR
Examination: In list - add all the exam codes you want to include, for example MSKUH, XSKUH, UABDO. These can be of different modalities.
OR
Assigned to: Logged in user - this filter will only show exams assigned to the logged-in user.
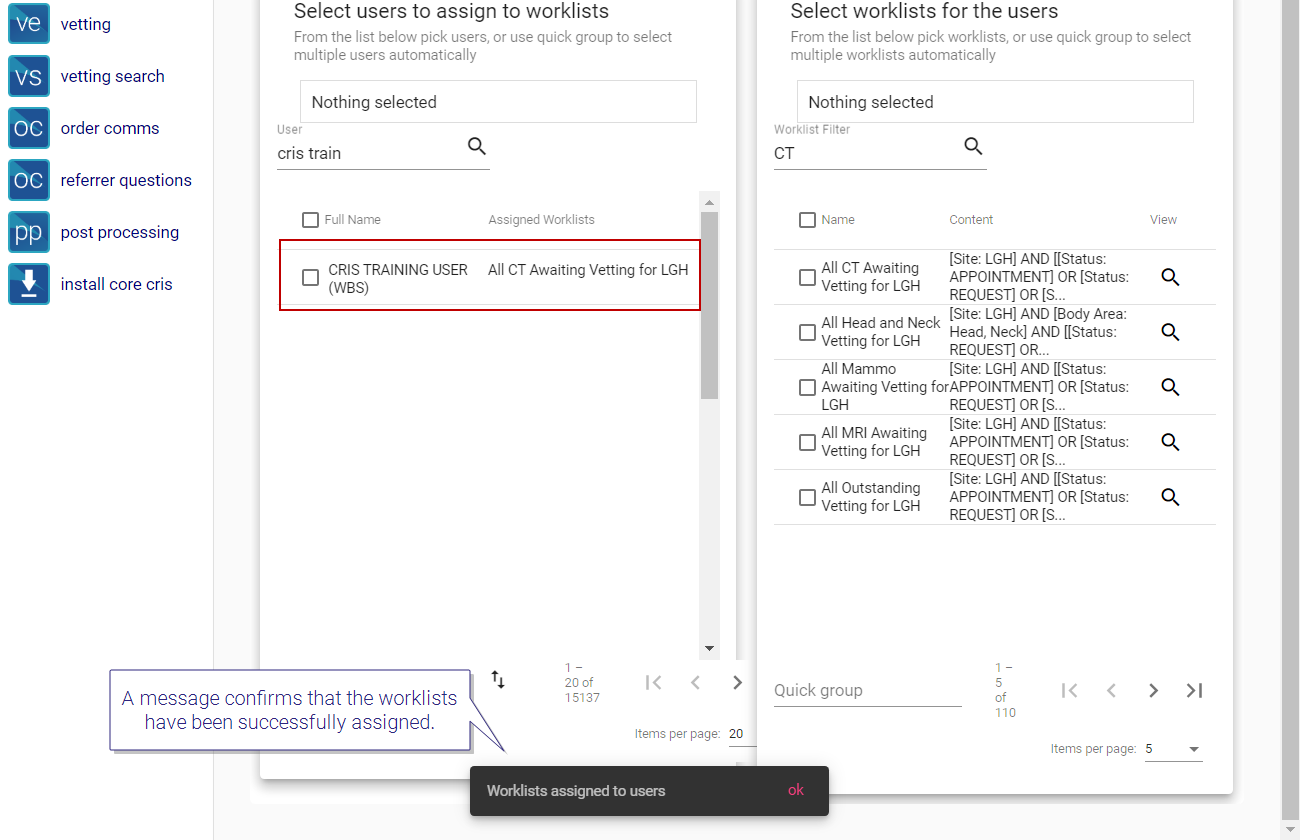
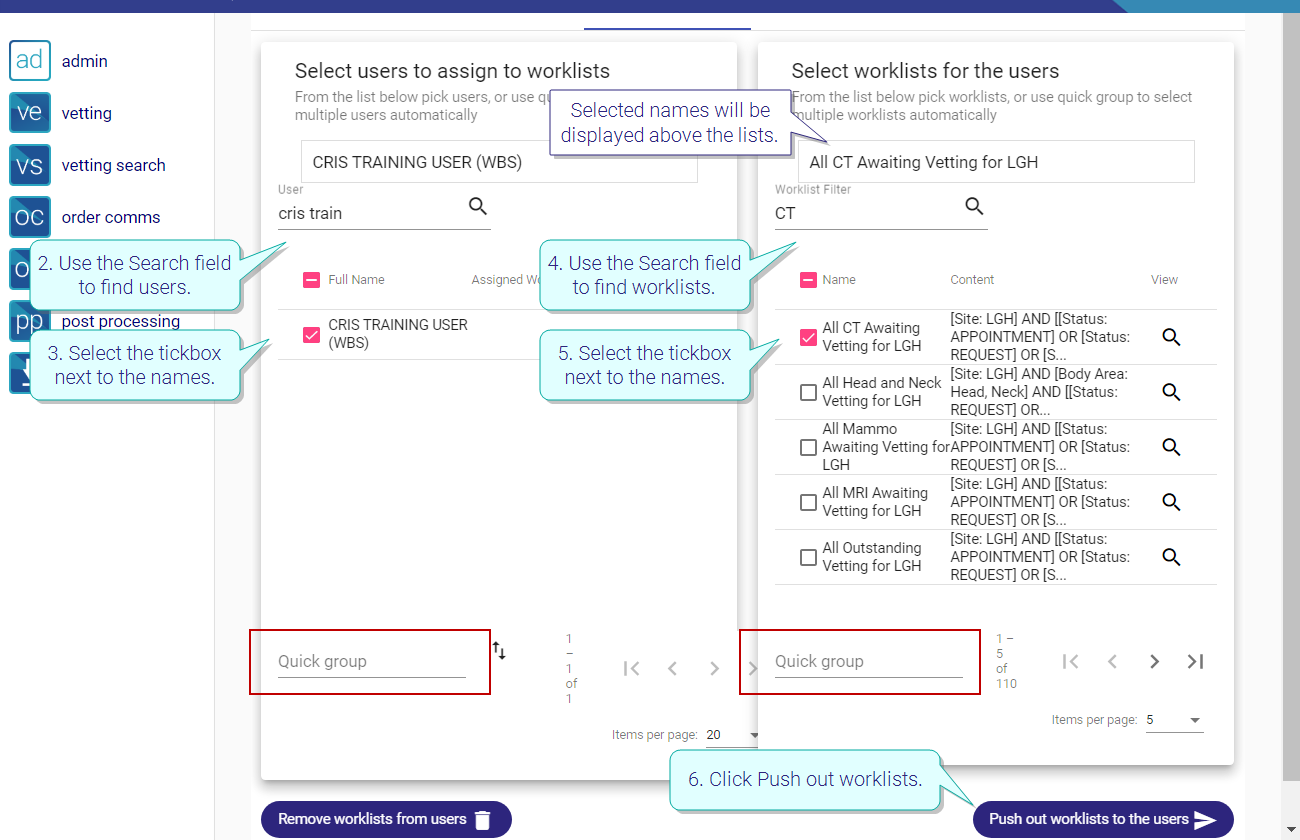
- Select the Assign Worklists tab.
- Use the Search field to find users in the list on the left.
- Select the tickbox next to the name(s). Selected names will be displayed in the field above
- Use the Search field to find worklists in the list on the right.
- Select the tickbox next to the worklist(s). Selected worklists will be displayed in the field above
- Click Push out worklists.
OR
Click the Quick group field to select an existing group. See Quick groups, below.
OR
Click the Quick group field to select an existing group. See Quick groups, below.
A toast message confirms success.