XR settings for Reception
XR settings control and configure all of Cris.
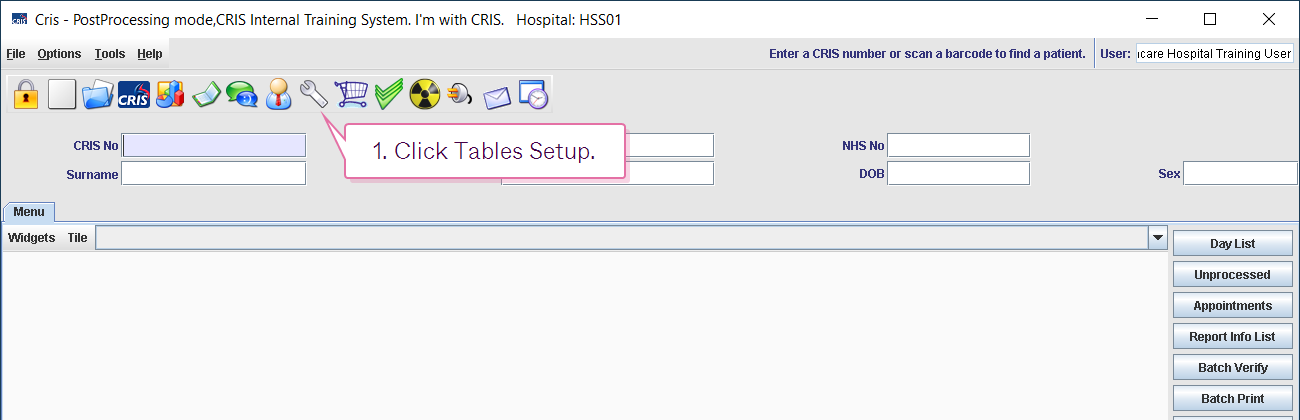
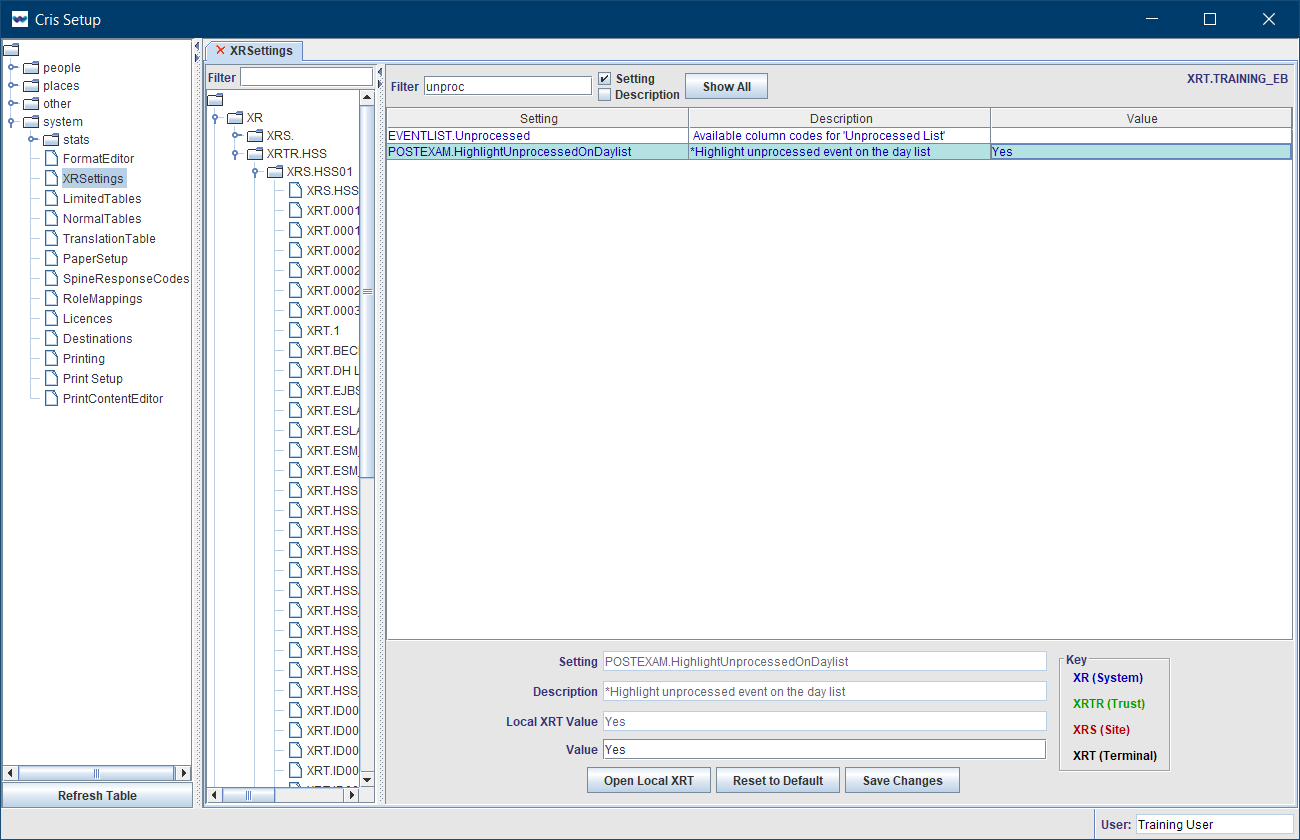
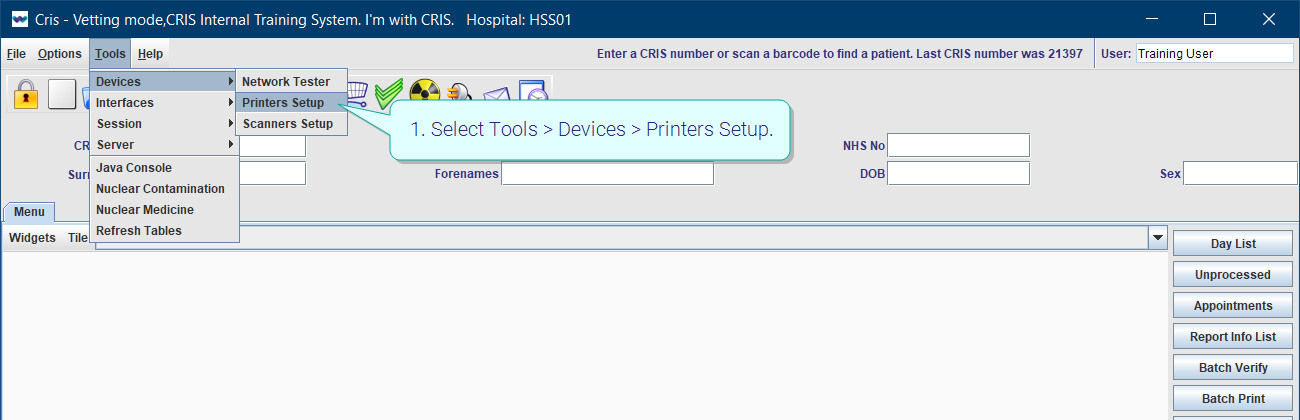
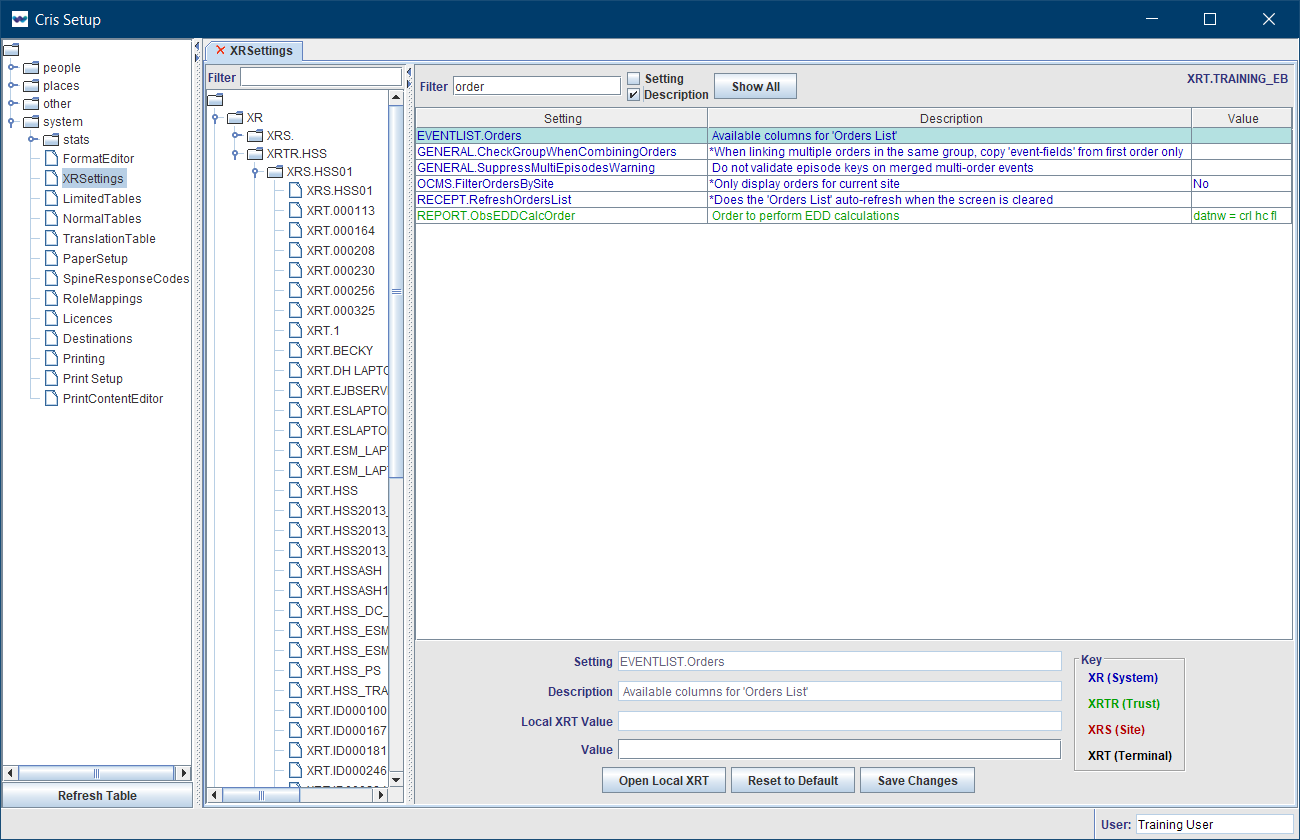
- Click Tables Setup.

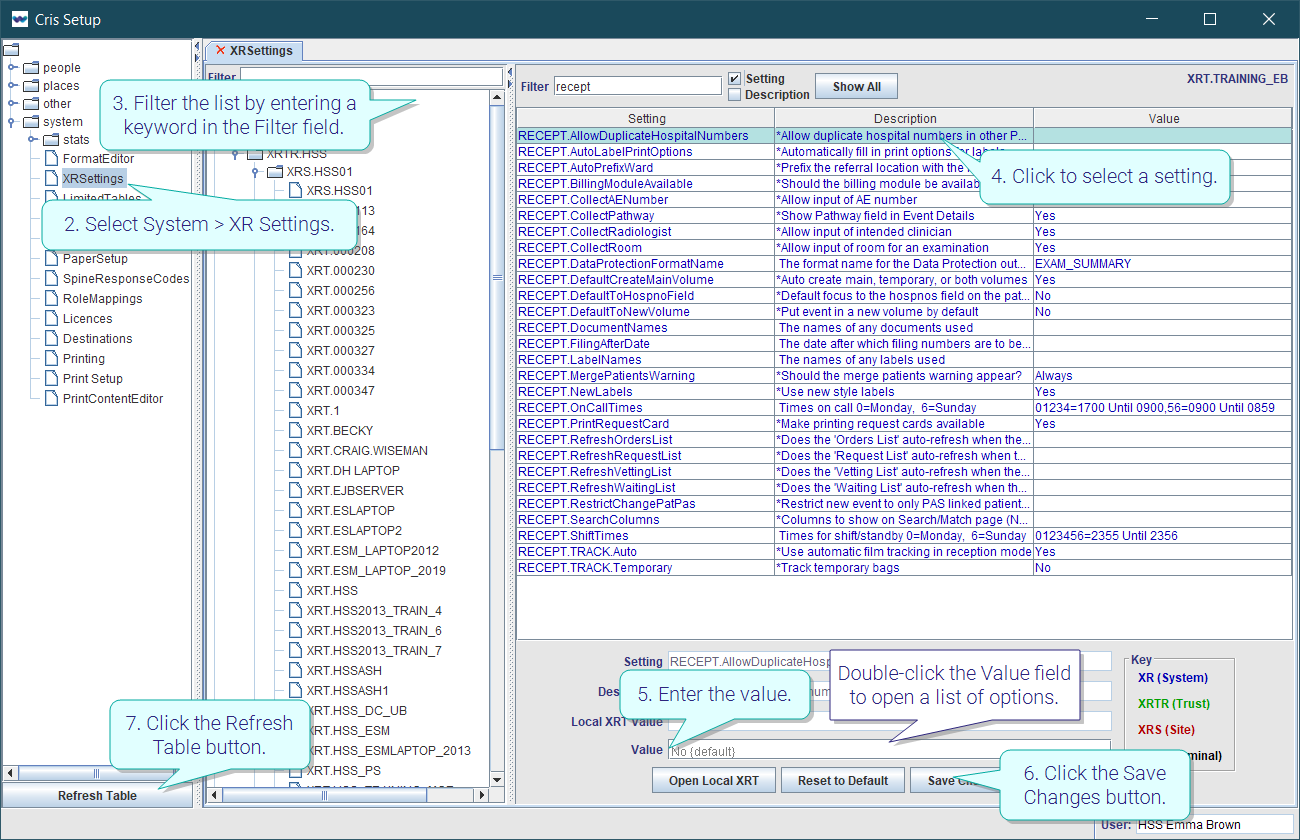
- Select System > XR Settings.
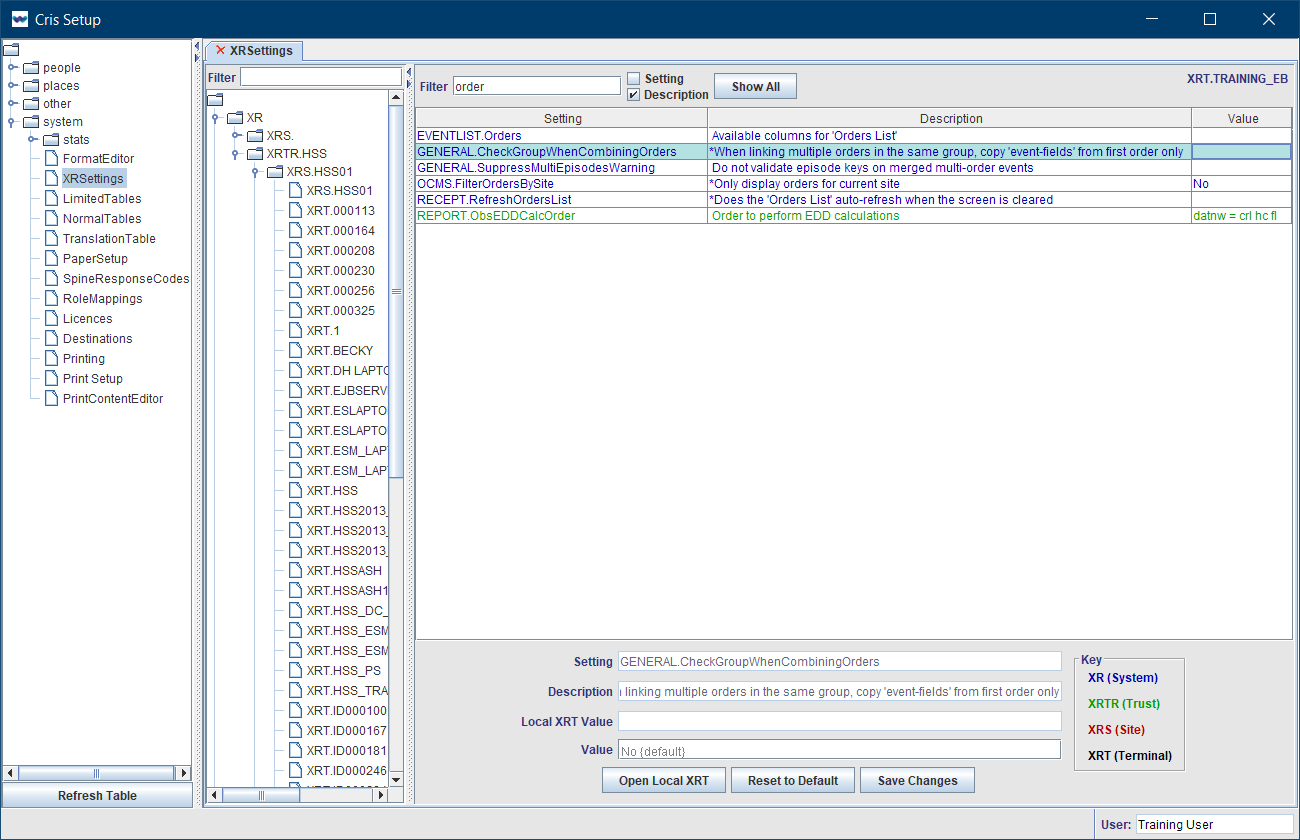
- Filter the list by entering a keyword in the Filter field.
- Click to select a setting.
- Enter a value in the Value field.
- Click the Save Changes button.
- Click the Refresh Table button.
OR
Double-click the Value field then double-click to select a value from the options.
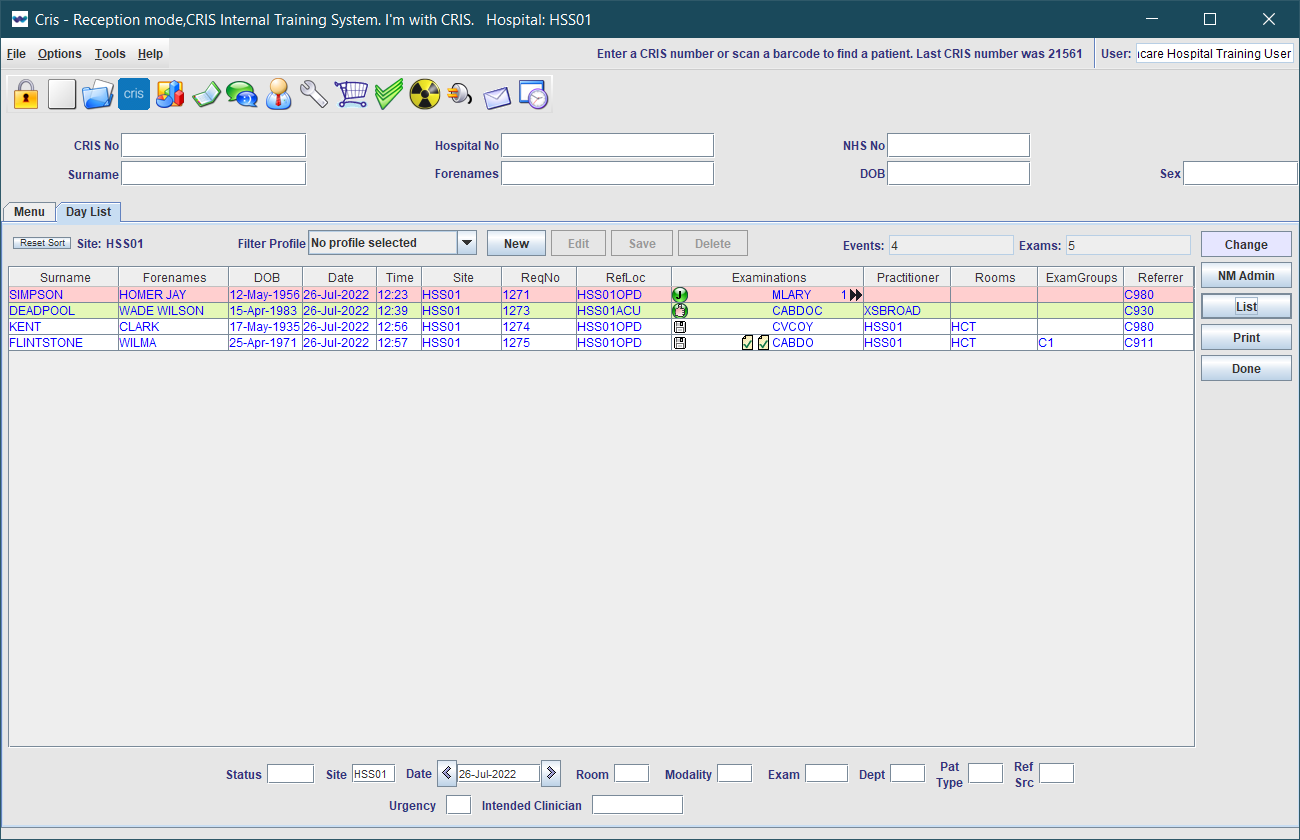
Day List
| Level | Setting | Value | Description | |
|---|---|---|---|---|
|
XR, XRTR, XRS |
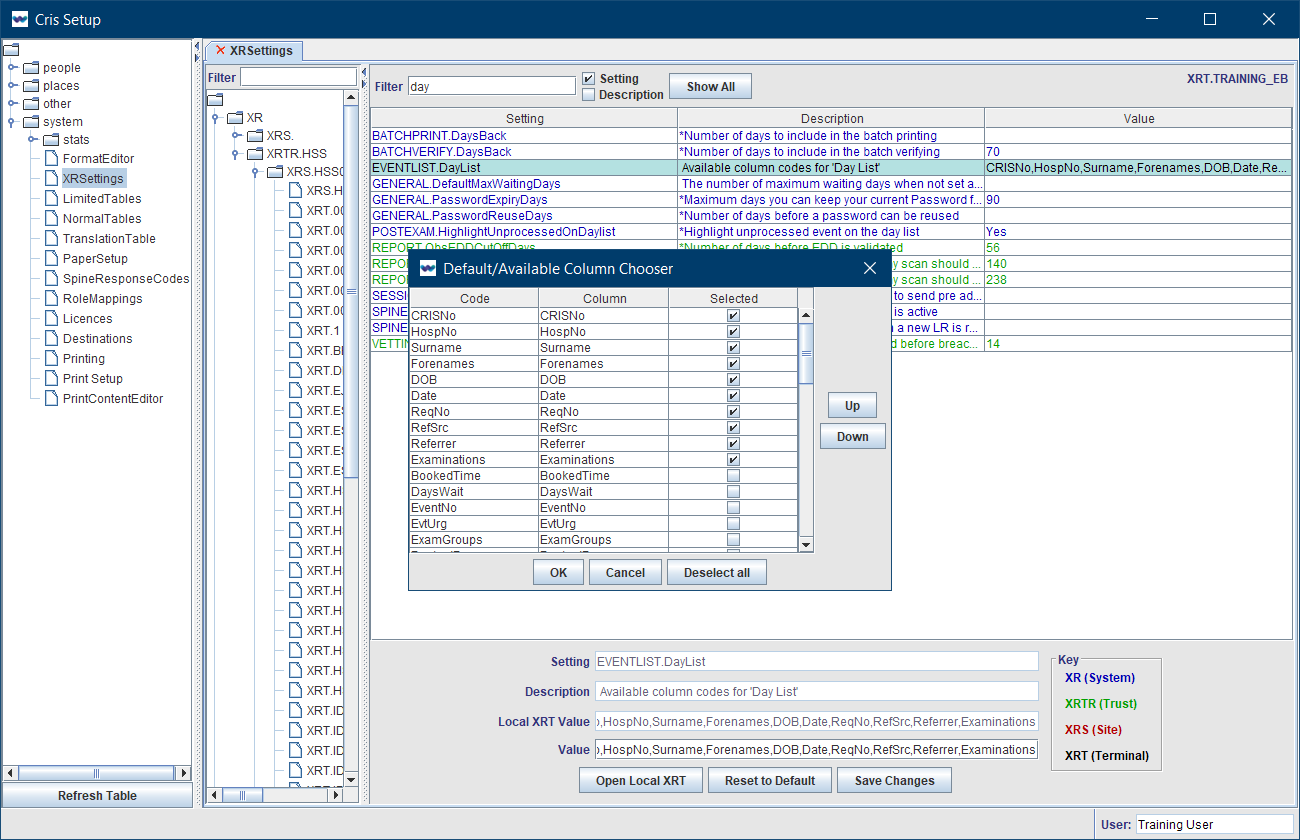
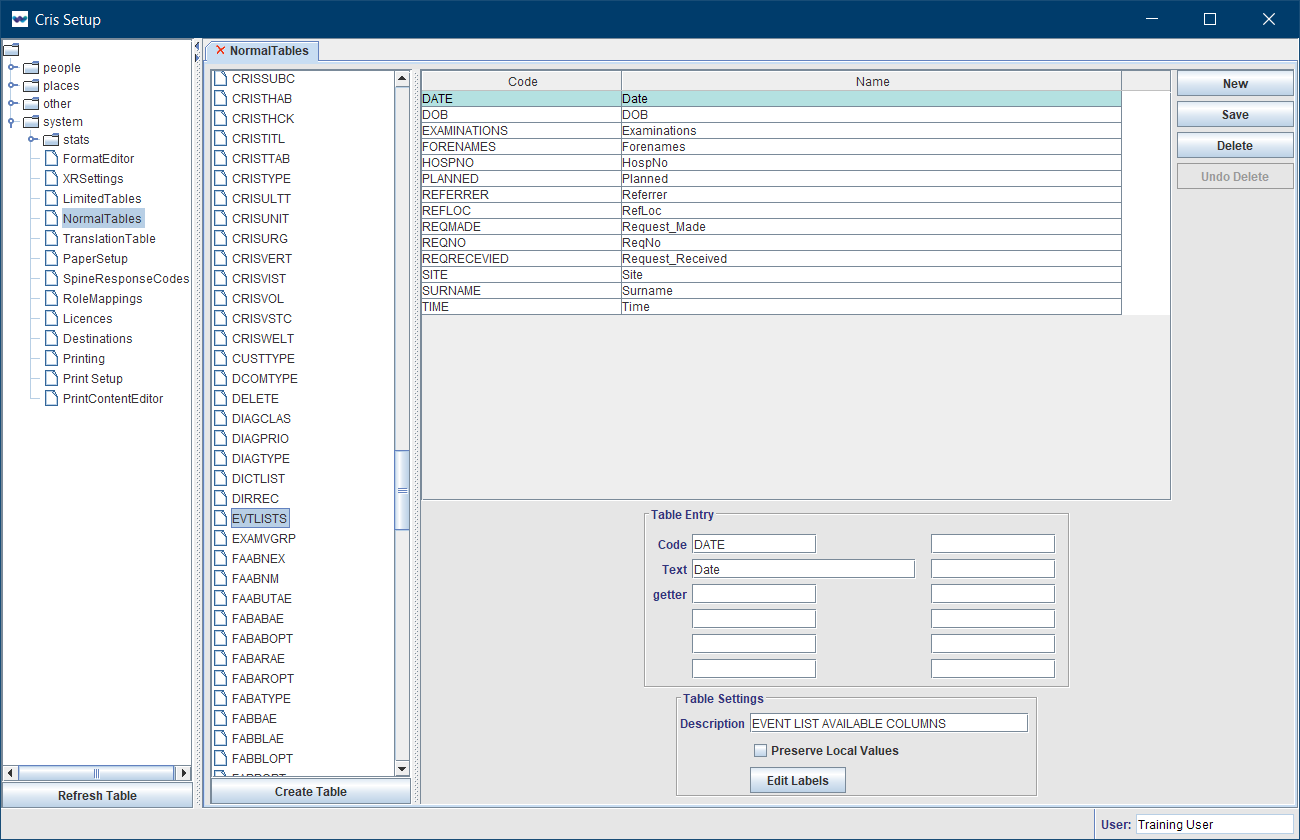
EVENTLIST.DayList |
Select columns from the list of options. Available columns |
Select which columns are available in the Day List. See also System > Normal Tables.
|
|
XR, XRTR, XRS |
POSTEXAM.HighlightUnprocessedOnDaylist | Yes, No, Default (Yes). |
Applies a coloured background to unprocessed events on the Day List after a period of time. Over 30 minutes = green, over 60 minutes = pink.
|
Request List
| Level | Setting | Value | Description | |
|---|---|---|---|---|
|
XR, XRTR, XRS |
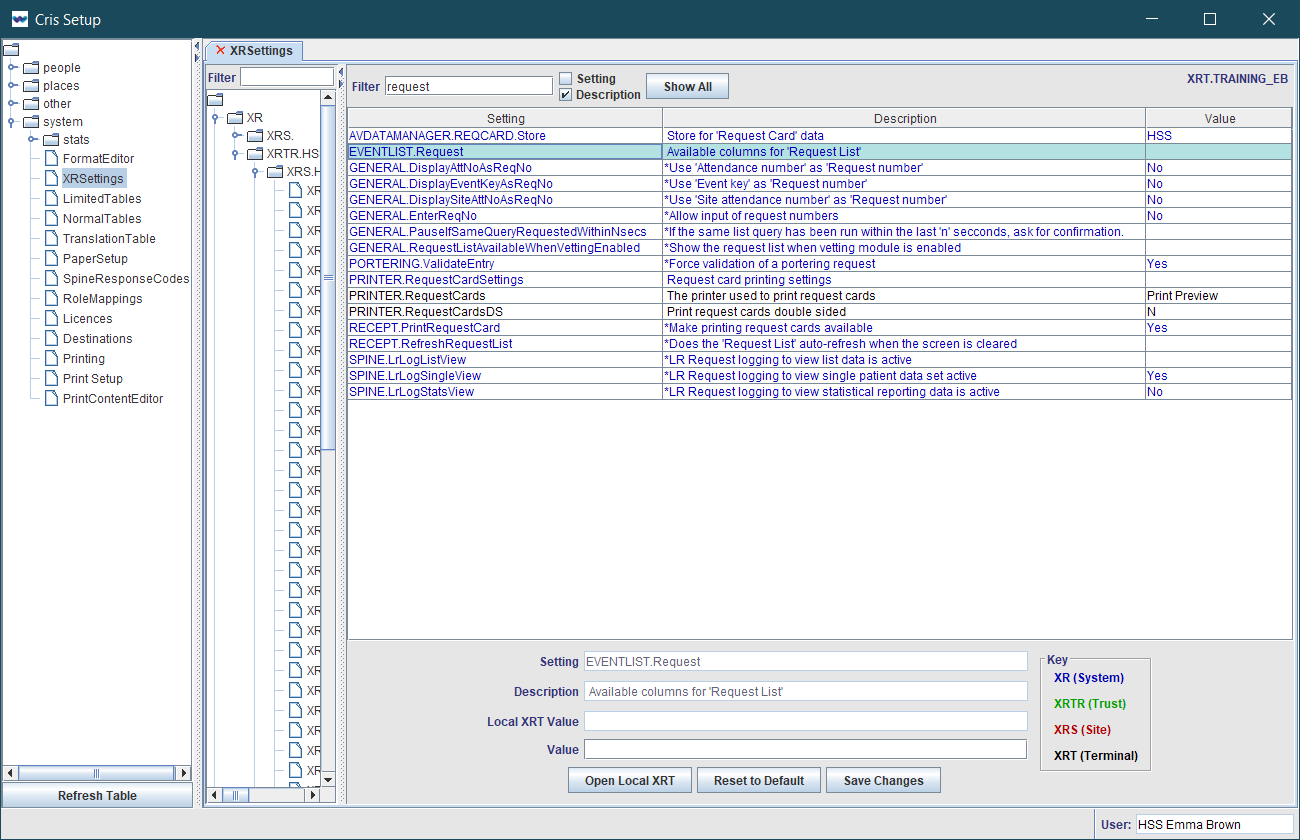
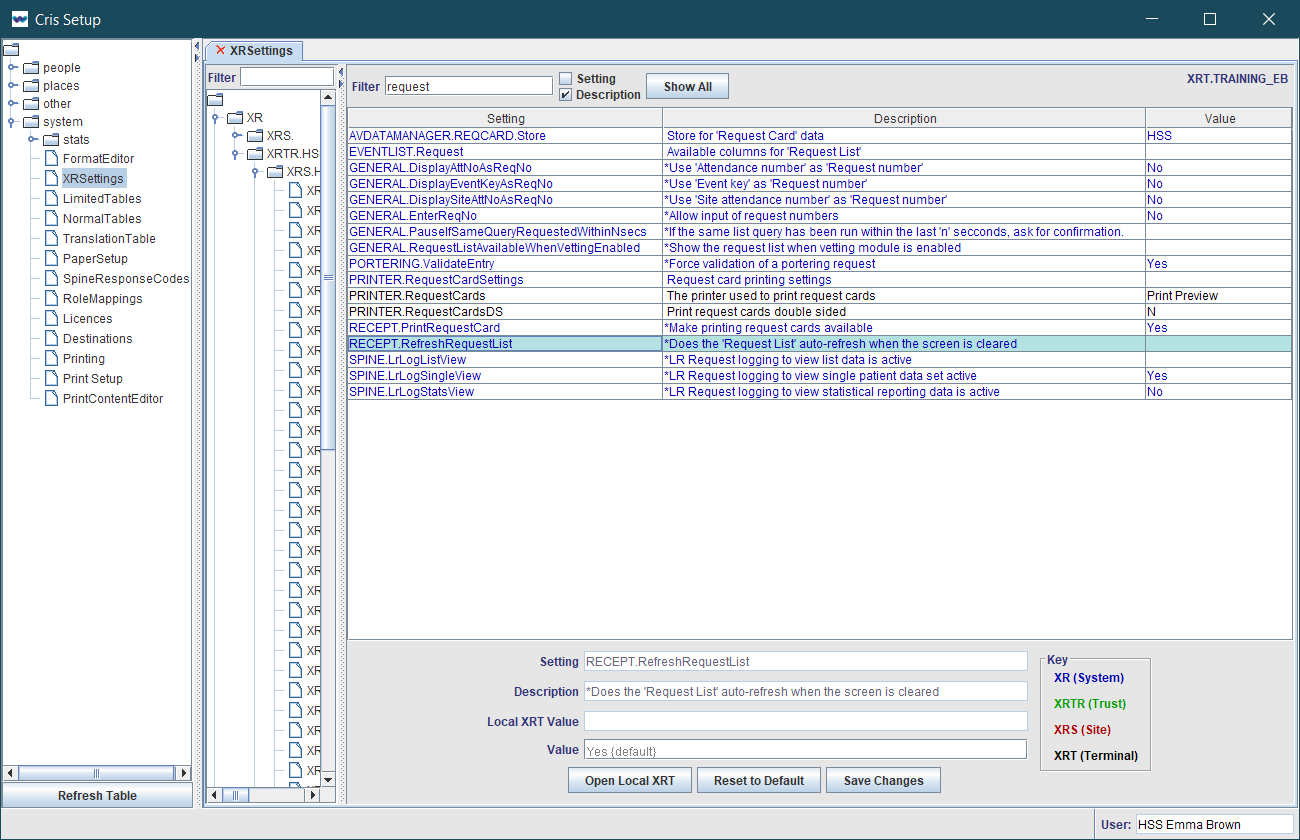
EVENTLIST.Request |
Select columns from the list of options. Available columns |
Select which columns are available in the Request List. See also System > Normal Tables.
|
|
XR, XRTR, XRS |
RECEPT.RefreshRequestList | Yes, No, Default (Yes). | Automatically refresh the Request List when the screen is cleared. |

|
XR, XRTR, XRS |
GENERAL.RequestListAvailableWhenVettingEnabled. | Yes, No, Default (Yes). | Show the Request List when the Vetting module is enabled. |
Request cards
| Level | Setting | Value | Description | |
|---|---|---|---|---|

|
XR, XRTR, XRS |
AVDATAMANAGER.REQCARD.Store |
|
Where to store scanned request card image files. |
|
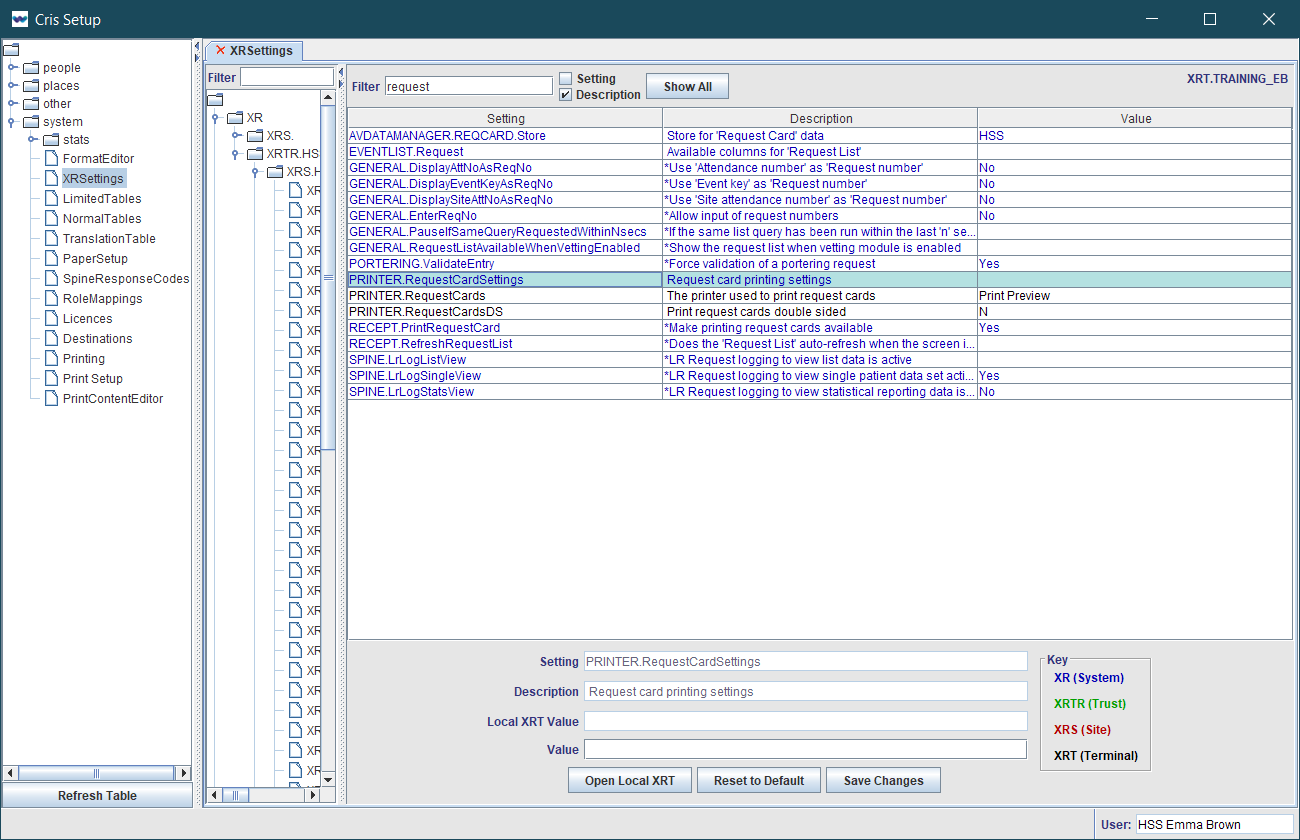
XR, XRTR, XRS | PRINTER.RequestCardSettings | Request card printing settings. | |
|
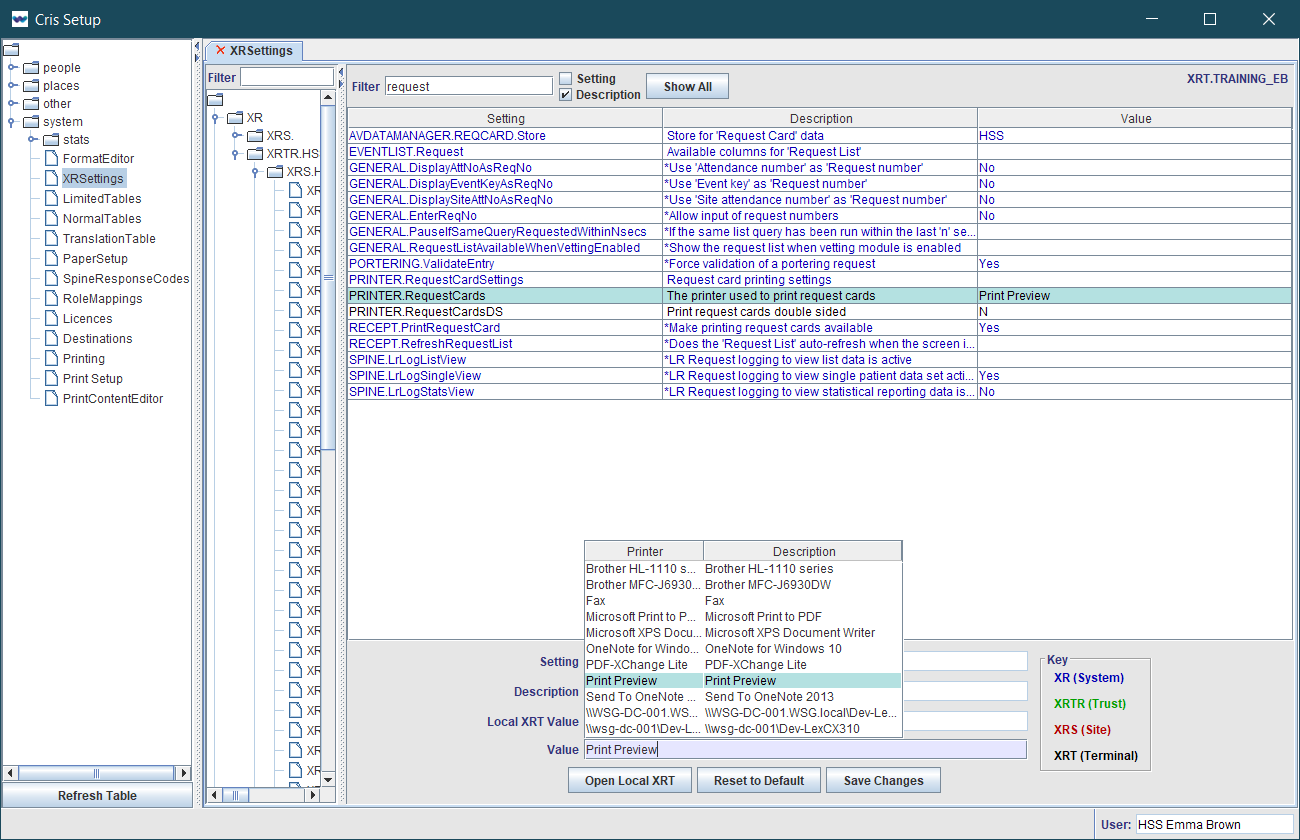
XRT | PRINTER.RequestCards |
The printer used to print request cards. This can also be set via Tools > Devices > Printers Setup.
|
|

|
XRT | PRINTER.RequestCardsDS | Yes, No, Default (No). | Print request cards double-sided. |
|
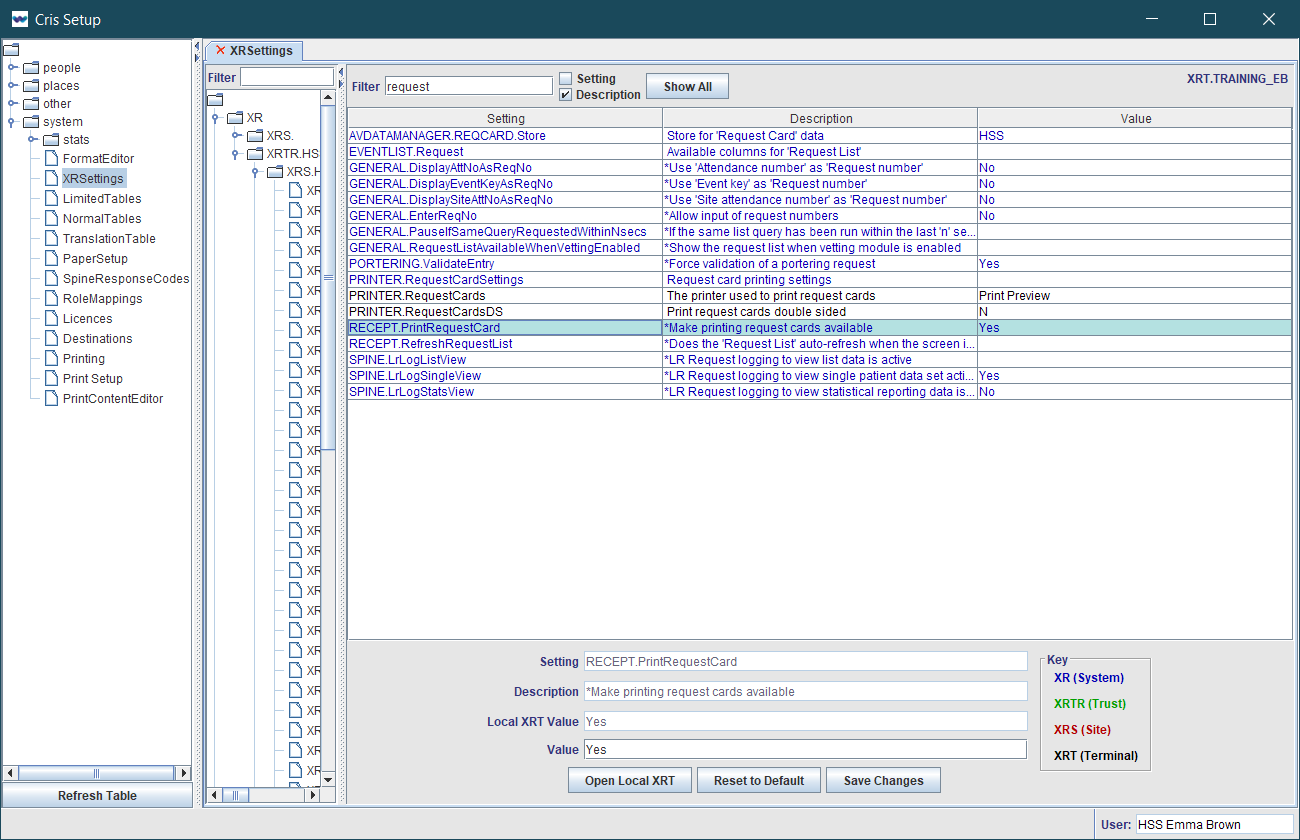
XR, XRTR, XRS | RECEPT.PrintRequestCard | Yes, No, Default (No). | Make printing request cards available. |
Orders
| Level | Setting | Value | Description | |
|---|---|---|---|---|
|
XR, XRTR, XRS | GENERAL.CheckGroupWhenCombiningOrders | Yes, No, Default (No). | When linking multiple orders in the same group, copy event fields from the first order only. For example, to avoid duplicating clinical history. |
|
Warning: Although multiple orders in the same event most likely have the same clinical history, it is possible that a referrer could enter different clinical history against different orders. You will not see the second (and subsequent) clinical history if you set this value to Yes. |
||||
|
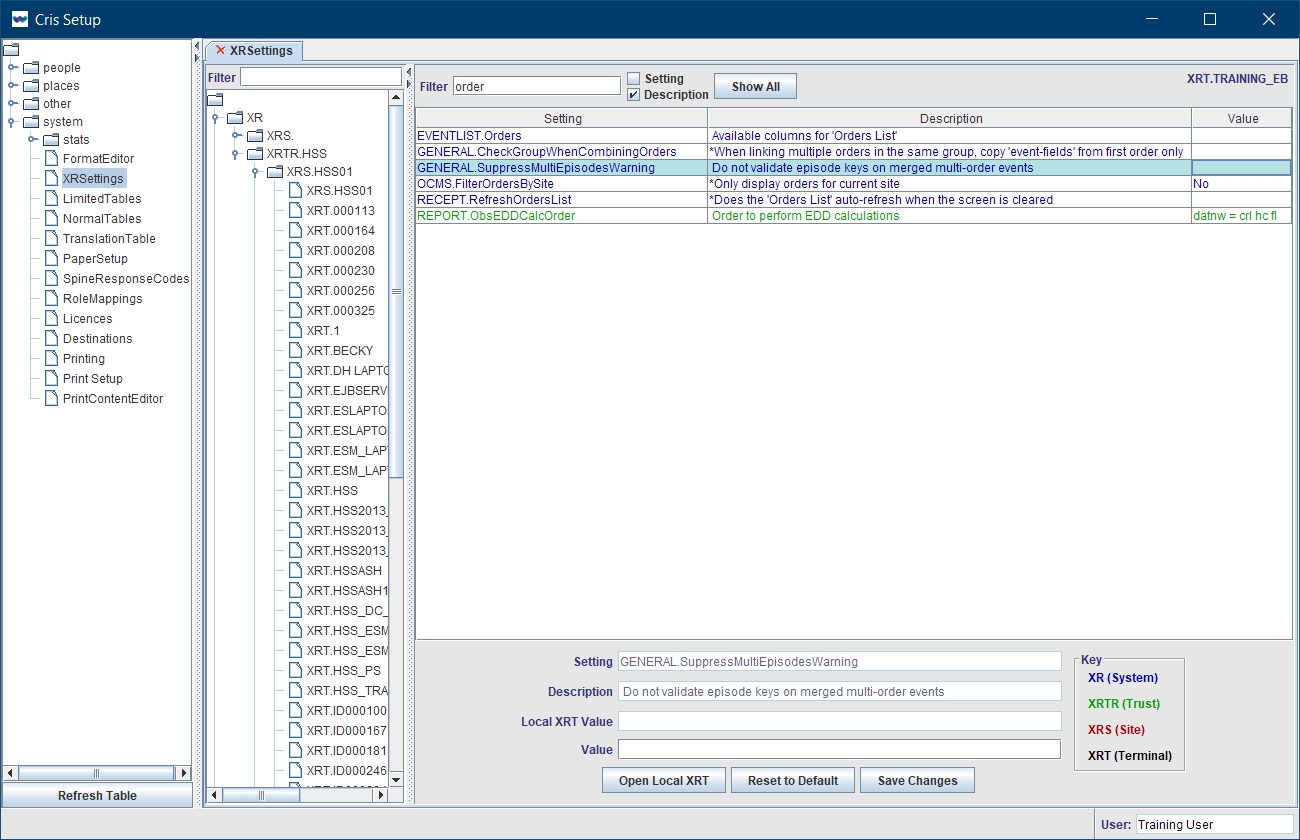
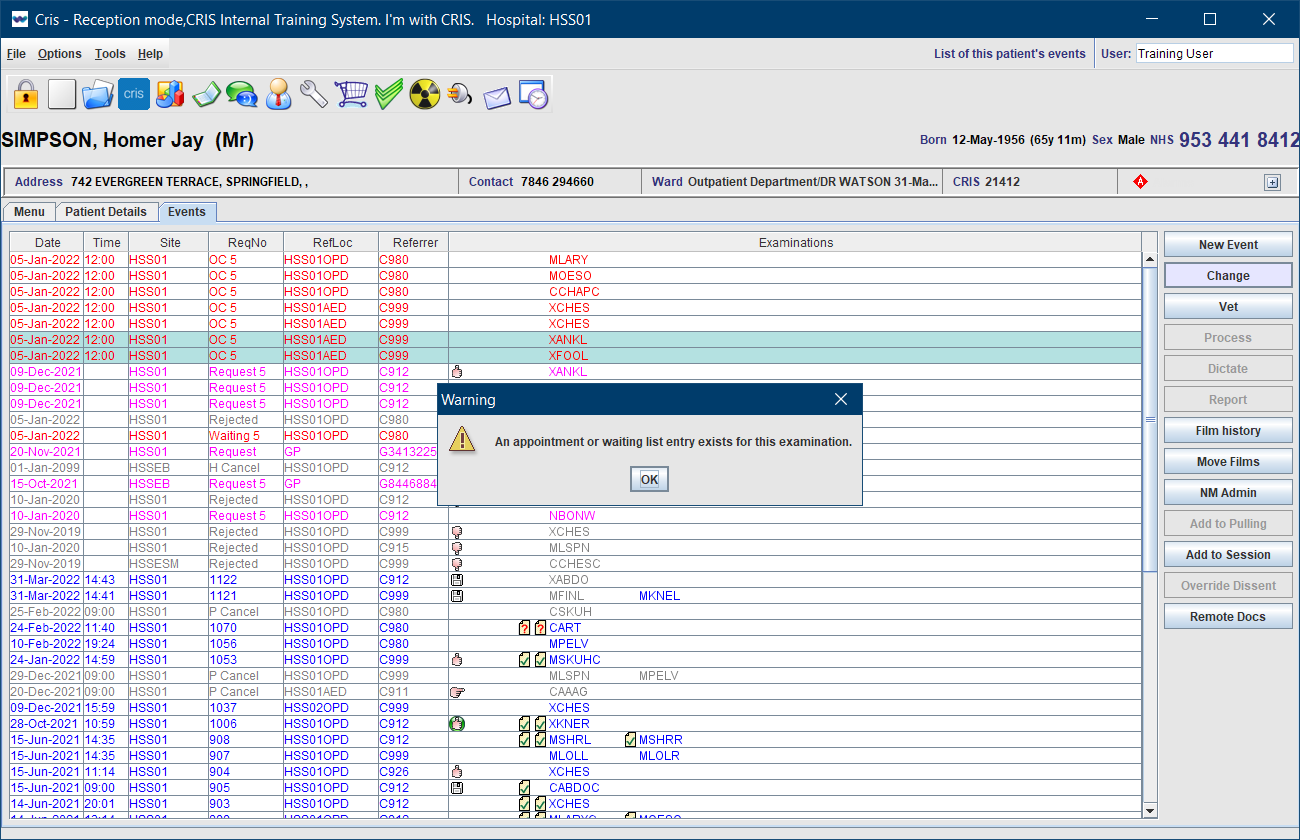
XR, XRTR, XRS | GENERAL.SuppressMultiEpisodesWarning | Yes, No. | Do not validate episode keys on merged multi-order events. This stops the pop-up message which tells you a patient already has an event with this procedure.
 |
Orders List
| Level | Setting | Value | Description | |
|---|---|---|---|---|
|
XR, XRTR, XRS |
EVENTLIST.Orders |
Select columns from the list of options. Available columns |
Select which columns are available in the Orders List. See also System > Normal Tables.
|
|
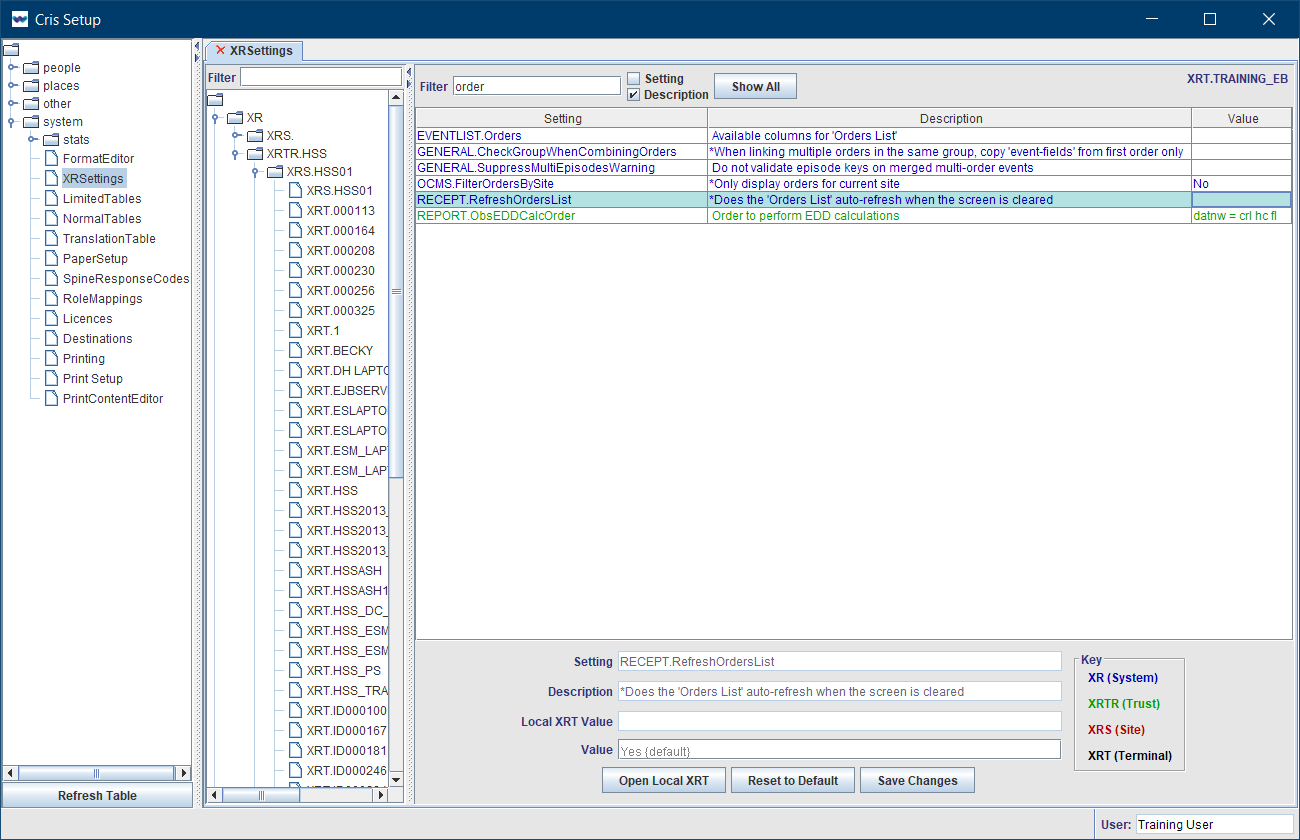
XR, XRTR, XRS |
RECEPT.RefreshOrdersList | Yes, No, Default (Yes). | Automatically refresh the Orders List when the screen is cleared. |

|
XR, XRTR, XRS |
OCMS.FiltersOrdersBySite | Yes, No, Default (Yes). | Restrict (filter) orders to the current site only. |
Order Comms (OCMS) XR settings
| Level | Setting | Value | Description | |
|---|---|---|---|---|
|
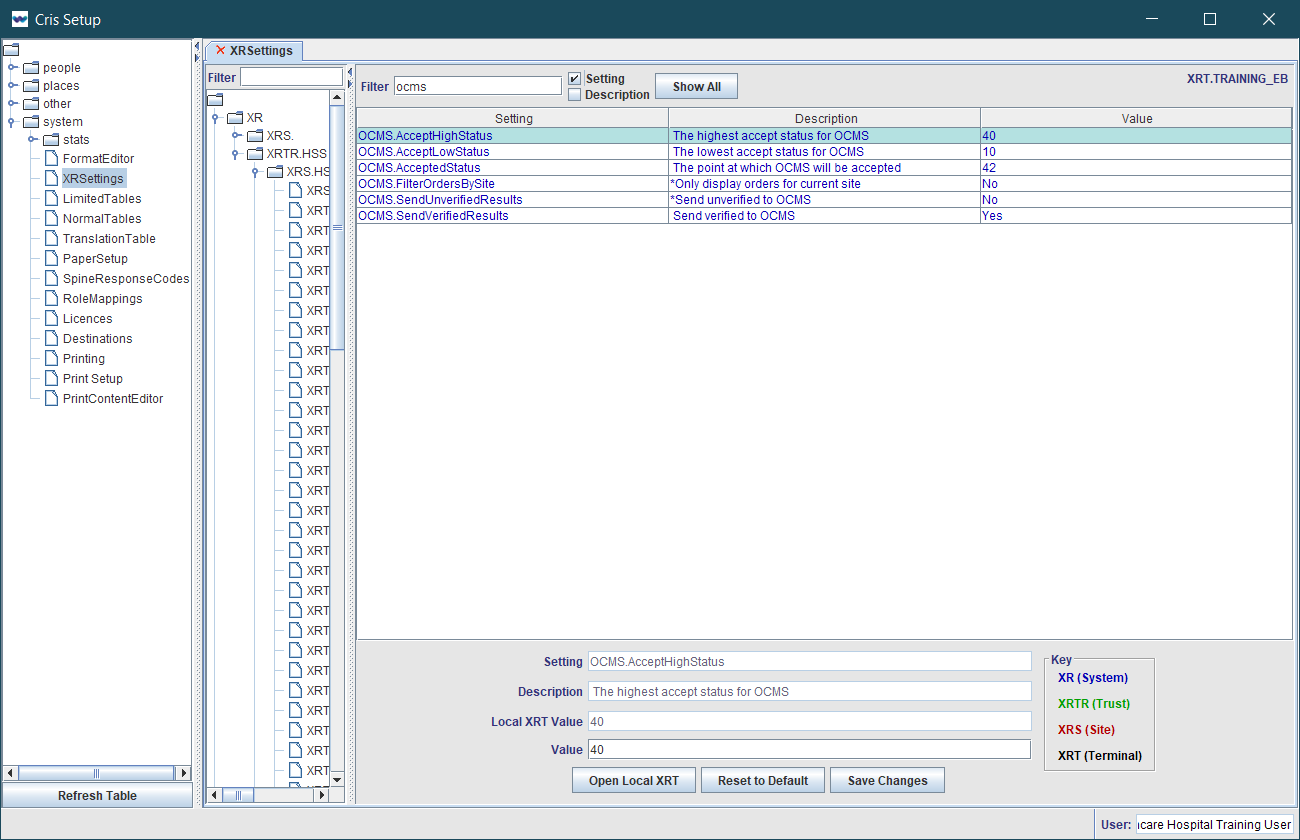
XR |
OCMS.AccedptHighStatus | 40 | The highest accept status for OCMS. |
| XR | OCMS.AcceptLowStatus | 10 | The lowest accept status for OCMS. | |
| XR | OCMS.AcceptedStatus | 42 |
A number to indicate whether an order has been accepted. |
|
| XR | OCMS.SendUnverifiedResults | Yes, No, Default (No). | Send unverified results back to Order Comms. | |
| XR | OCMS.SendVerifiedResults | Yes, No, Default (None). | Send verified results back to Order Comms. |
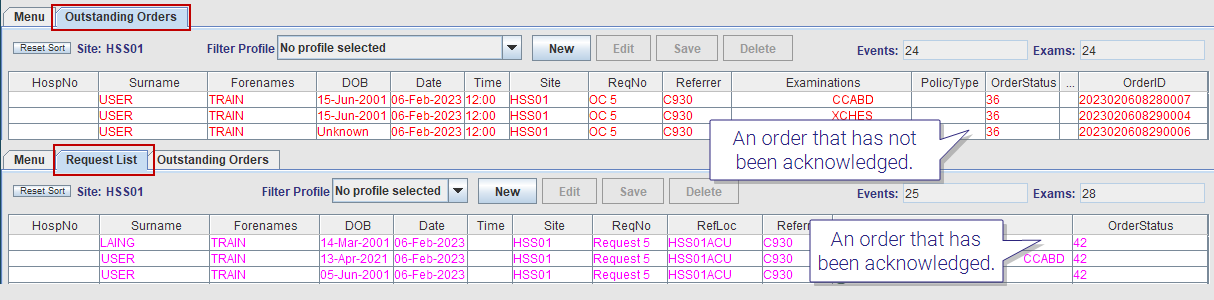
Example:
Orders have a status code. Your local values may vary.
| Number | Description | |
|---|---|---|
|
36 | An order that has not been acknowledged and turned into an event. |
| 42 | An order that has been acknowledged and turned into an event. | |
| 50 | Reflex order. Entering a hard-copy request directly via Cris will send a 'reflex order' and associated results back to Order Comms. | |
| 99 | Cancelled order. |
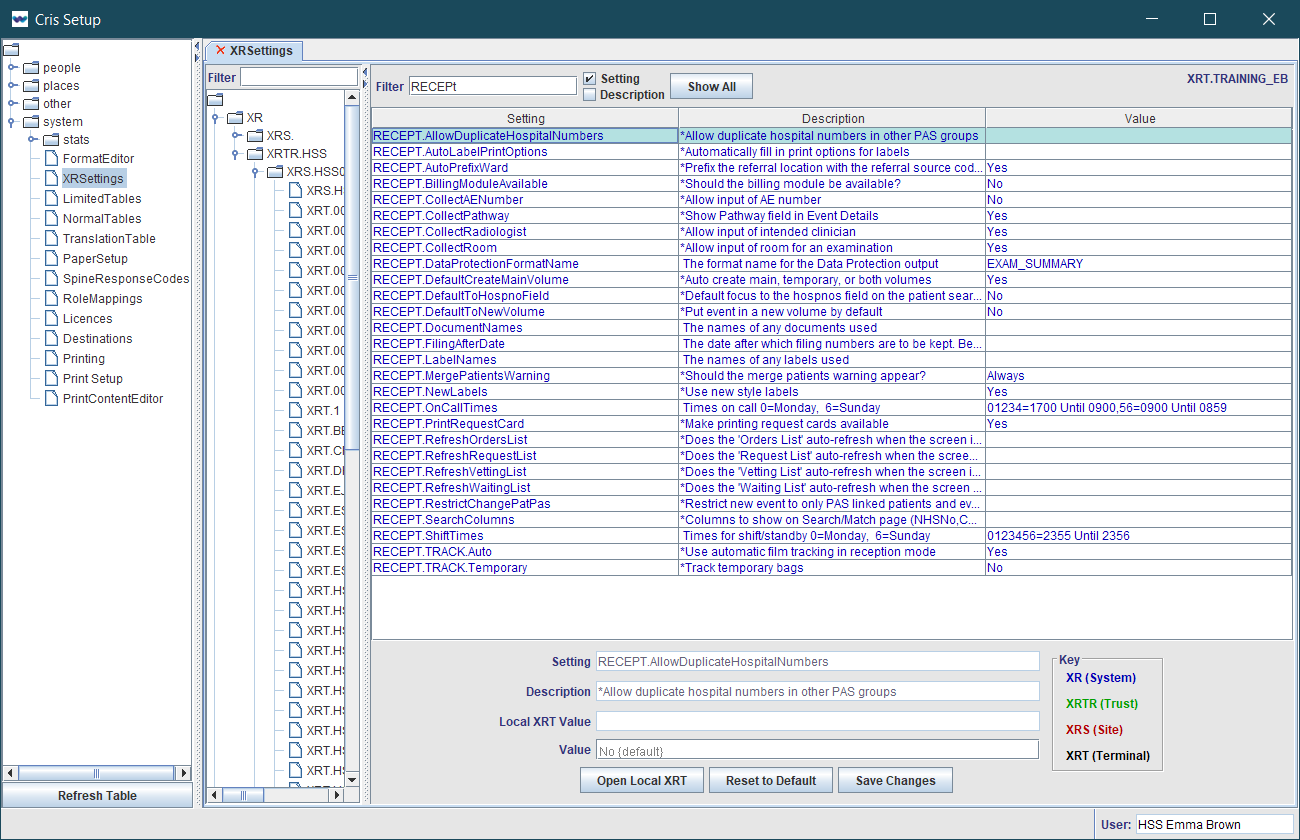
Reception
| Level | Setting | Value | Description | |
|---|---|---|---|---|
|
XR, XRTR, XRS | RECEPT.AllowDuplicateHospitalNumbers | Yes, No, Default (No). | Allow duplicate hospital numbers in other PAS groups. |
| RECEPT.AutoLabelPrintOptions | Yes, No, Default (Yes). | Auto-fill print options for labels. | ||
| RECEPT.AutoPrefixWard | Yes, No, Default (No). | Prefix referral location with referral source code on event entry. | ||
| RECEPT.BillingModuleAvailable | Yes, No, Default (No). | Is the billing module available. | ||
| RECEPT.CollectAENumbers | Yes, No, Default (Yes). | Allow input of AE numbers. | ||
| RECEPT.CollectPathway | Yes, No, Default (No). | Show Pathway field in Event Details. | ||
| RECEPT.CollectRadiologistxr_list_ | Yes, No, Default (No). | Allow input of Intended Clinician. | ||
| RECEPT.CollectRoom | Yes, No, Default (Yes). | Allow input of room for an examination. | ||
| RECEPT.DataProtectionFormatName | EXAM_SUMMARY | Format name for the data protection output. Create a format in System > Format Editor. | ||
| RECEPT.DefaultCreateMainVolume | Main, Temporary, Both, Default (Main). | Auto-create main, temporary, or both volumes. | ||
| RECEPT.DefaultToHospitalNotField | Yes, No, Default (No). | Default focus to Hosp No field on patient search. | ||
| RECEPT.DefaultToNewVolume | Yes, No, Default (No). | Put an event in a new volume by default. | ||
| RECEPT.DocumentNames | Names of any documents used. | |||
| RECEPT.FilingAfterDate | Date after which filing numbers are to be kept. Before this they are to be replaced. | |||
| RECEPT.LabelsNames | Names of any labels used. | |||
| RECEPT.MergePatientsWarning | Always, Conditional, Never. | When should merge patients warning appear. | ||
| RECEPT.NewLabels | Yes, No, Default (No). | Use new style labels. | ||
| RECEPT.OnCallTimes | Times on call. 0 = Monday, 6 = Sunday. 01234 (Mon-Fri) = 17:00 - 09:00 and 56 (Sat-Sun) = 09:00 - 0859. | |||
| RECEPT.PrintRequestCard | Yes, No, Default (No). | Make printing request cards available. | ||
| RECEPT.RestrictChangePatPas | Yes, No, Default (No). | Restrict new event to only PAS-linked patients and events. | ||
| RECEPT.SearchColumns | Yes, No, Default (No). | Columns to show on Search / Match screen (NHSNo, CHINo, CRISNo, HospNo). | ||
| RECEPT.ShiftTimes | Times for shift / stand-by. 0 = Monday, 6 = Sunday. 0123456 (Mon - Sun) = 23:55 - 23:56. | |||
| RECEPT.TRACK.Auto | Yes, No, Default (No). | Use automatic film tracking in Reception mode. | ||
| RECEPT.TRACK.Temporary | Yes, No, Default (No). | Track temporary bags. |
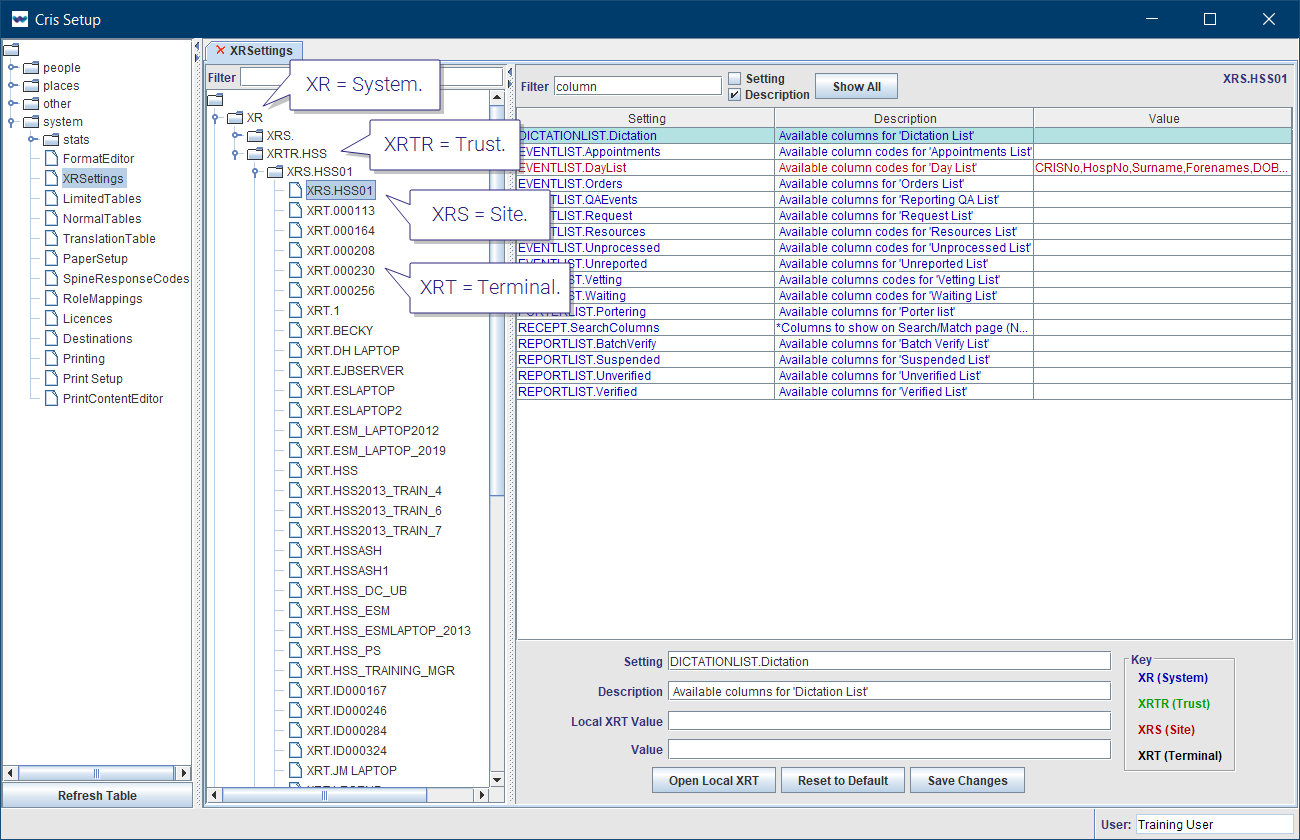
It is essential to consider the level of an XR setting when making changes. System and Trust should not be altered without agreement from all stakeholders.
| Level | Description |
|---|---|
| XR (System) | Changes made here will affect the entire Cris system across all connected trusts. |
| XRTR (Trust) | Changes made here will override XR and affect the whole trust. |
| XRS (Site) | Changes made here will override XRTR and affect the entire hospital / site. |
| XRT (Terminal) | Changes made here will override XRS Setting and only apply to that terminal / workstation. |
Note:
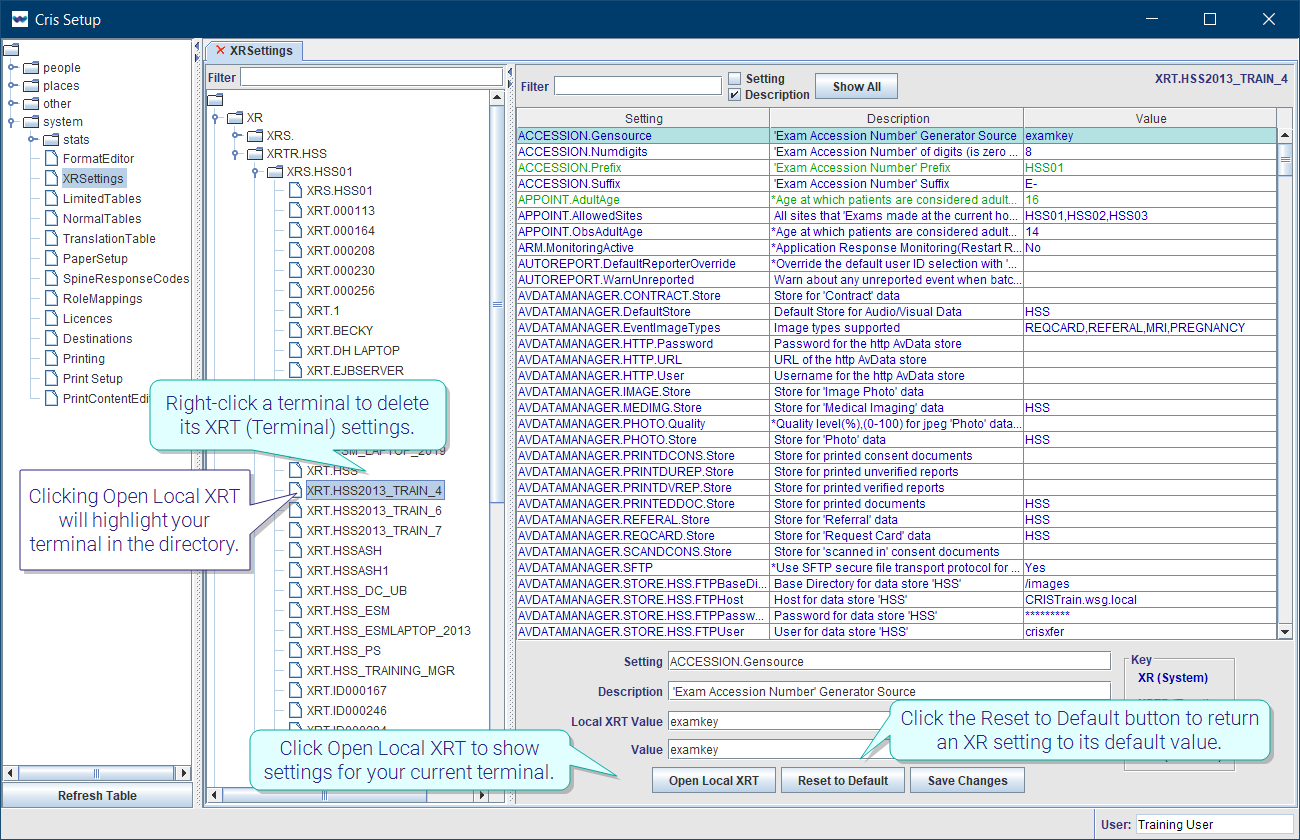
When you open the Cris Setup window, you will see that your terminal is highlighted in the directory tree. Therefore, if you change XR settings, they will be applied at Terminal level. If you want XR settings to apply across your Site, Trust, or System, select a higher level folder before making changes.
Tip:
-
Click Open Local XRT to show settings for your current terminal. Clicking Open Local XRT will highlight your terminal in the directory.
-
Click the Reset to Default button to return an XR setting to its default value.
-
Right-click a terminal to delete its XRT (Terminal) settings.
Tip:
Press the Esc key to exit a field without making a selection from an options list.
XR Settings for Modules:

|
|
Orders |

|
|
Vetting |

|
|
Appointments |

|
|
Reception |

|
|
Post processing |

|
|
Reporting |

|
|
Resources |

|
|
Sessions |

|
|
Portering |
|
|
|
Medical Photography |