Enter a paper request
Enter details from a paper request manually then scan the card / document. NIMIS: See also Select an episode.
When a paper request is received, enter it on Cris, save it as Received, and scan the request card.
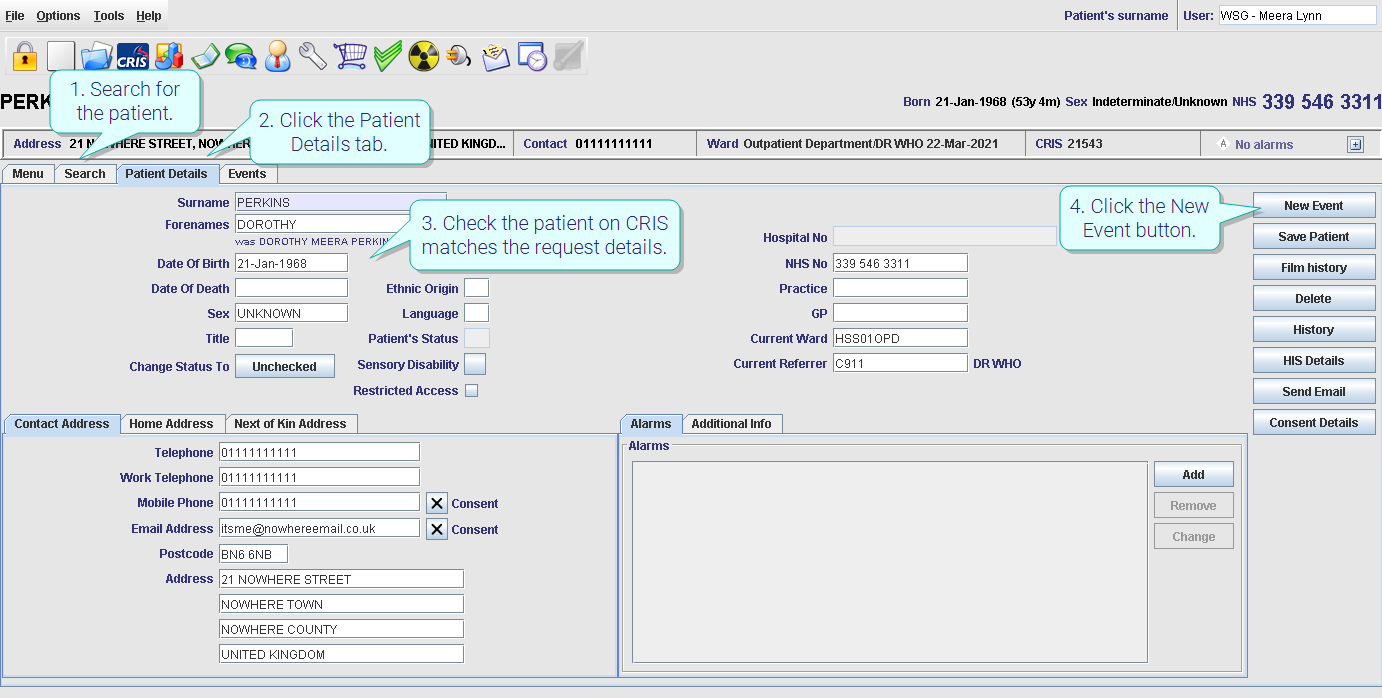
- Search for the patient.
- Click the Patient Details tab.
- Check the patient on Cris matches the request details.
- Click the New Event button.
- Enter the exam Code.
- Enter the Room if appropriate.
- Enter a clinician code in the Practitioner field to assign vetting to a particular clinician.
- Enter the Urgency.
- Enter the Request Date as per the paper request - this starts the Diagnostic Waiting Time (if applicable).
- Click the Request button.
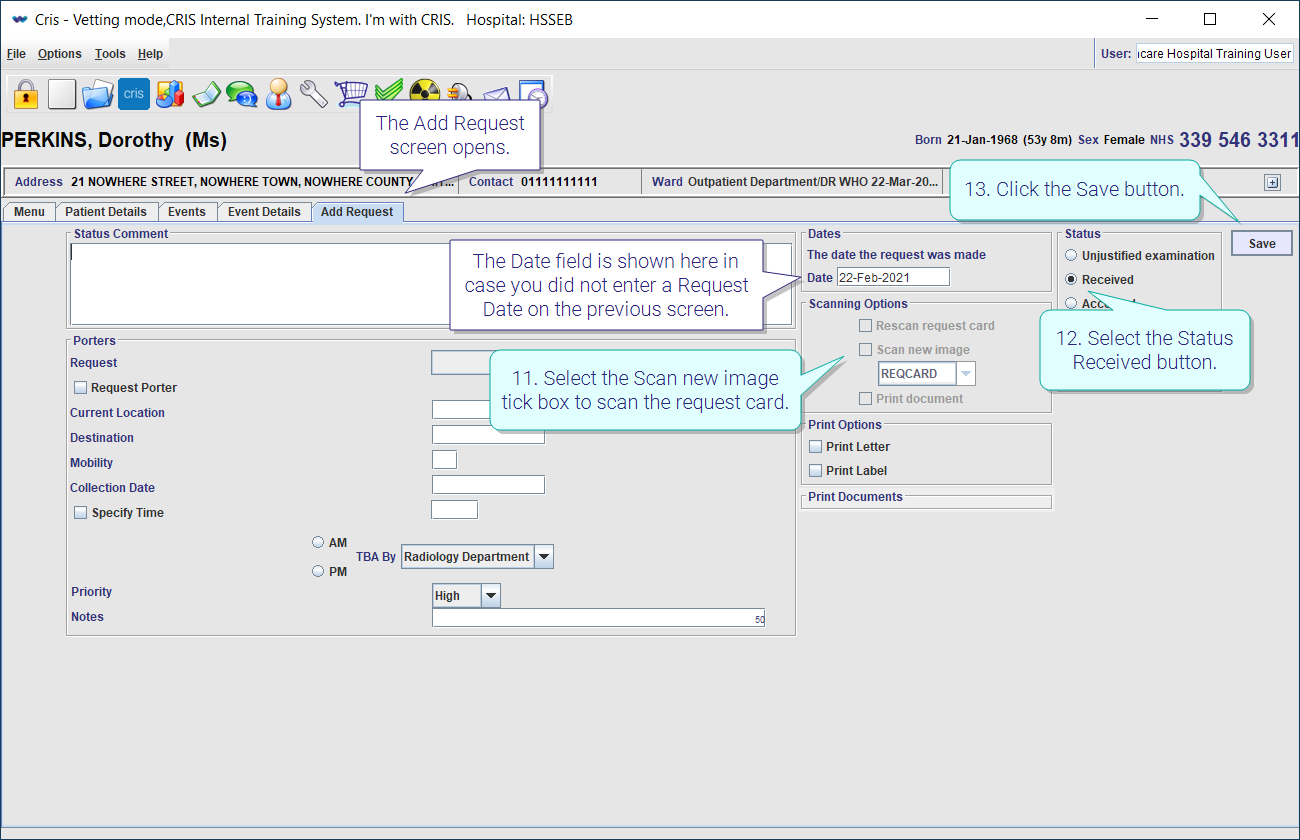
- Select the Scan new image tick box to scan the request card.
- Select the Status Received button.
- Click the Save button.

The Event Details screen opens.

The Add Request screen opens.
The Date field is shown here in case you did not enter a Request Date on the previous screen.
Scanning will begin and the request will be saved. It can then be vetted by a clinician.
Warning:
Saving as Received does not mean the examination will definitely go ahead. The request still needs to be vetted by a clinician.
When a vetted paper request is received, enter it on Cris, save it as Received, and scan the request card.
- Search for the patient.
- Click the Patient Details tab.
- Check the patient on Cris matches the request details.
- Click the New Event button.
- Enter the exam Code.
- Enter the Room if appropriate.
- Enter the clinician code of the person who vetted the request in the Practitioner field.
- Enter the Urgency.
- Enter the Request Date as per the vetted request - this starts the Diagnostic Waiting Time (if applicable).
- Click the Requestbutton.
- Select the Scan new image tick box to scan the request card.
- Select the Status Received button.
- Click the Save button.
The Event Details screen opens.
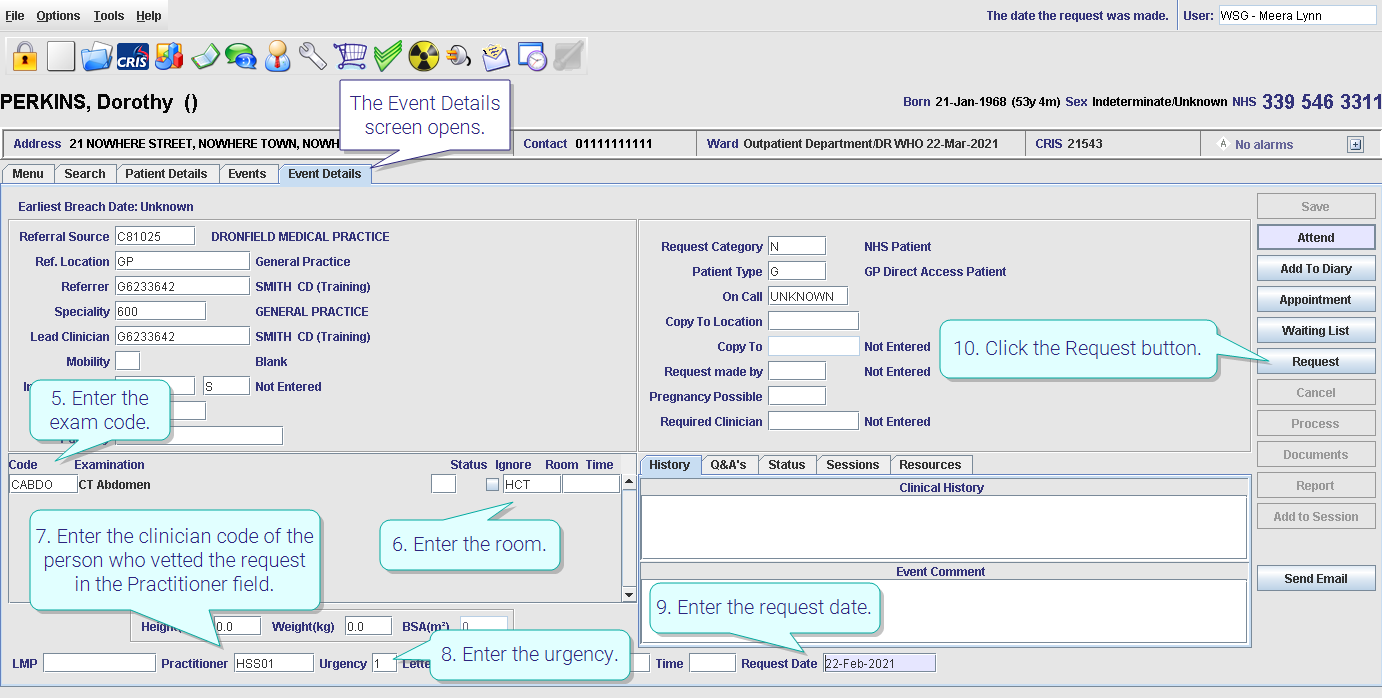
The Add Request screen opens.
The Date field is shown here in case you did not enter a Request Date on the previous screen.

Scanning will begin and the request will be saved. It can then be attended, appointed, or placed on a waiting list.
Tip:
Saving an order as Accepted is a way to record it as having been vetted, if your site does not use the vetting module. Remember to add an Event Comment on the Event Details screen, and record the Practitioner who approved the order on the Add Request screen.
Warning:
Saving as Accepted should only be done / authorised by a clinician (who will be recorded as the Practitioner).
Note:
Request Date is the date a request was made by the referrer. For Order Comms, this is automatically entered in Cris. For a paper request, you can manually enter / change the date if the request is being added on a different (later) date than it was requested.
Note:
The following are tabs on the Event Details screen which may contain further information about an event.
History
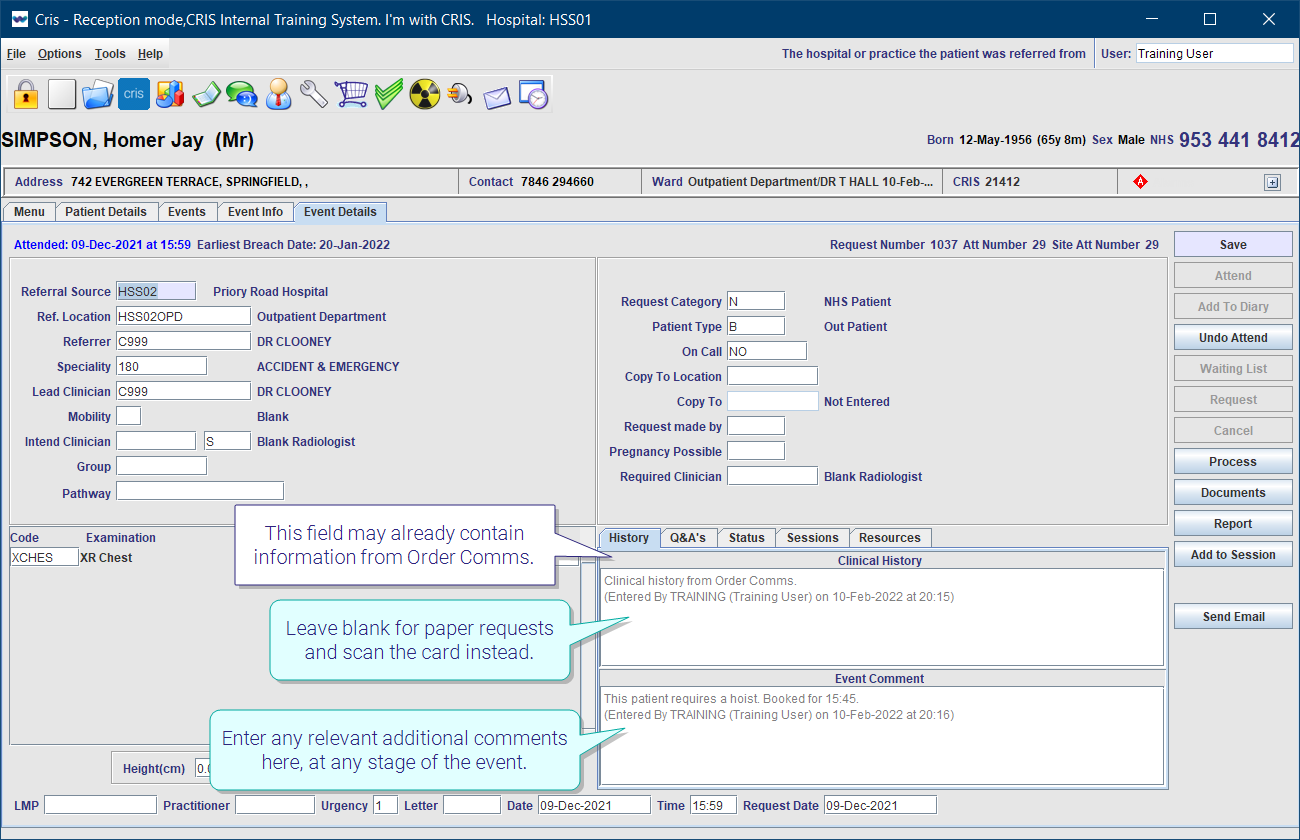
Clinical History
If a request originated from an electronic order, this field may already contain information from Order Comms.
When entering a paper request (to avoid accidentally typing incorrect details, which may result in clinical risk) it is advisable to leave this field blank. You will have the opportunity to scan the request card via the Add Request screen.
Event Comment
Enter any relevant additional comments here, at any stage of the event.
Q & A's
Reason for Examination
If the request originated from an electronic request this field may already contain information from Order Comms. Type further clinical history here and / or the reasons for requesting / performing the examination if entered on the request card.
Clinical Safety Questions
If the request originated from an electronic request this field may already contain information from Order Comms. Type any Clinical Safety questions here if entered via the request card.
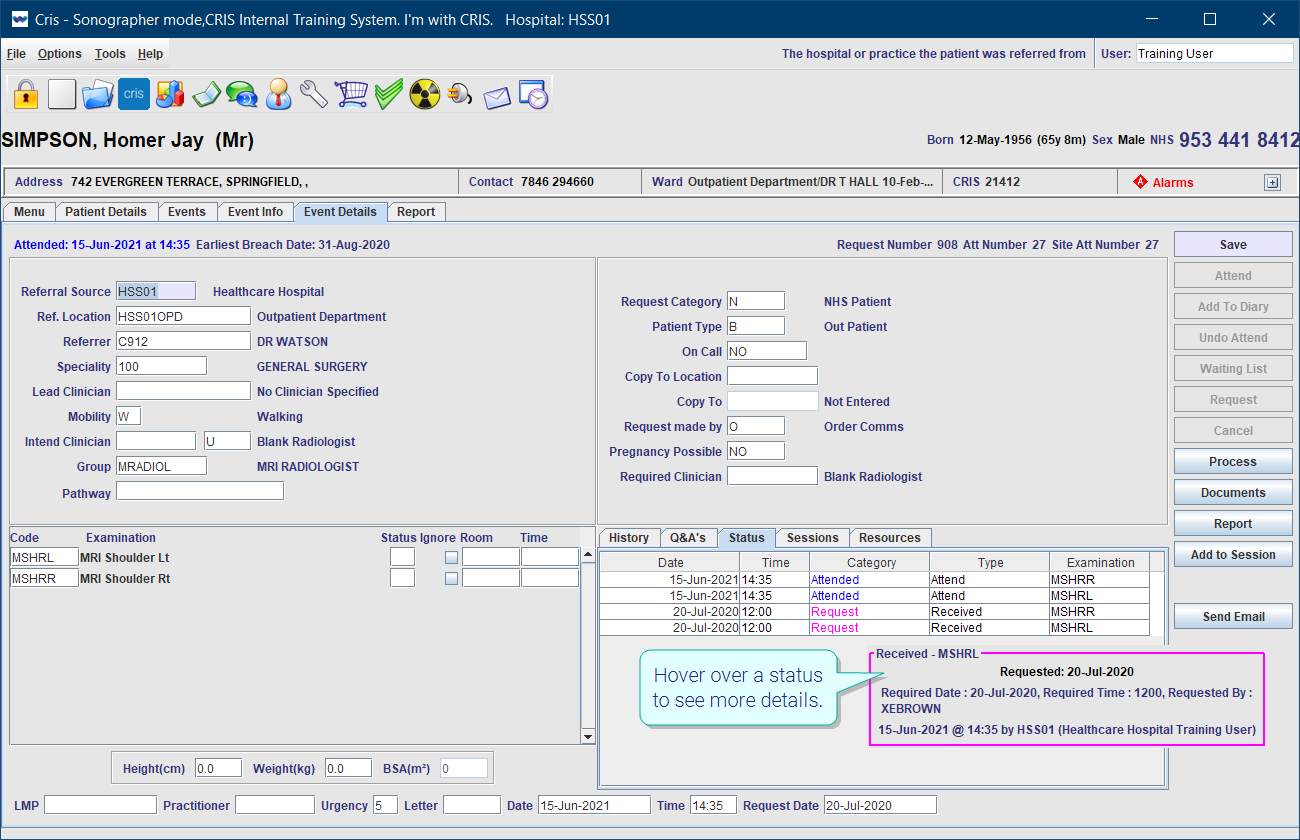
Status
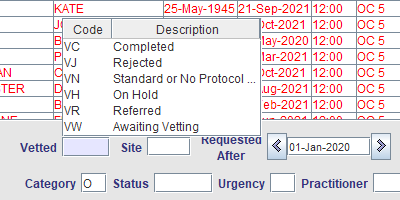
The Status tab contains a chronological list of status changes from Request to Attend. It will show the date and time of vetting, appointments, and cancellations.
Hover over a status to see more details.
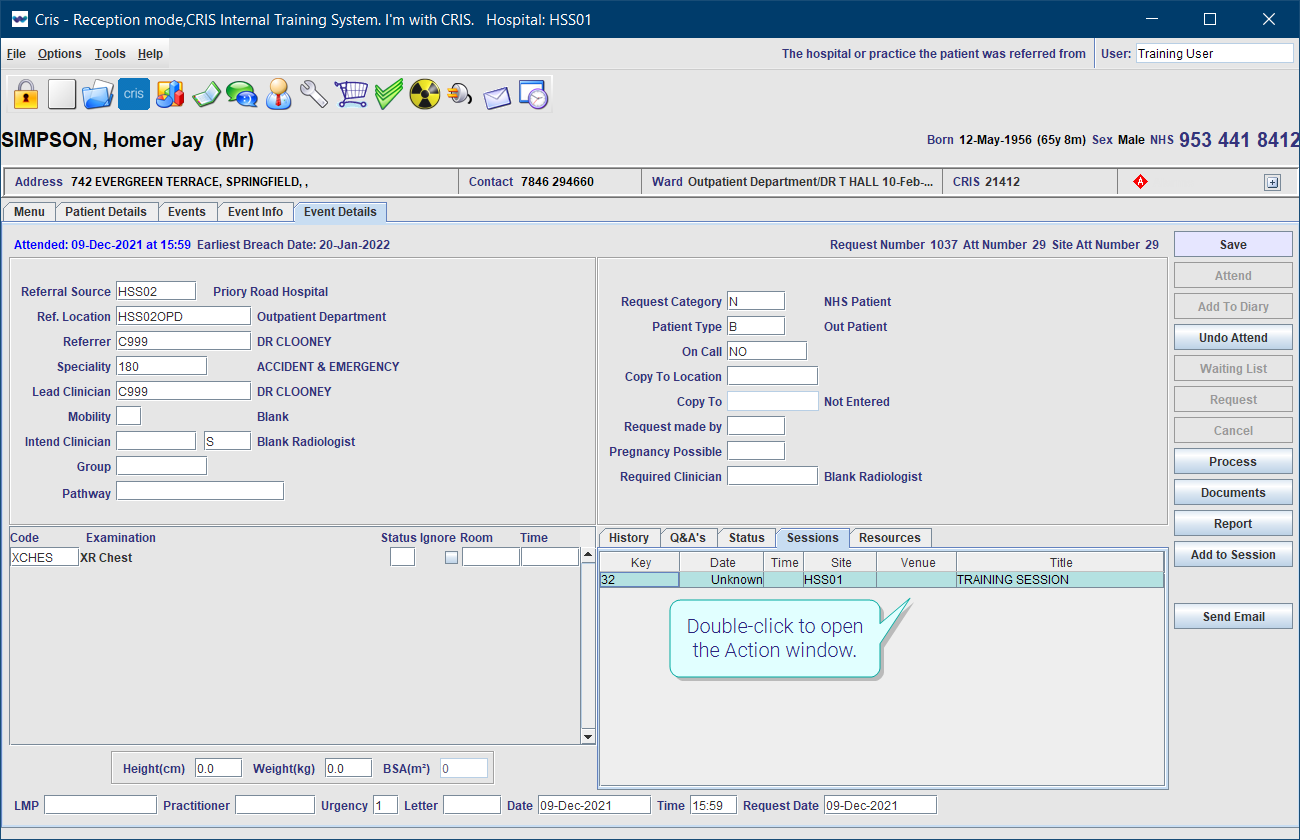
Sessions
The Sessions tab contains any event actions that have been recorded during a Session. For example, an event might be discussed as a teaching case.
Double-click to open the Action window.
Resources
The Resources tab is used (if you have the Resources module) to record any specific resources (people) required for this examination.
Tip:
Double-click in a field, or press F4 with the cursor in that field to display available values. Select one value, or leave blank to see all.
Tip:
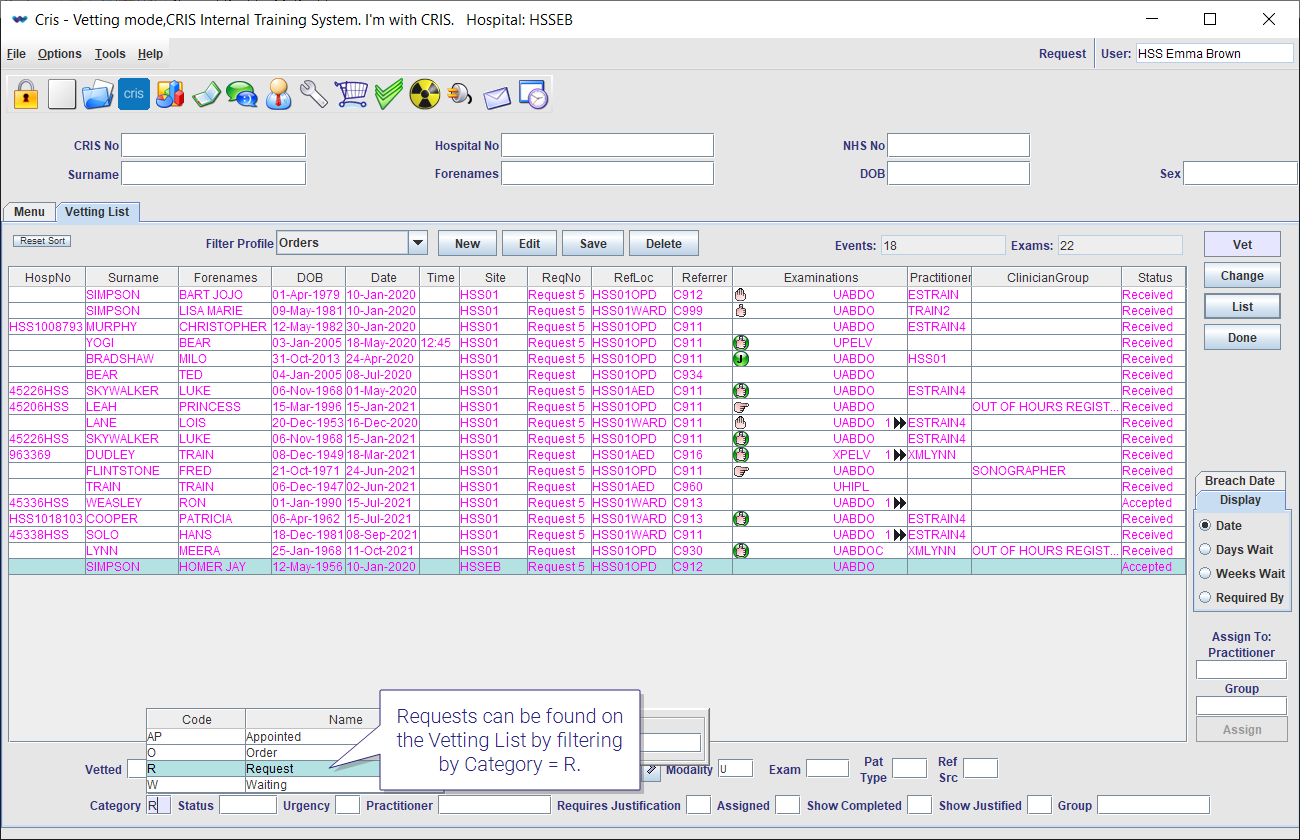
Requests can be found on the Vetting List by filtering by Category = R.