
Post process
Other users will see an icon ![]() on the worklist that indicates the examination is locked.
on the worklist that indicates the examination is locked.
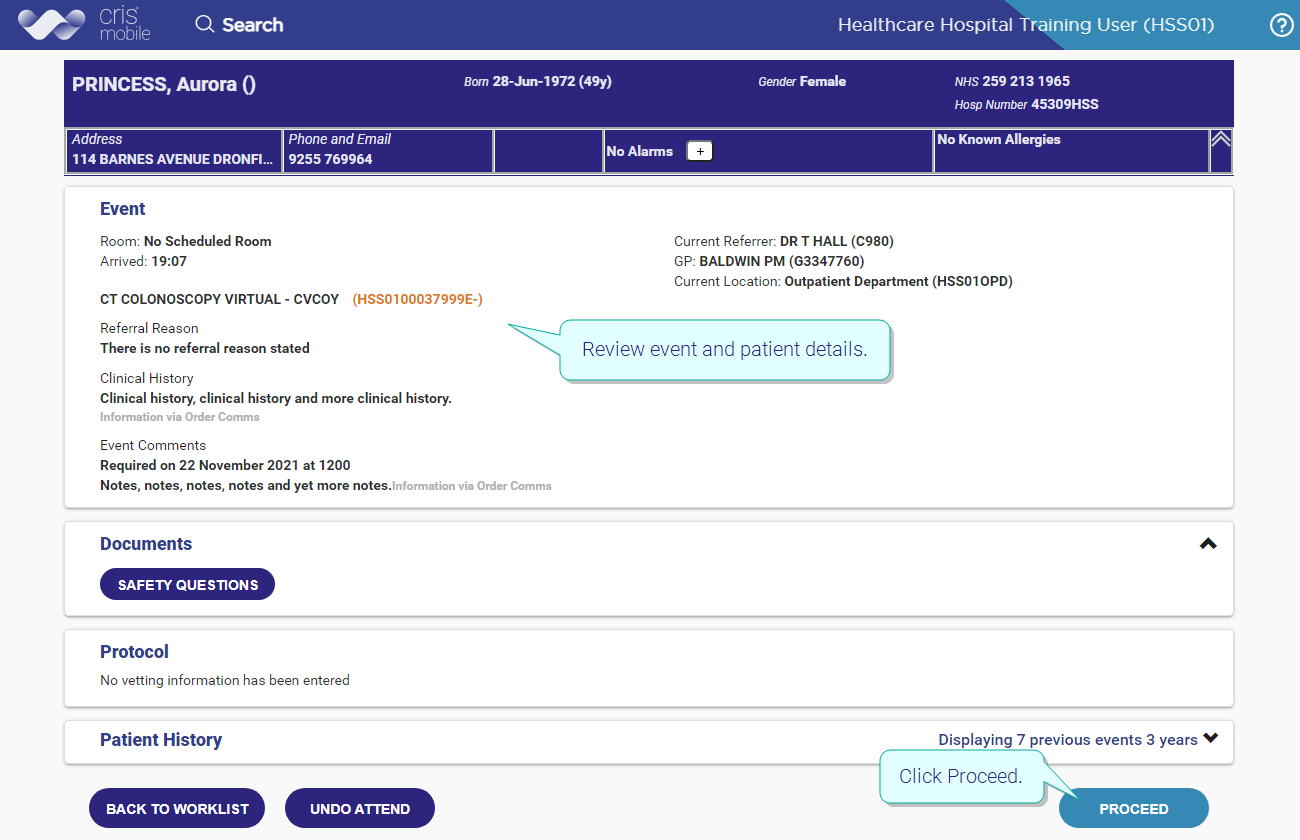
Review event and patient details then click Proceed.
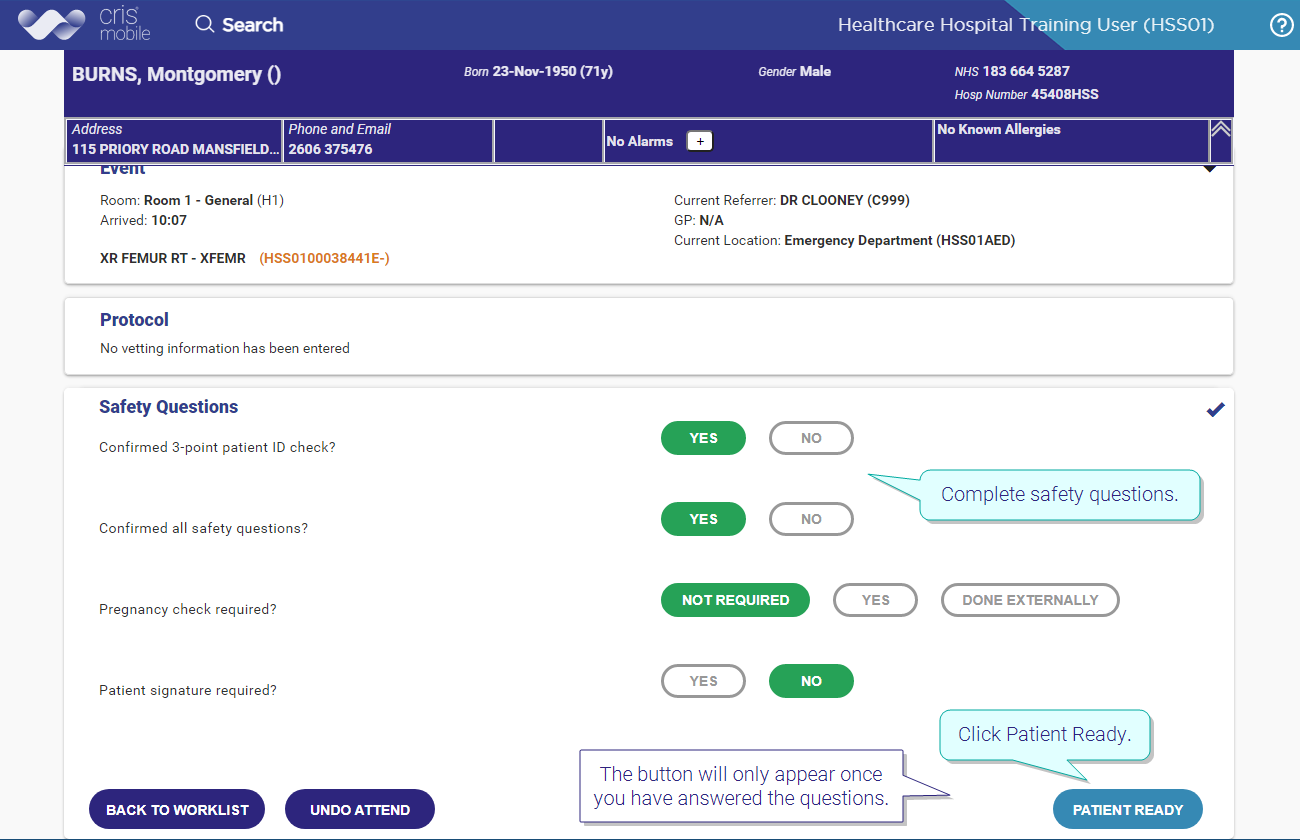
Complete safety questions then click Patient Ready. The button will only appear once you have answered the questions.
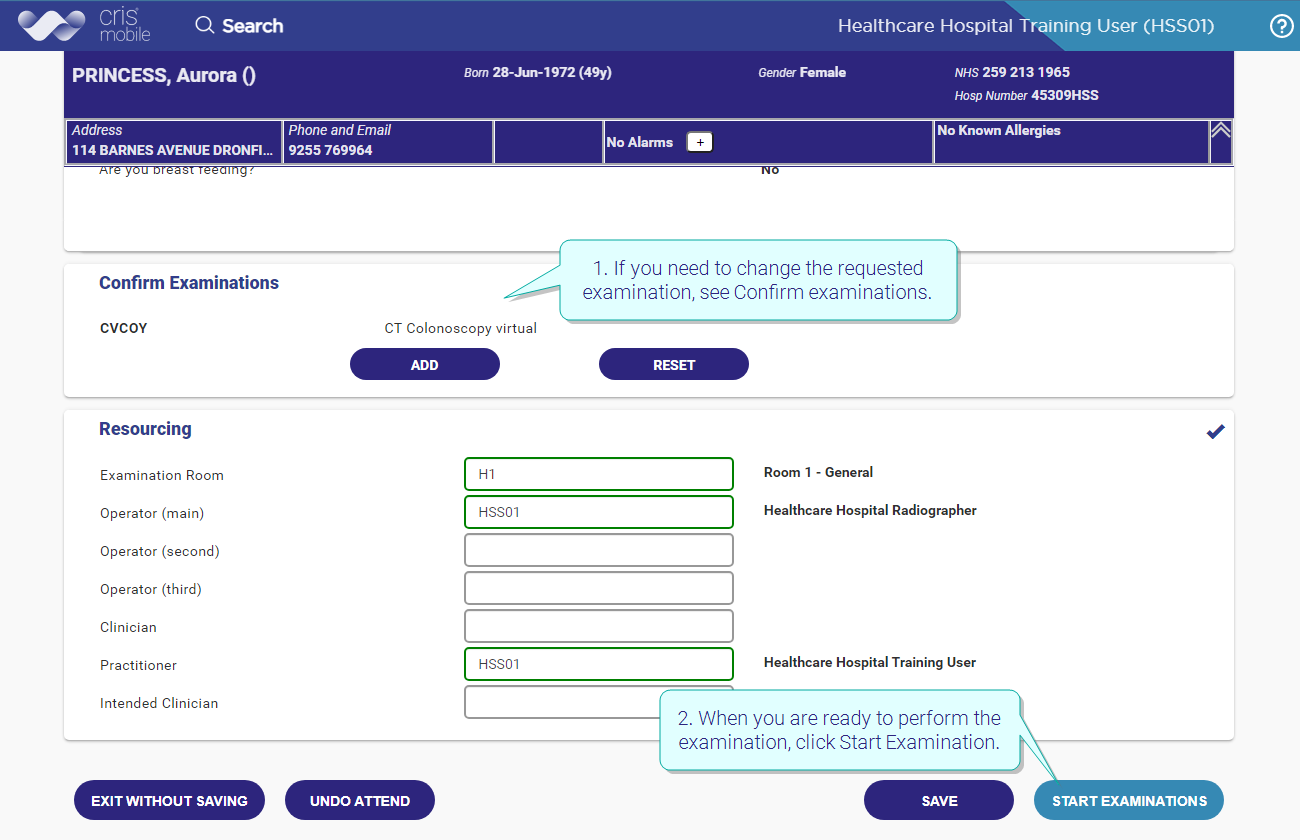
- Check the requested examination(s).
- Click Add to add a new examination. You must leave a minimum of one examination.
- Click Remove to remove any unwanted examinations.
- Click Reset to return to the original requested examination(s).
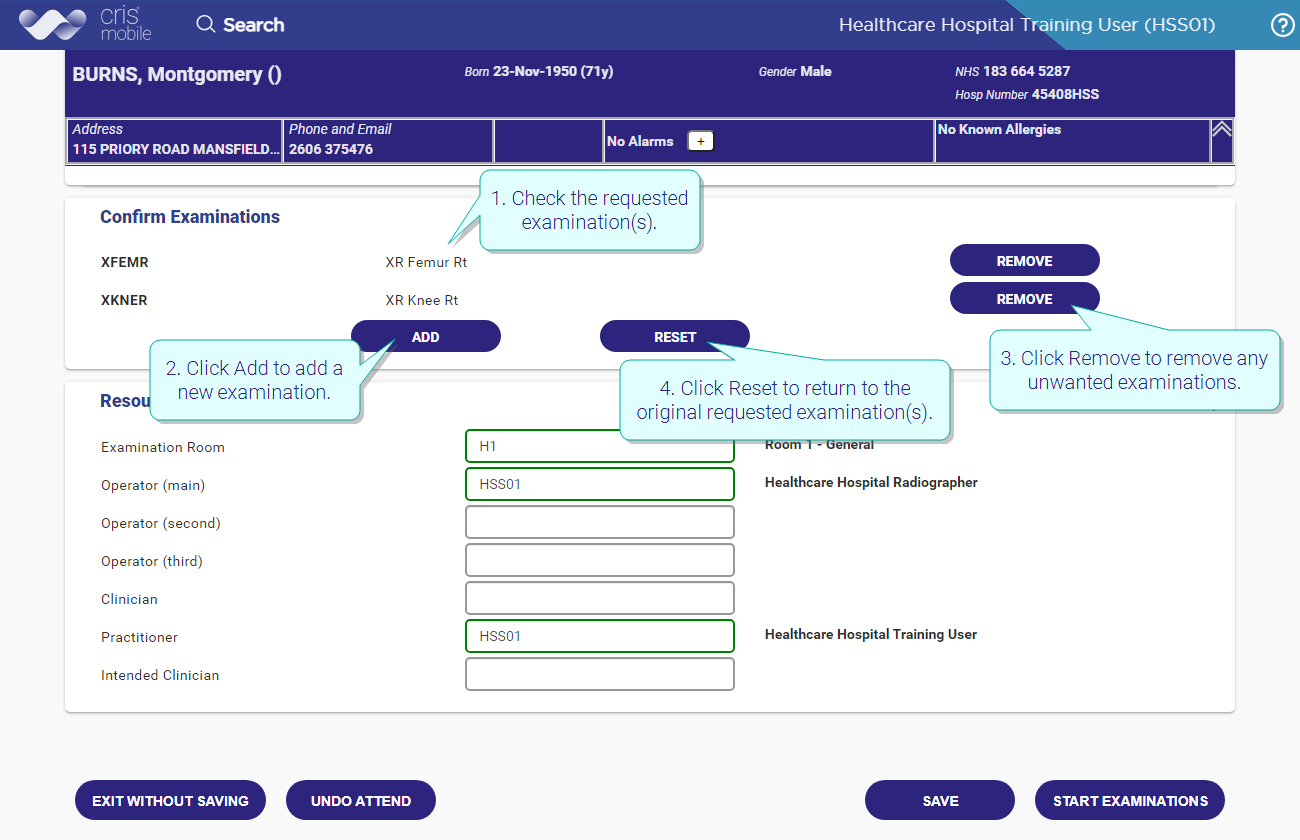
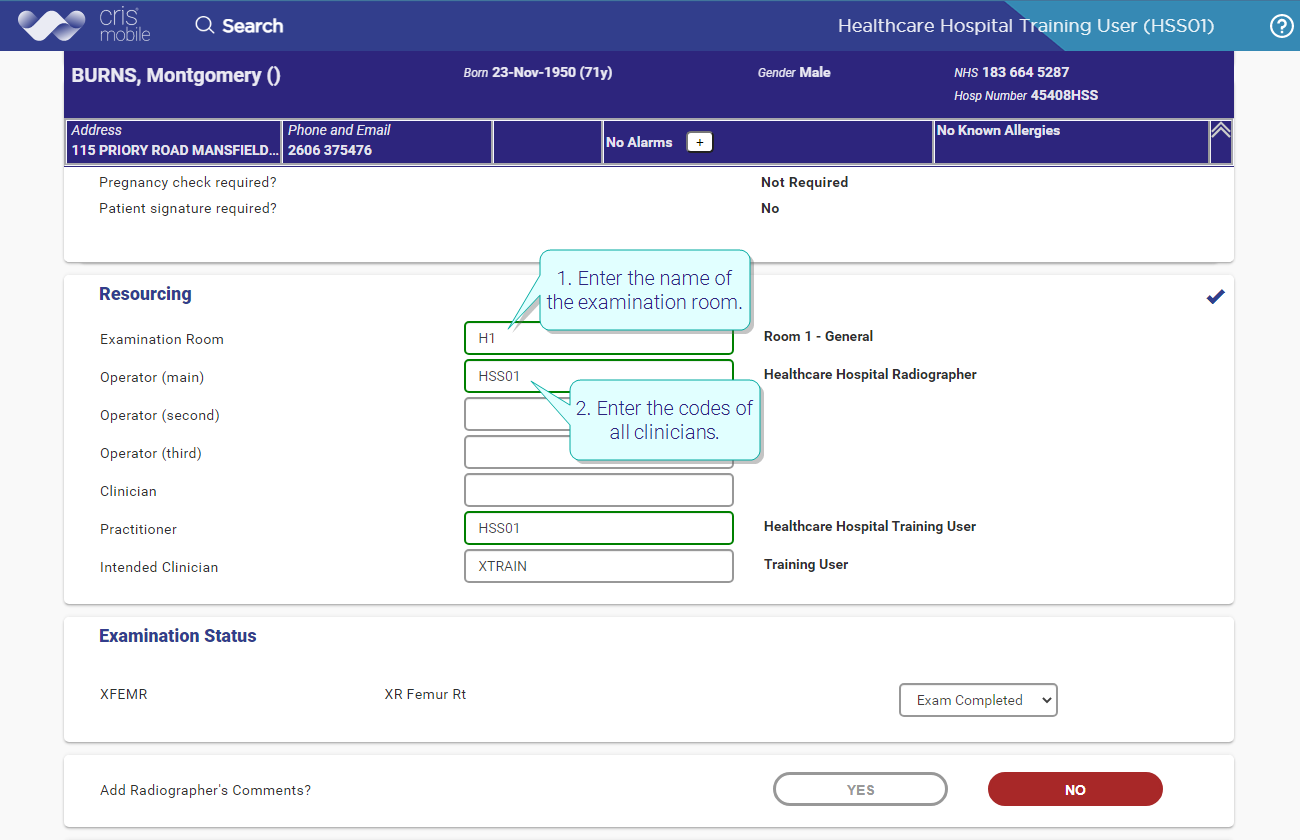
- Enter the name of the examination room.
- Enter the codes of all clinicians who have participated in the event. Start typing to display matching names.
- Operator(s) perform the imaging. This field will default to the logged-in user, but can be edited.
- Clinician is someone who participates for a reason other than imaging, for example to take a biopsy.
- Practitioner is the person responsible for the event. This field will default to the logged-in user, but can be edited. If electronic vetting has taken place, this field will contain the name of the person who vetted the exam.
- Intended clinician will report this event.
Room, Operator (Main), and Practitioner are mandatory fields, marked with an asterisk until you complete them.
- If you need to change the requested examination, see Confirm examinations, above.
- When you are ready to perform the examination, click Start Examination.
- Select an exam status from the drop-down list.
- Complete the following:
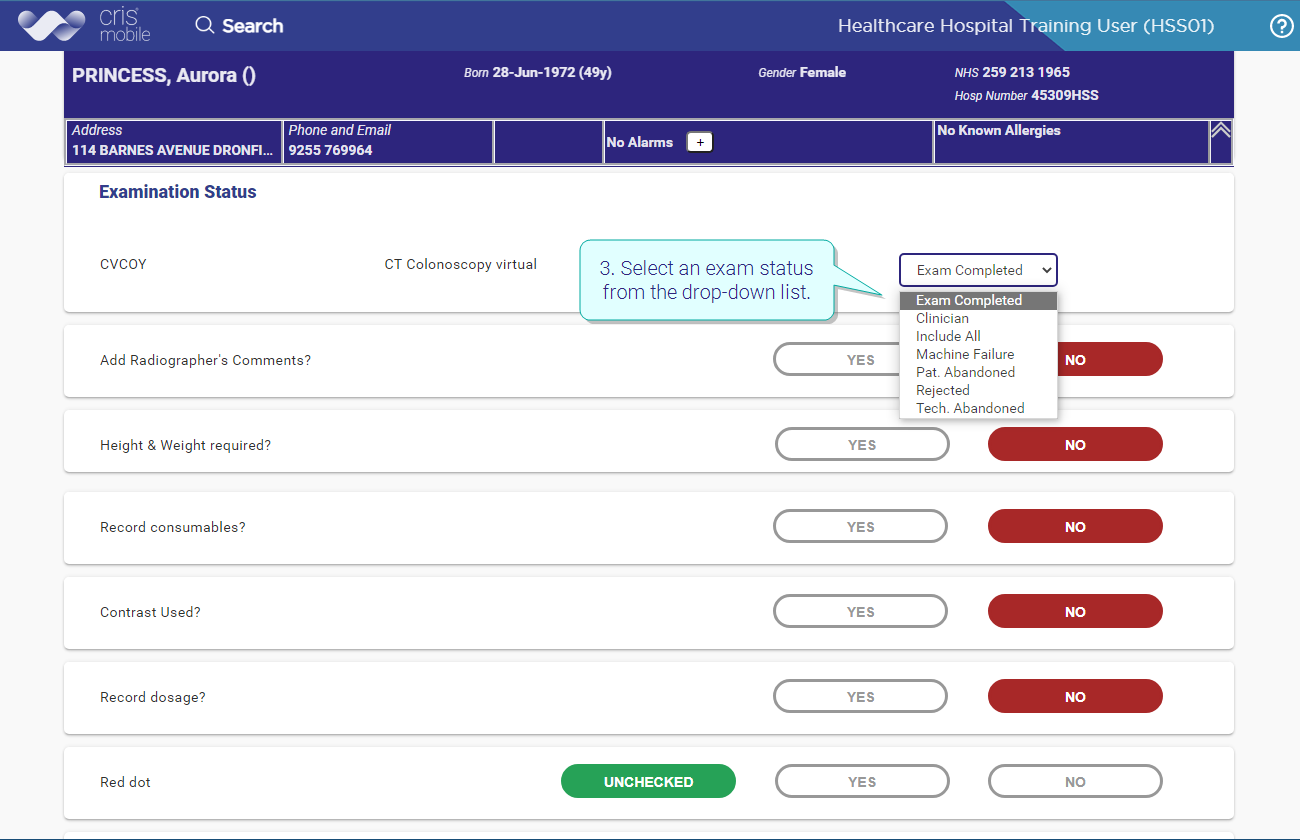
| Exam status | Description |
| Exam completed | Imaging performed successfully. |
| Clinician | The clinician decided not to complete this examination. |
| Machine Failure | Machine failure caused this examination to be abandoned. |
| Pat Abandoned | The patient decided not to go ahead with this examination. |
| Rejected | The request for this examination was rejected (by a clinician / practitioner). |
| Tech Abandoned | The operator decided this examination should be abandoned. |
Note:
Exam status applies to the selected exam only. You can, for example, abandon one examination but perform the other in a multi-exam event. If the whole event is abandoned (no imaging is performed at all), select Undo Attend then Undo Attend again, if it will go ahead later. Select Cancel Event if it will not be performed.
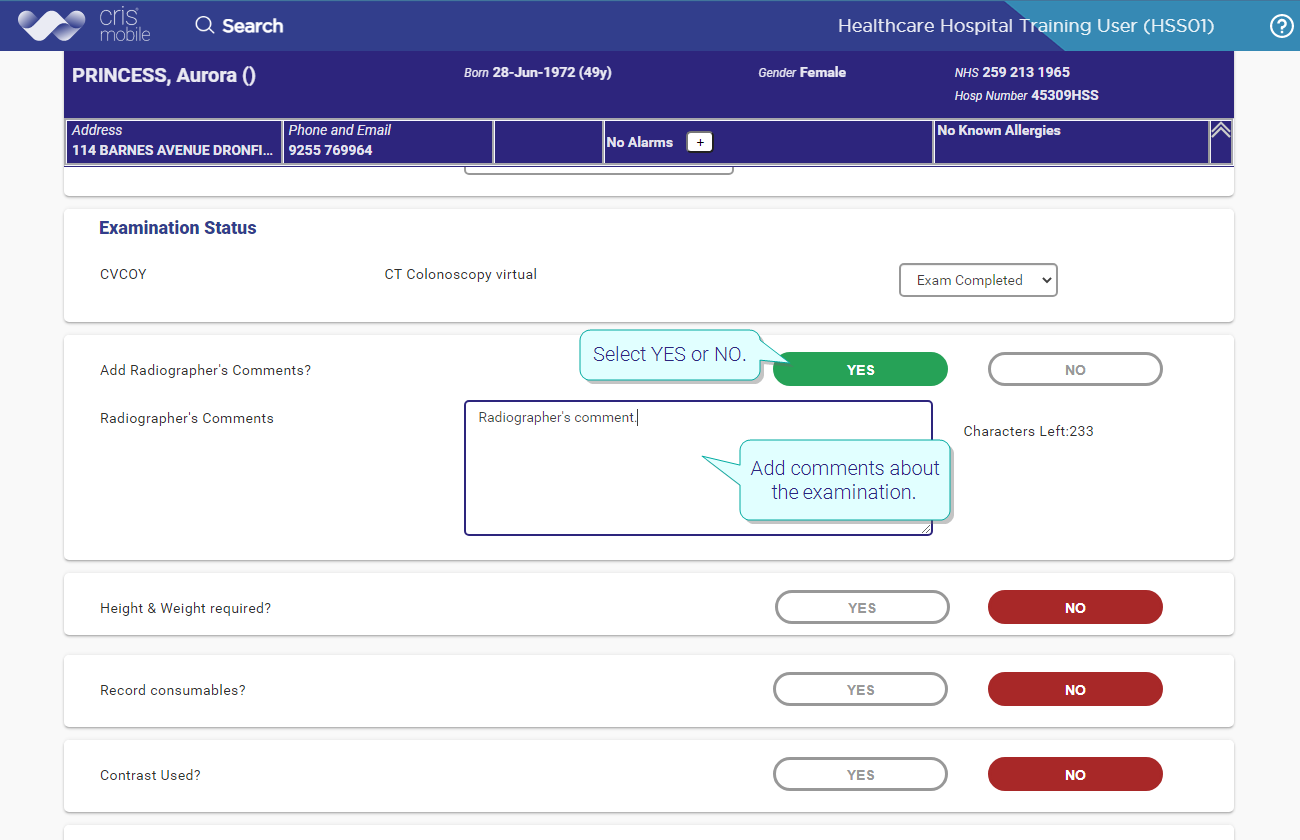
| Add radiographer's comments? |
Select YES or NO. Add comments about the examination.
|
||||||||||||||||||||||
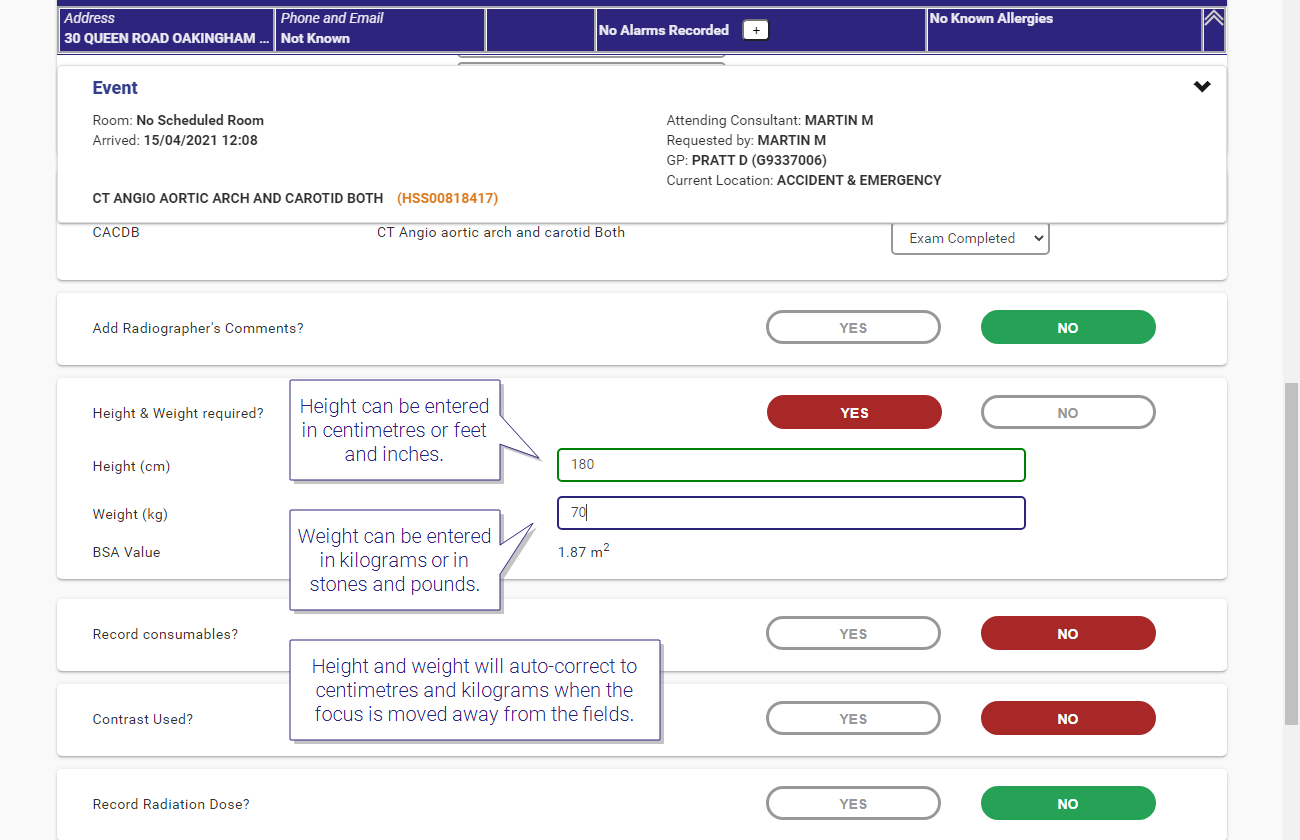
| Height & weight required? |
Height can be entered in centimetres or feet and inches. Enter 5 11 for 5 feet 11 inches. Weight can be entered in kilograms or in stones and pounds. Enter 10 2 for 10 stones 2 pounds. Height and weight will auto-correct to centimetres and kilograms when the focus is moved away from the fields.
|
||||||||||||||||||||||
| Consumables (stock) |
Select YES or NO. Enter items used.
|
||||||||||||||||||||||
|
Note: This is a free-text field. The information is sent to the Event Comments field in core Cris. |
|||||||||||||||||||||||
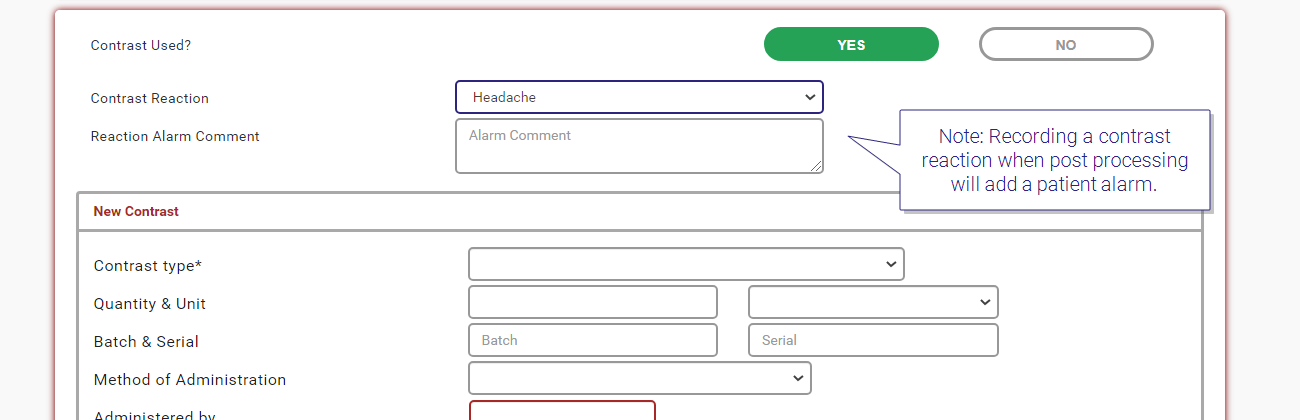
| Contrast used? |
Select YES or NO. Enter contrast details.
|
||||||||||||||||||||||
|
Note: * Recording a contrast reaction when post processing will add a patient alarm. Alarms added in this way, or via the Add button (Add an alarm) will also be visible in core Cris.
Note: Contrast type and Administered by are mandatory fields. Checked By is no longer mandatory. If entered, Administered by and Checked by must be valid radiographers. If both fields are completed then they cannot be the same value. |
|||||||||||||||||||||||
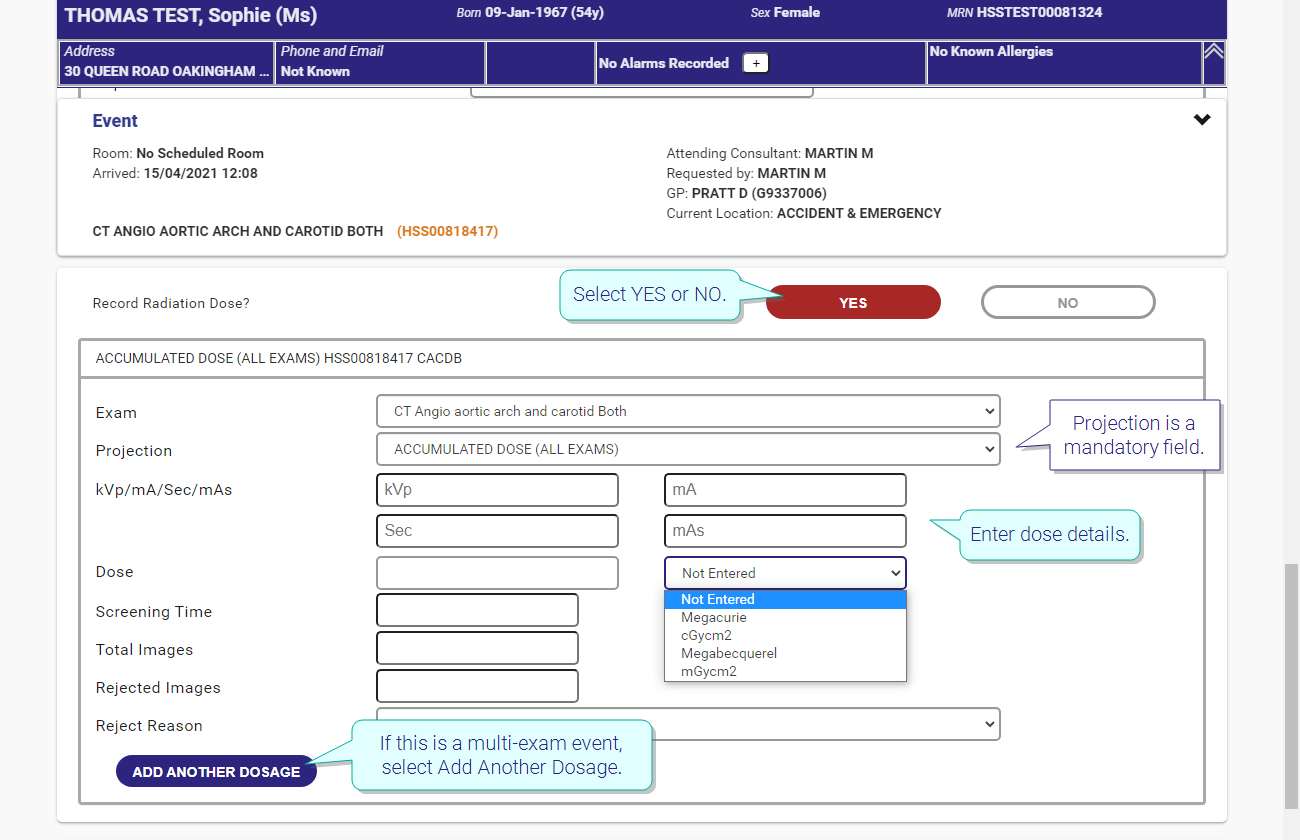
| Record dosage? |
Select YES or NO. Enter dose details.
If this is a multi-exam event, select Add Another Dosage, and repeat. |
||||||||||||||||||||||
| Red dot |
A red dot denotes a clinically significant finding. Select Unchecked , Yes, or No.
Note: This is an optional field and may not appear at your site. |
||||||||||||||||||||||
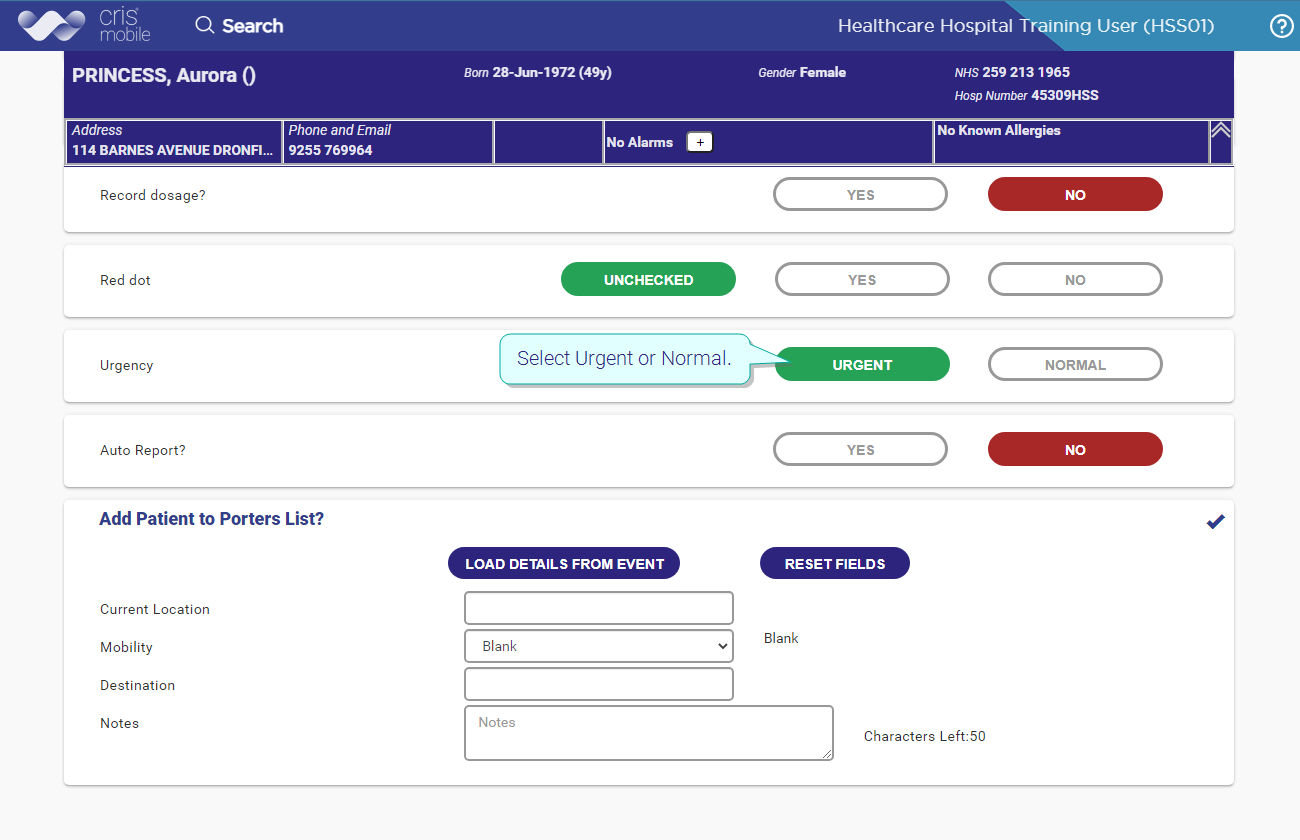
| Urgency |
Reporting urgency. Select Urgent or Normal. Selecting Urgent will highlight this event to reporting clinicians.
|
||||||||||||||||||||||
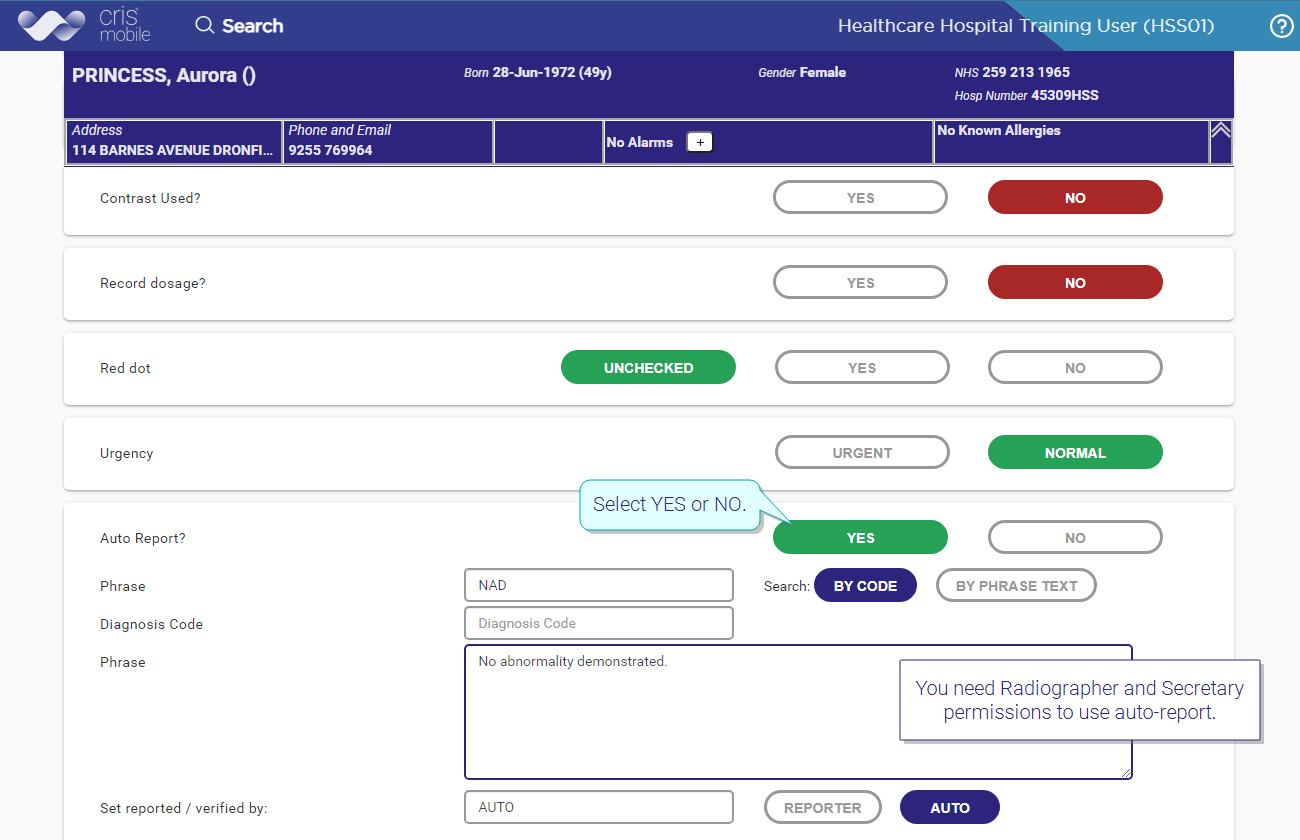
| Auto report |
Add an auto-report when a report from the radiology department is not required, for example for imaging performed in theatre during surgery. You need Radiographer and Secretary permissions to use auto-report.
Note: This is an optional field and may not appear at your site. |
||||||||||||||||||||||
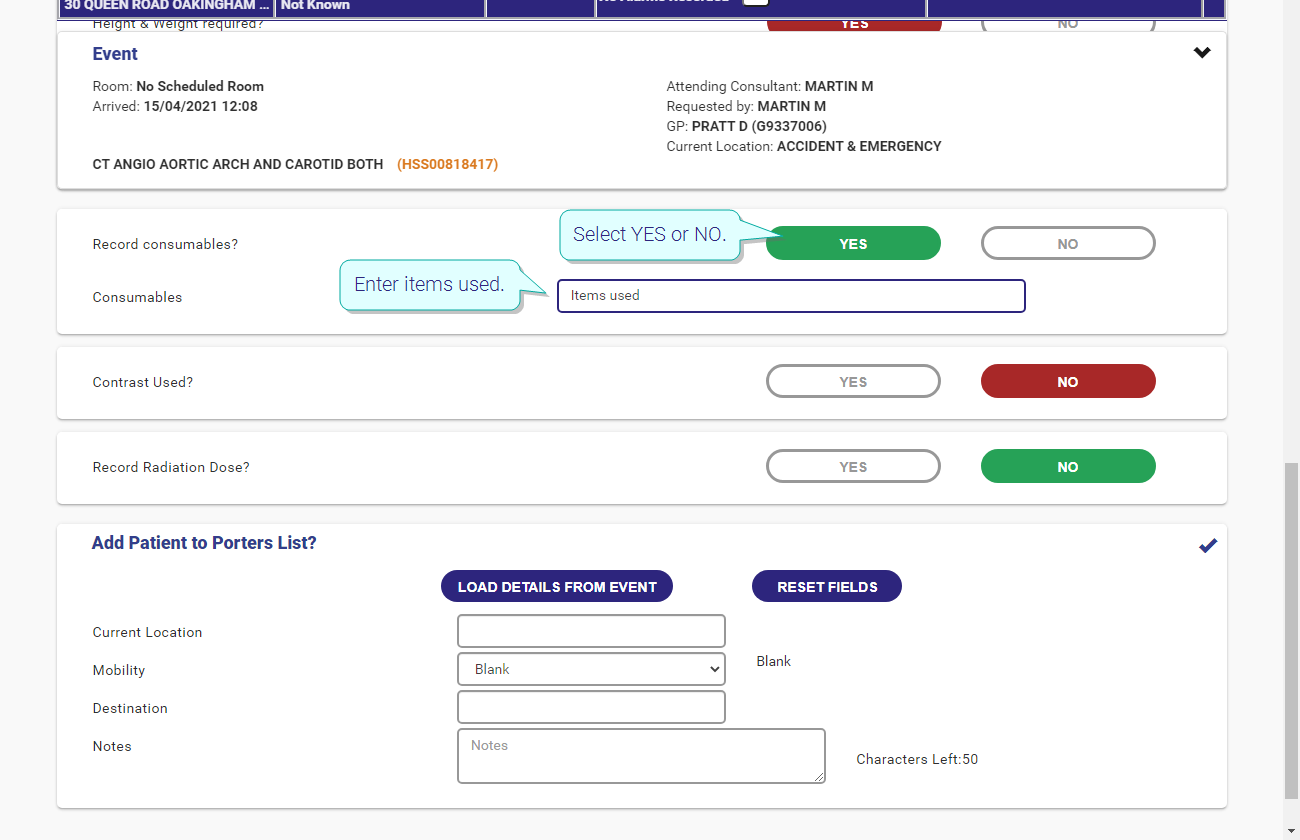

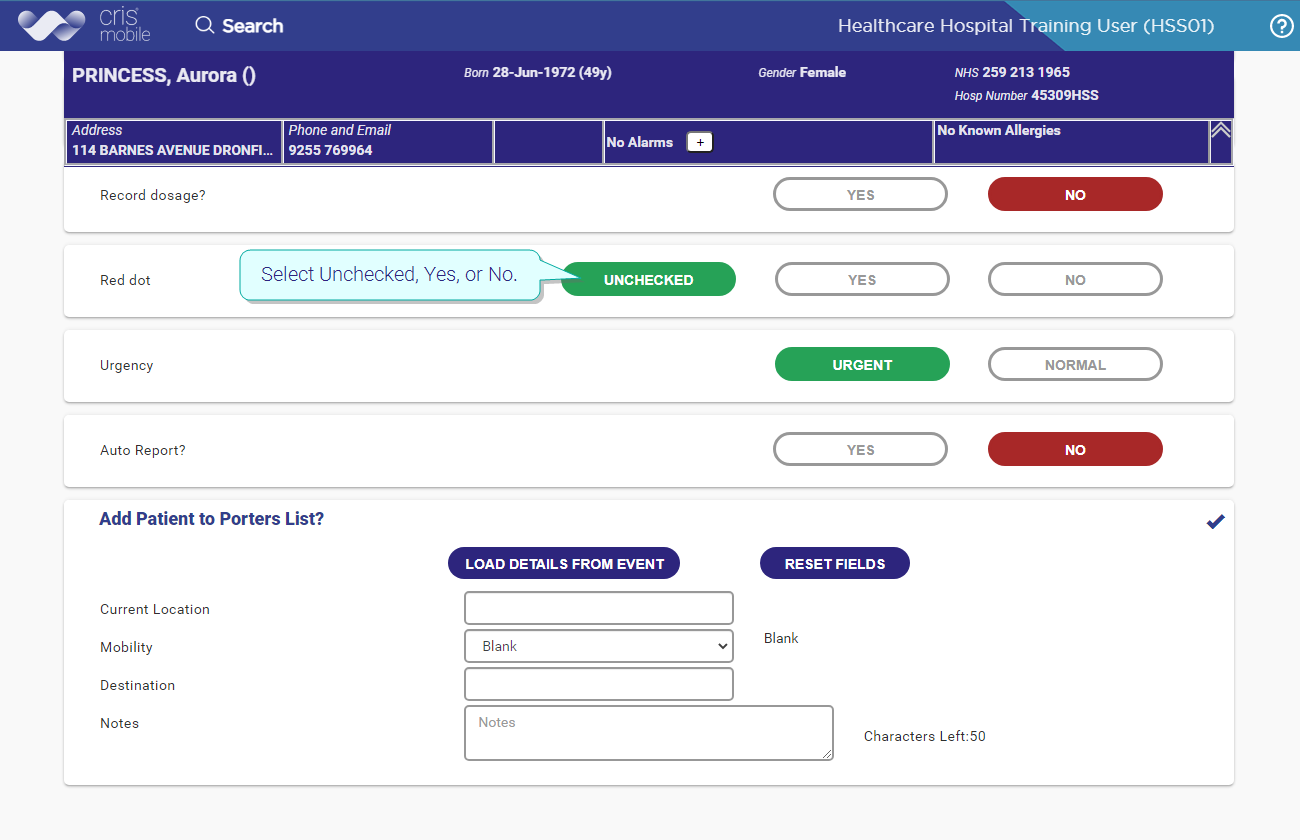
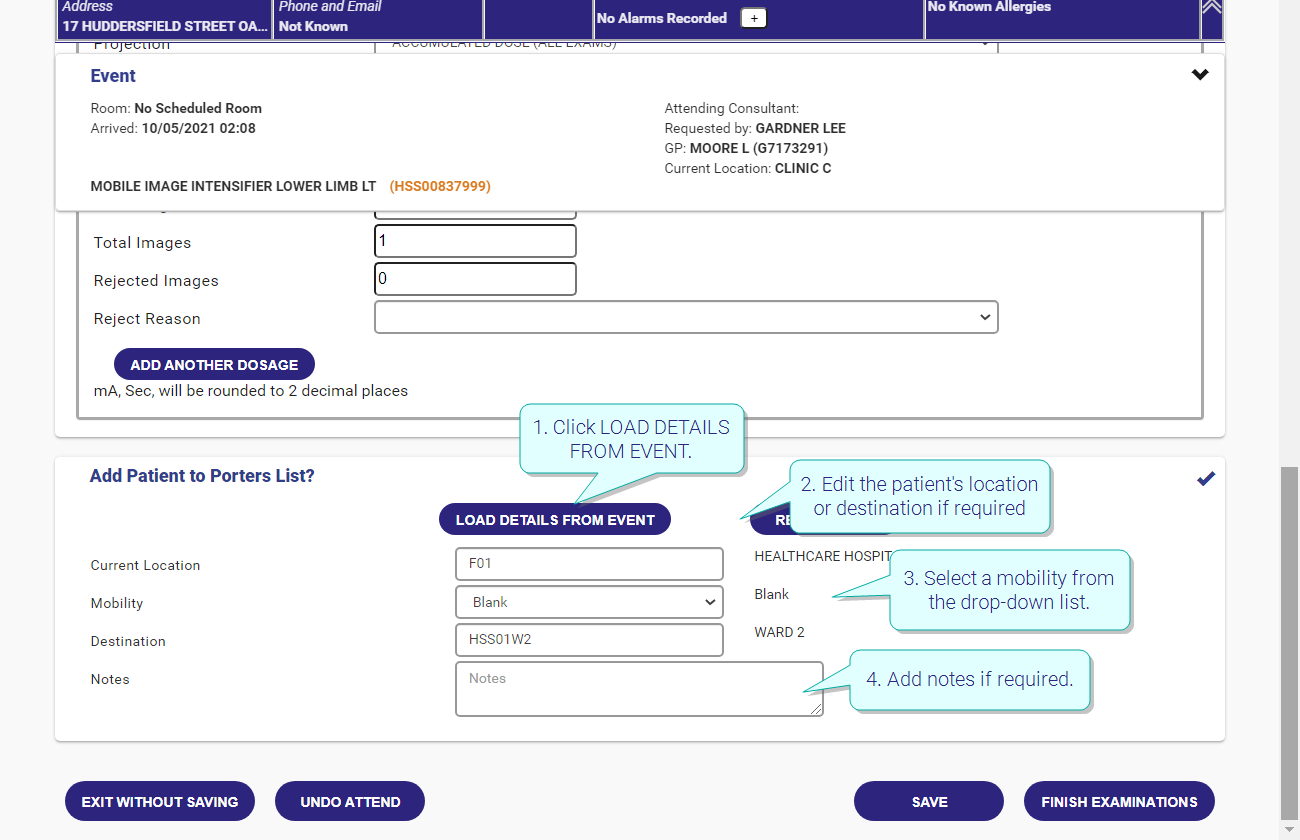
If your site uses the Portering module, you can request a porter here. The request will appear on the porter's worklist.
- Click Load Details From Event.
- You can edit the patient's location or destination if required.
- Select a mobility from the drop-down list.
- Add notes if required.
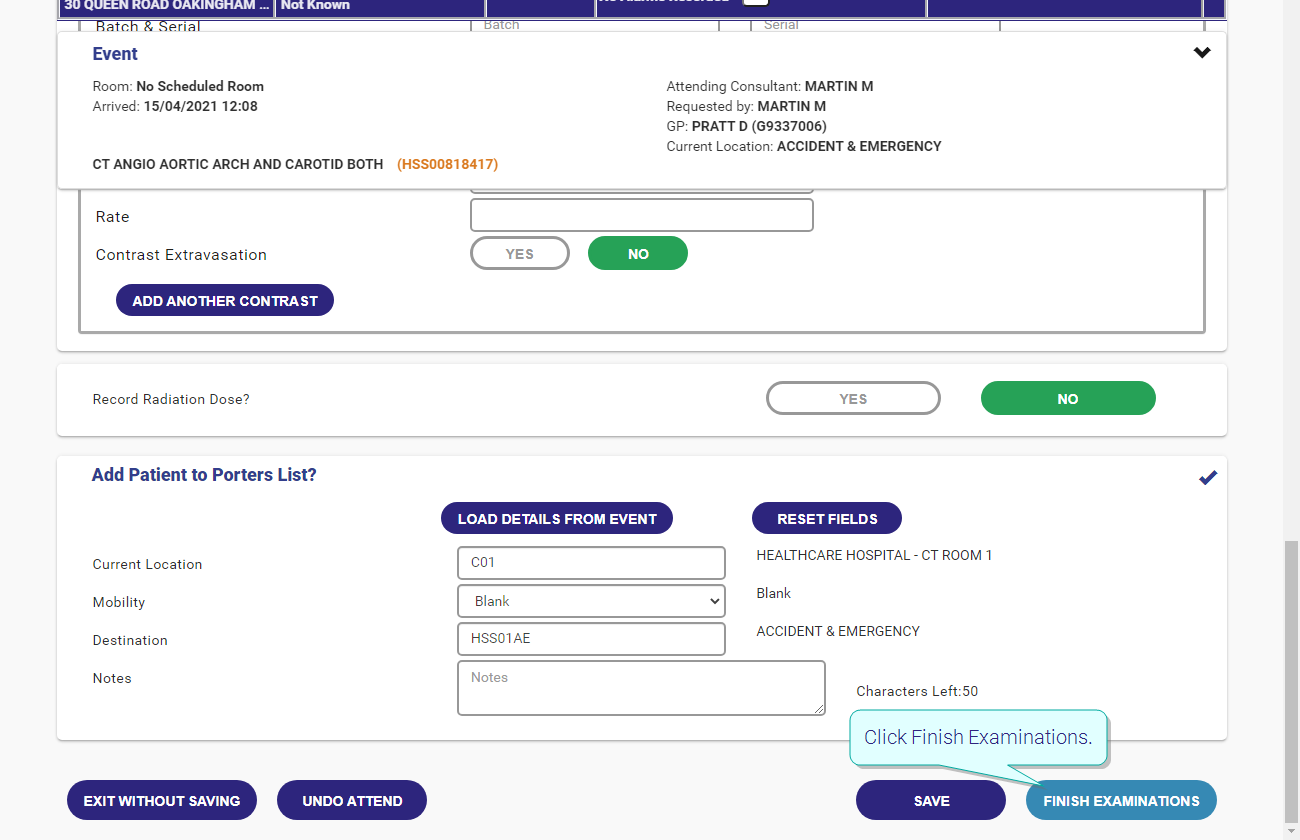
Once you have entered all necessary information, click Finish Examinations.
Tip:
- Click Save to close an event, saving any information entered thus far. The event remains on the worklist with a status of "exam started".
- Click Start Examination to begin entering event details.
- Click Finish Examination when you have entered all required information. The event will no longer appear on the worklist.