Scan a document
Document scanners are mainly used to scan request cards but you can scan any document or image and associate it with an event. Cris saves the scanned image at a predefined location. The image is associated with, and can only be viewed via, the event it was scanned against.
Scan a document
-
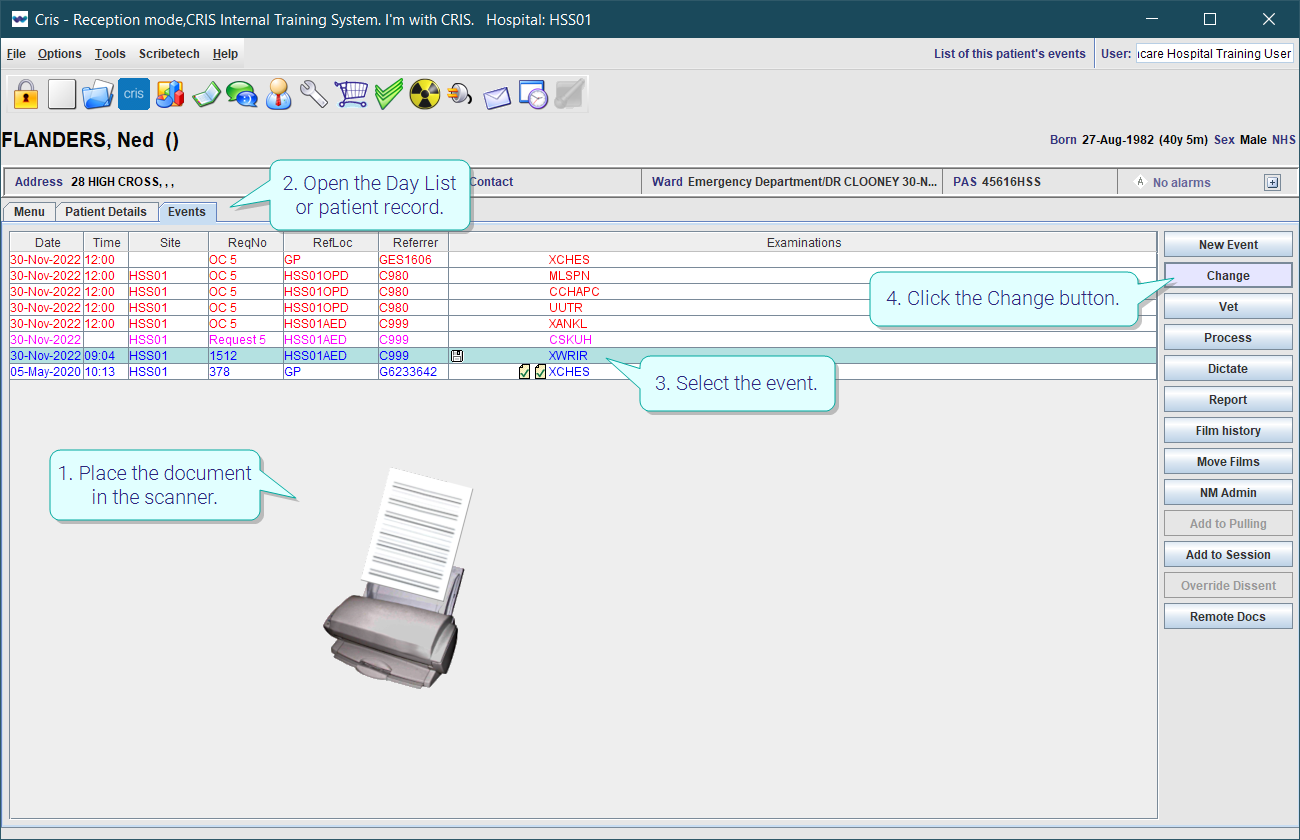
Place the document in the scanner.
-
Open the Day List or patient record.
-
Select the event.
-
Click the Change button.
Method 1
Use this method when saving a new request or if you made other changes, for example, added an Event Comment.
-
Click the Request button.
-
Select the Scan new image tickbox.
-
Select the Scan new image tick box to scan the request card.
-
Select the Status Received button.
-
Click the Save button.
The Add Request screen opens.

Scanning will begin and the event will be saved.
Method 2
Use this method to add a document to an existing event without making any other changes.
-
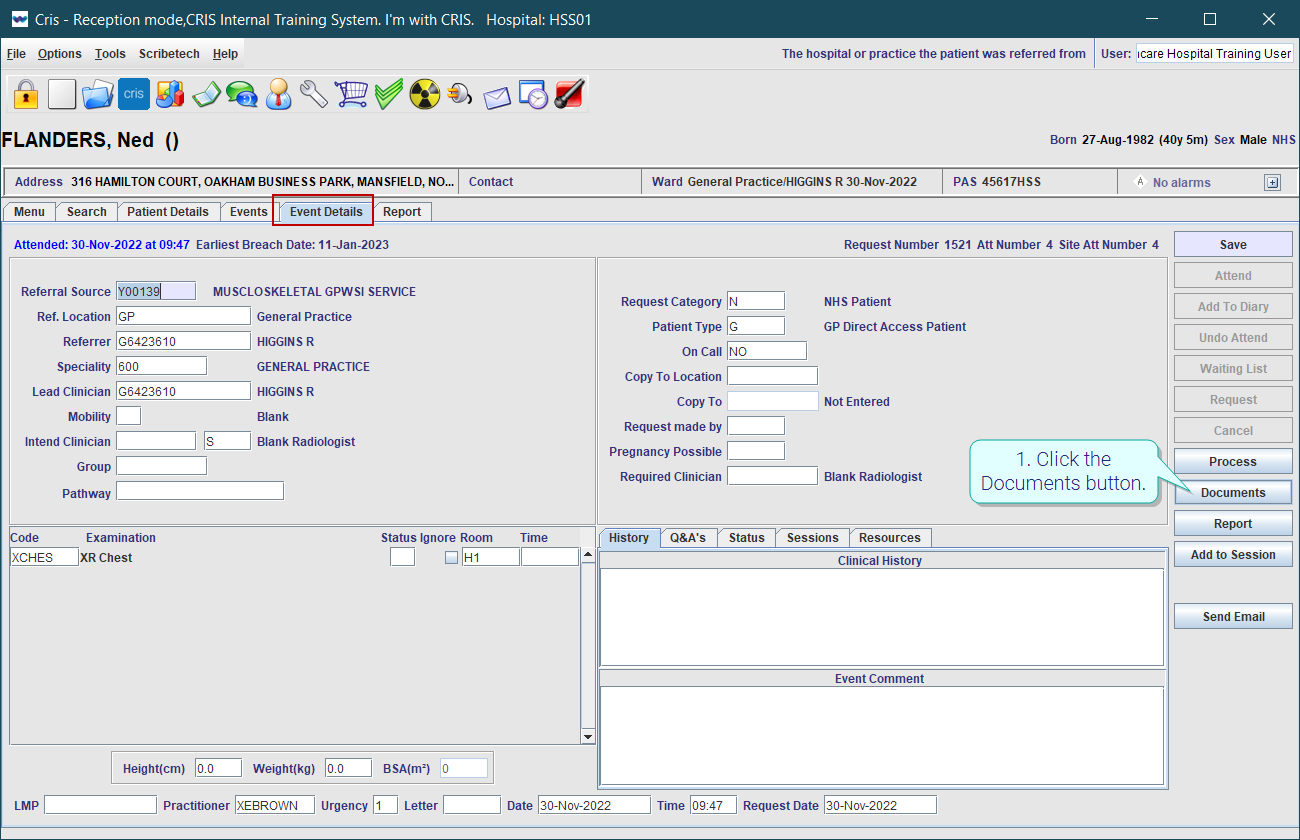
Click the Documents button.
-
Select the Scanned Documents tab.
-
Click the Scan New Documents button.
-
Select the Scan Document tick box.
-
Select the Document Type REQCARD.
-
Click the Quick Scan button.
The Documents screen opens.
Tip:
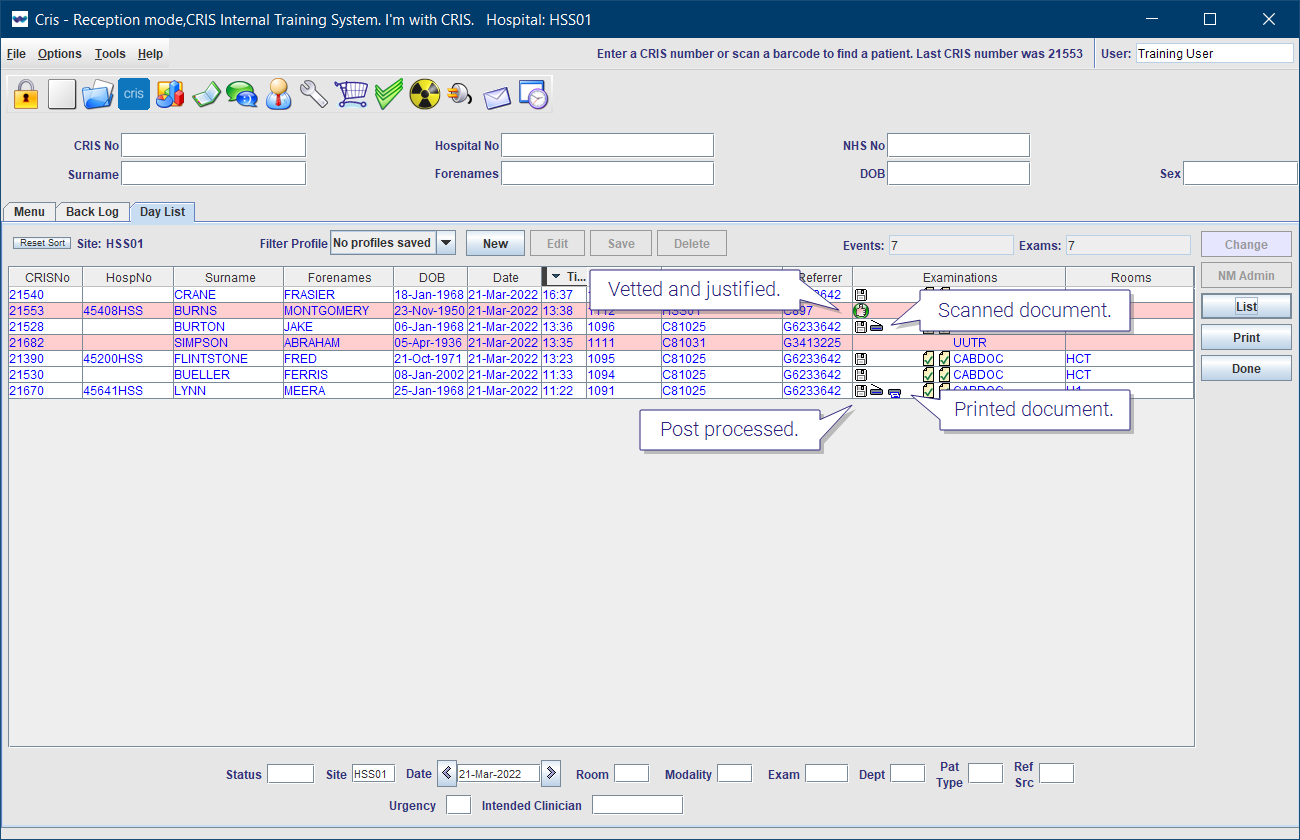
Monitor the Day List for events without a scanned request card. The Scan ![]() icon indicates a scanned document.
icon indicates a scanned document.
Tip:
For more information about configuring printers and scanners, see Devices.
System Administration: Devices
Configure a document scanner.
Select location for scanned images.
Add a document scanner.