Print reports
Verified list
-
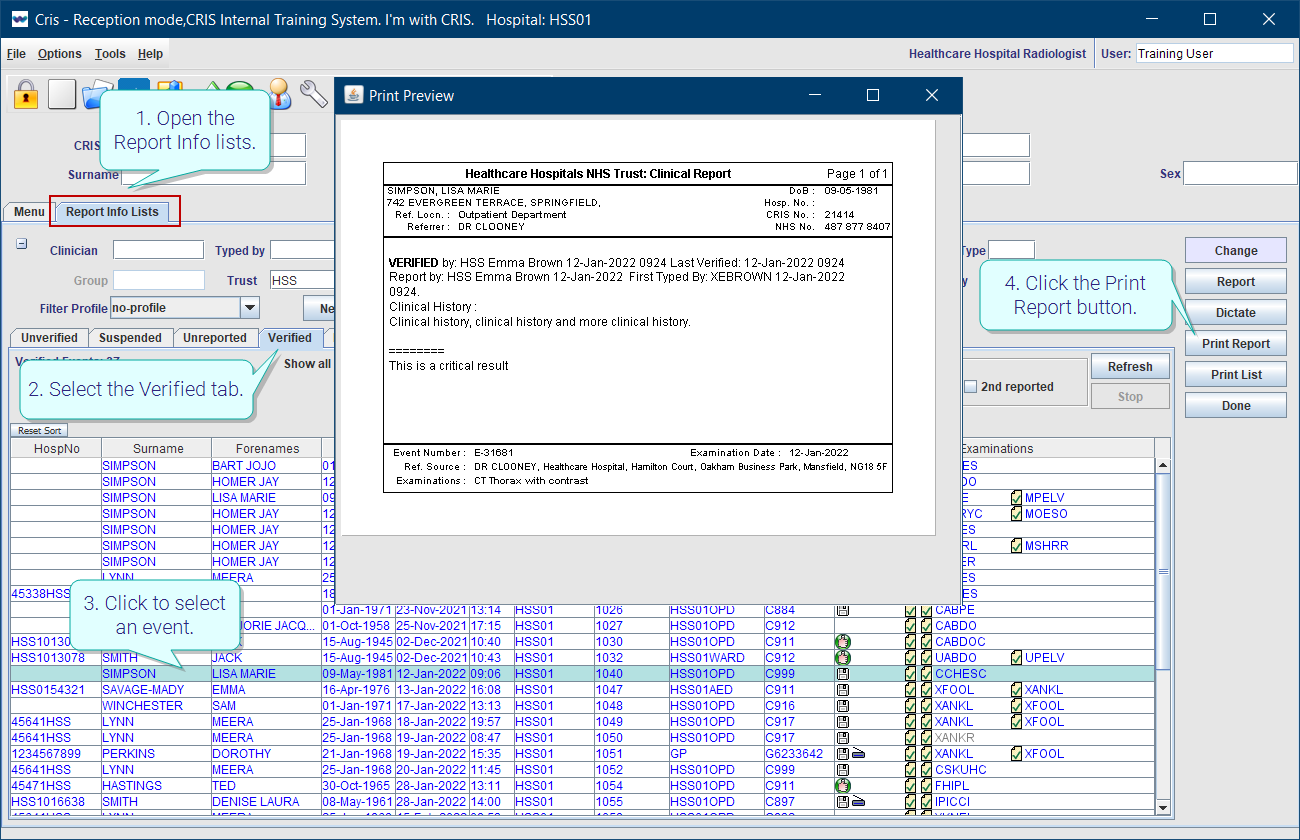
Open the Report Info lists.
-
Select the Verified tab.
-
Click to select an event.
-
Click the Print Report button.
OR
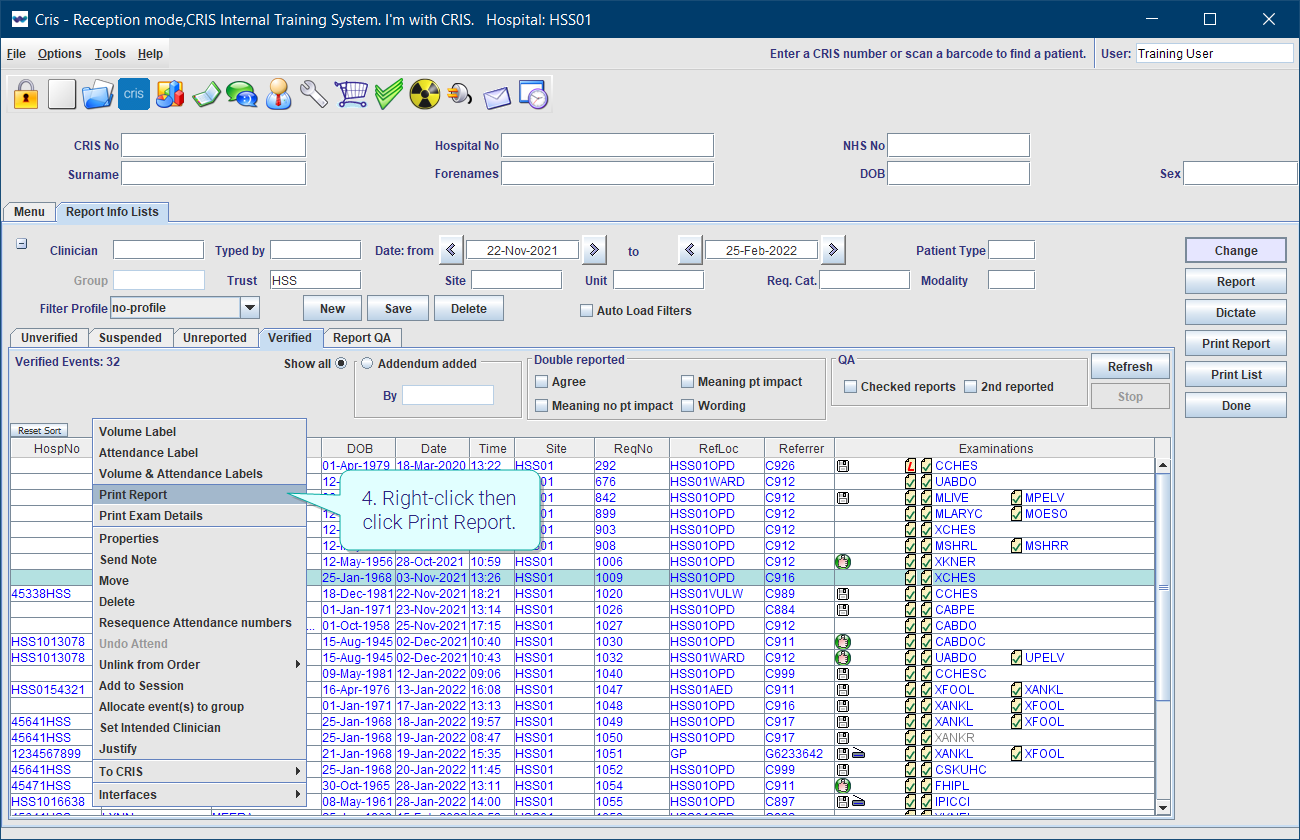
Right-click then click Print Report.
Tip:
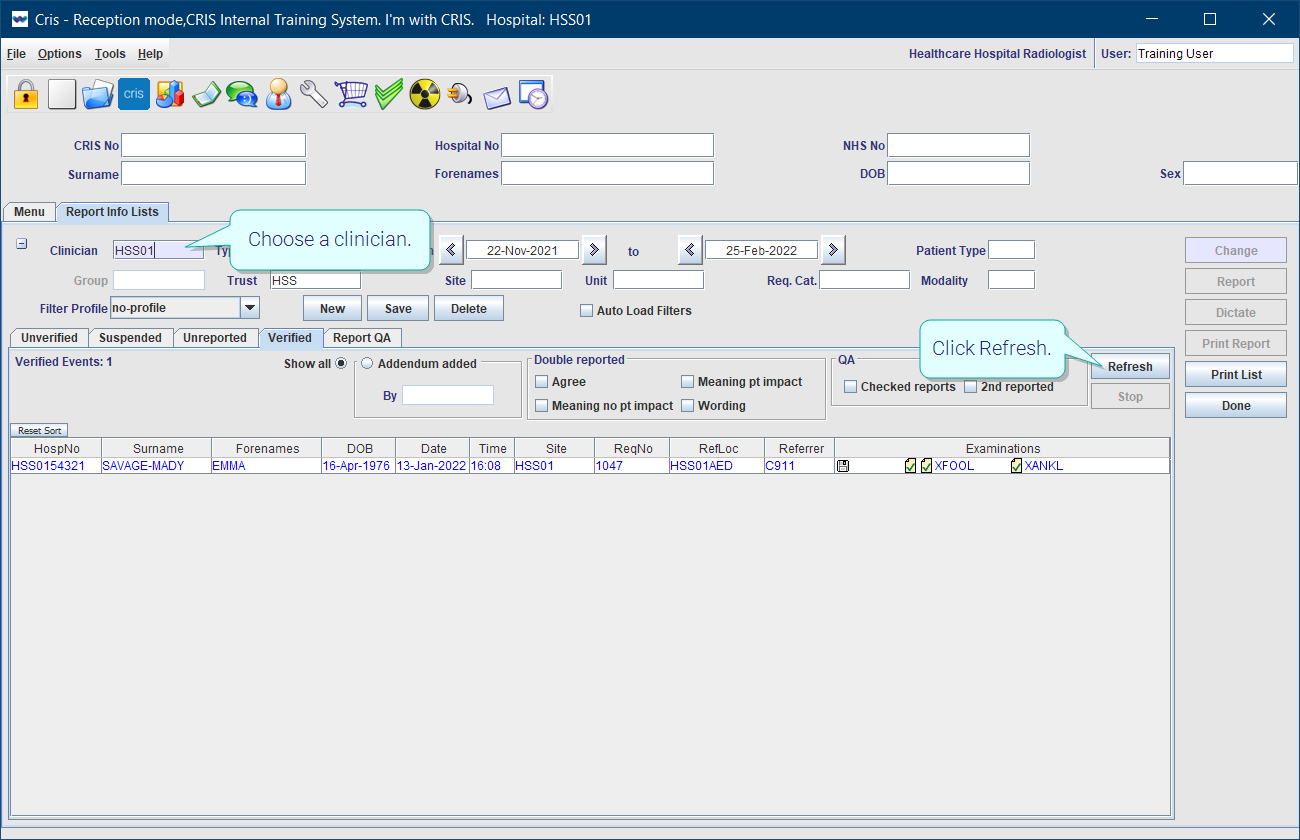
Filter by Clinician to see events reported by a particular person.
Events
-
Right-click the event in the patient's Events list.
-
Click Print Report.

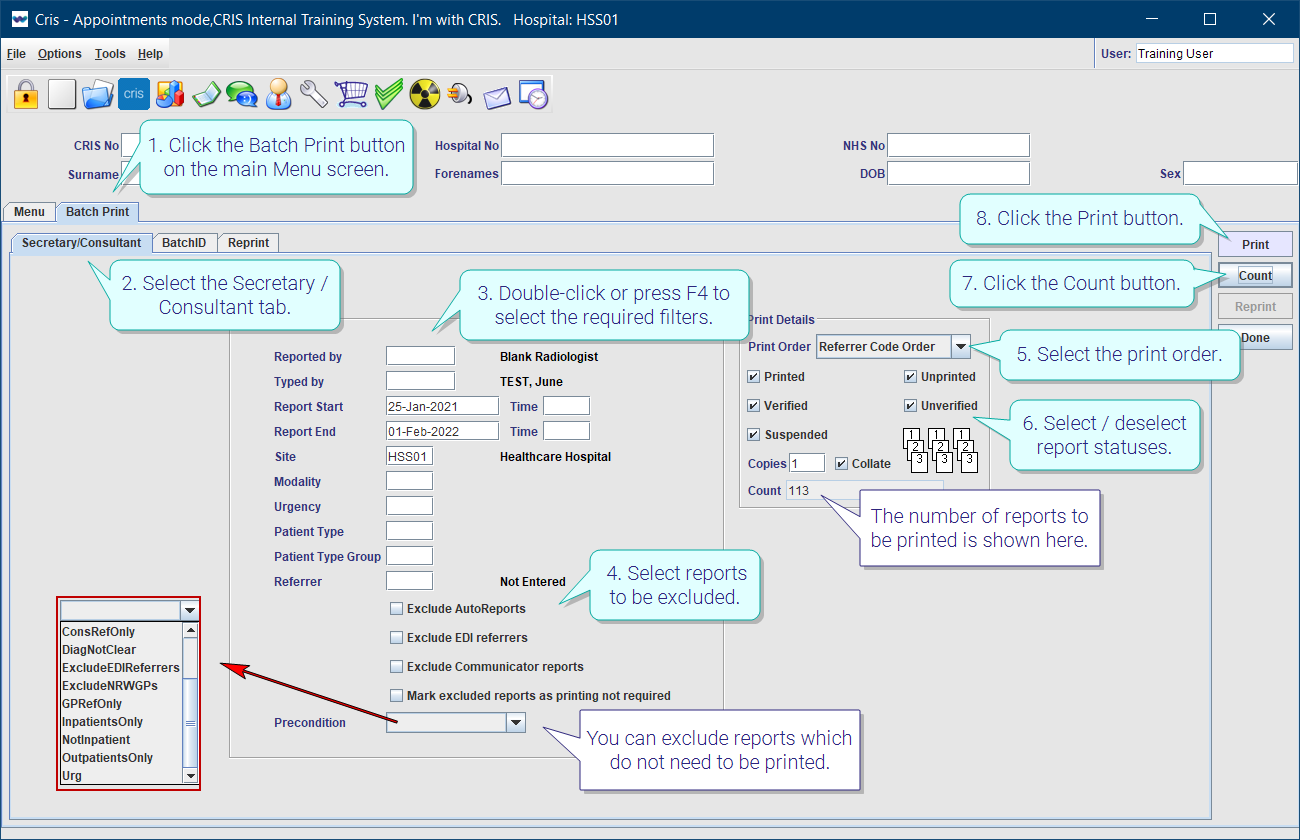
Batch print by reporter
-
Click the Batch Print button on the main Menu screen.
-
Select the Secretary / Consultant tab.
-
Double-click or press F4 to select the required filters.
-
Select reports to be excluded.
-
Select / deselect report statuses.
-
Click the Count button.
-
Click the Print button.
The number of reports to be printed is shown.
Note:
Unless specifically requested, you can exclude these reports from printing because they will be sent by another method:
-
Auto Reports - Events which do not require a formal radiology report. For example, Emergency Department exams which are performed and reviewed immediately.
-
EDI referrers - Referring clinicians who use an Electronic Desktop Interface (EDI) to send orders and receive results.
-
Communicator- Reports sent to the referrer via Communicator. Usually due to findings which require timely action, but check:- the referrer may also want a printed report.
Batch print by batch ID
No longer used. This is a legacy function.
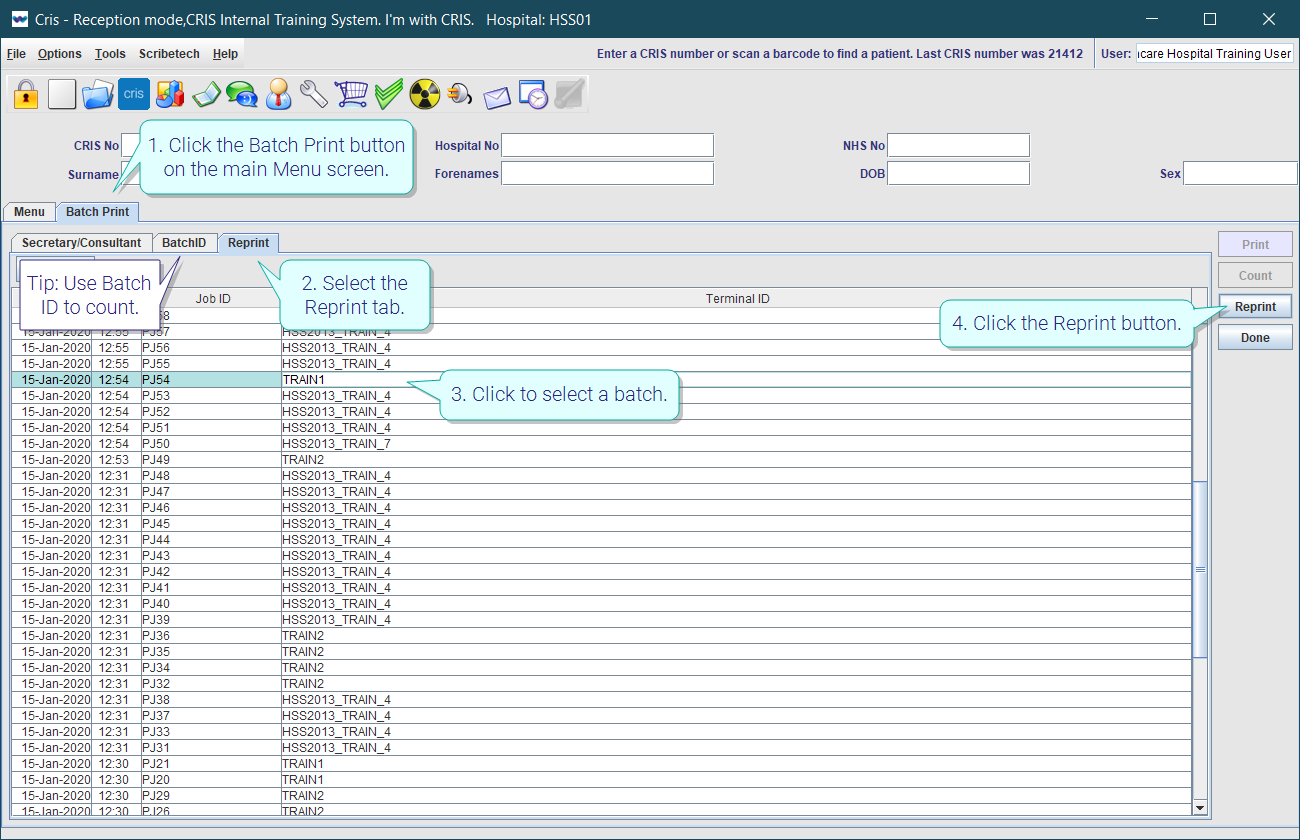
Reprint a batch
-
Click the Batch Print button on the main Menu screen.
-
Select the Reprint tab.
-
Click to select a batch.
-
Click the Reprint button.
Tip:
Use the Secretary / Consultant ID tab to check how many reports you would reprint.
Print to PDF
-
Select Tools > Devices > Printers Setup.
-
Double-click or press F4 in the Reports field.
-
Select a Print to PDF option.
-
Click the Save as default button.
-
Print your reports.

Note:
PDF printing and file naming is managed by your operating system.
Tip:
For more information about configuring printers and scanners, see Devices.
System Administration: Devices
Configure a document scanner.
Select location for scanned images.
Add a document scanner.