Move scanned documents
If a document is scanned onto the wrong patient or event, export it and save a copy. Before removing the document from the incorrect record, import a copy to the correct patient and event. We recommend you export and import files via the Scanned Documents tab. The full image is shown on this tab, unlike the Attached Documents tab which shows a list of files.
Export scanned images / documents
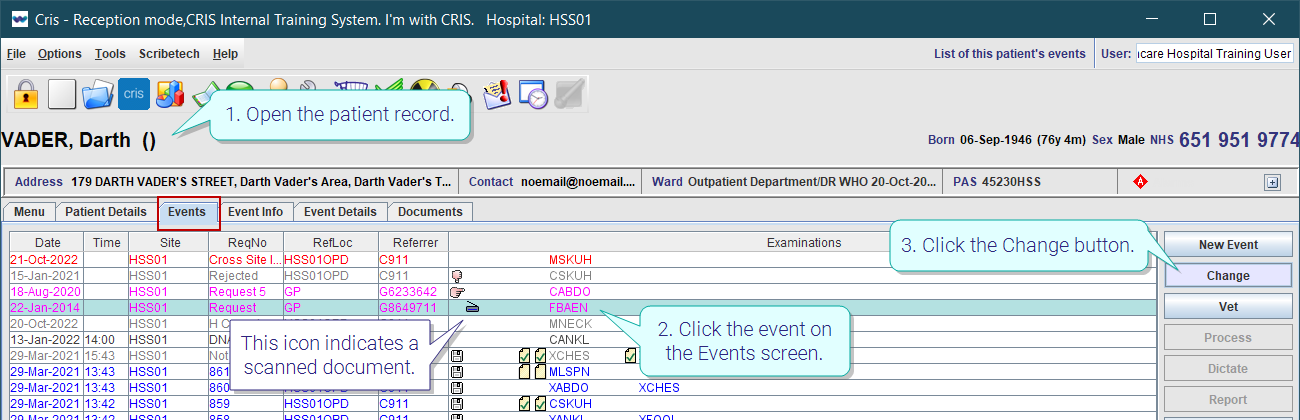
- Open the incorrect patient record.
- Click to select the event on the Events screen.
- Click the Change button.
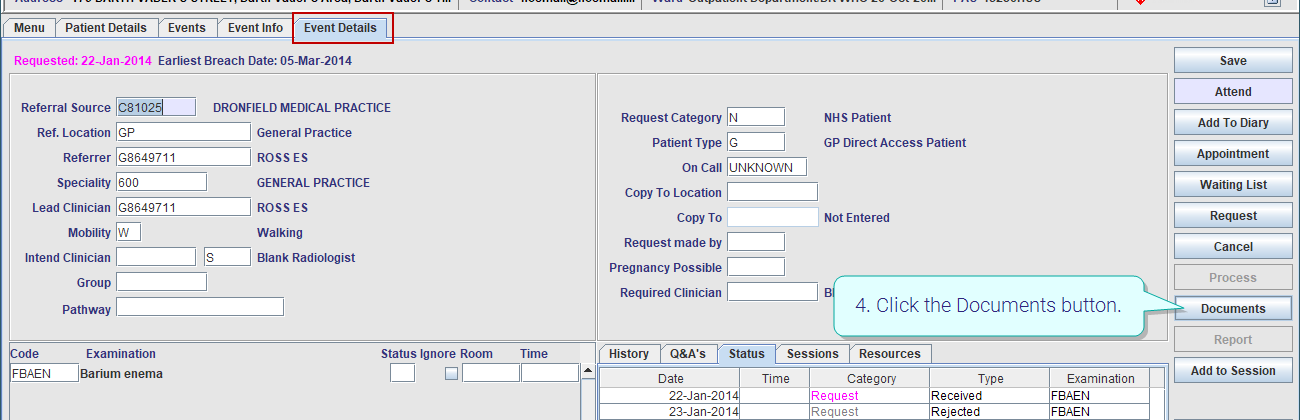
- Click the Documents button.
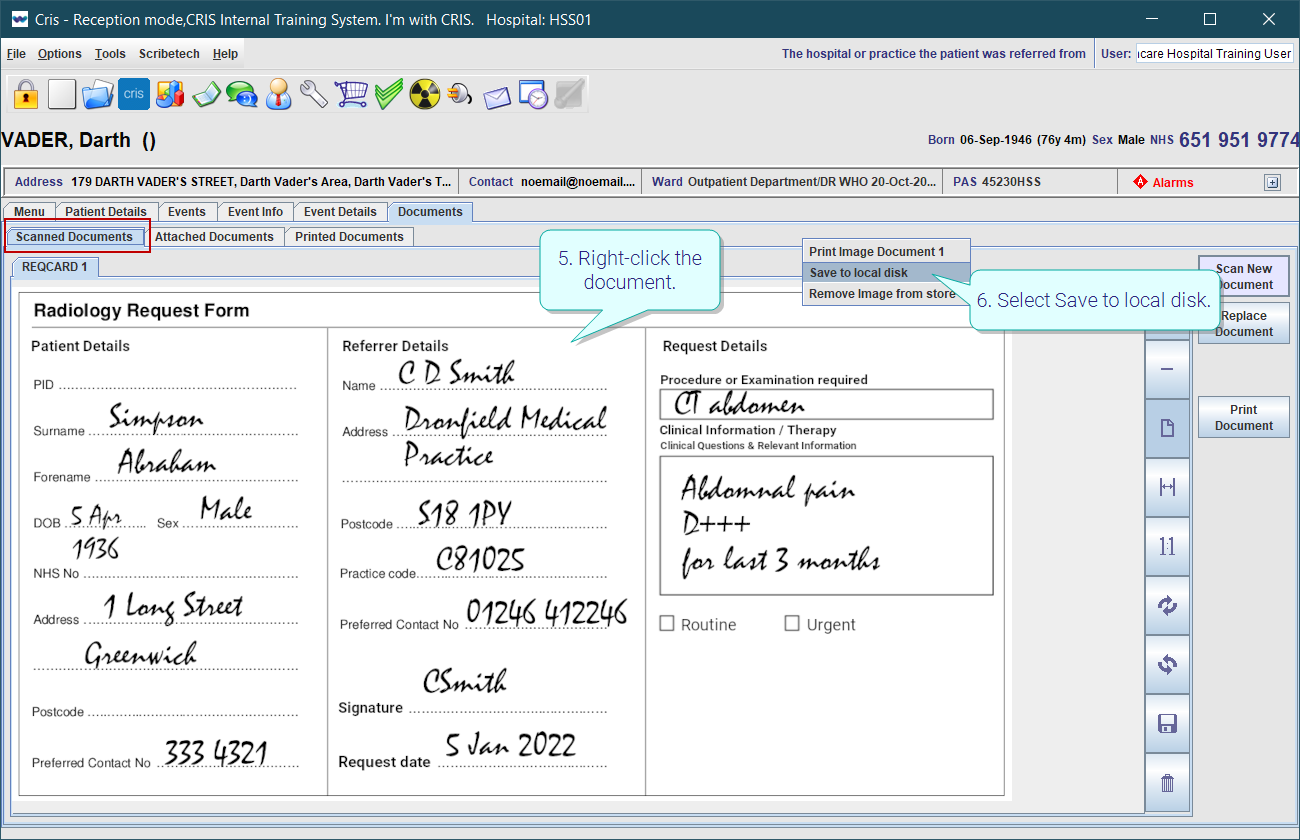
- Right-click the document.
- Select Save to local disk.
- Navigate to your save location.
- Enter a file name followed by .jpeg.
- Click the Save button.
This icon ![]() indicates a scanned document.
indicates a scanned document.
A file explorer window opens.
Cris supports jpeg, pdf, and tiff file types.
Warning:
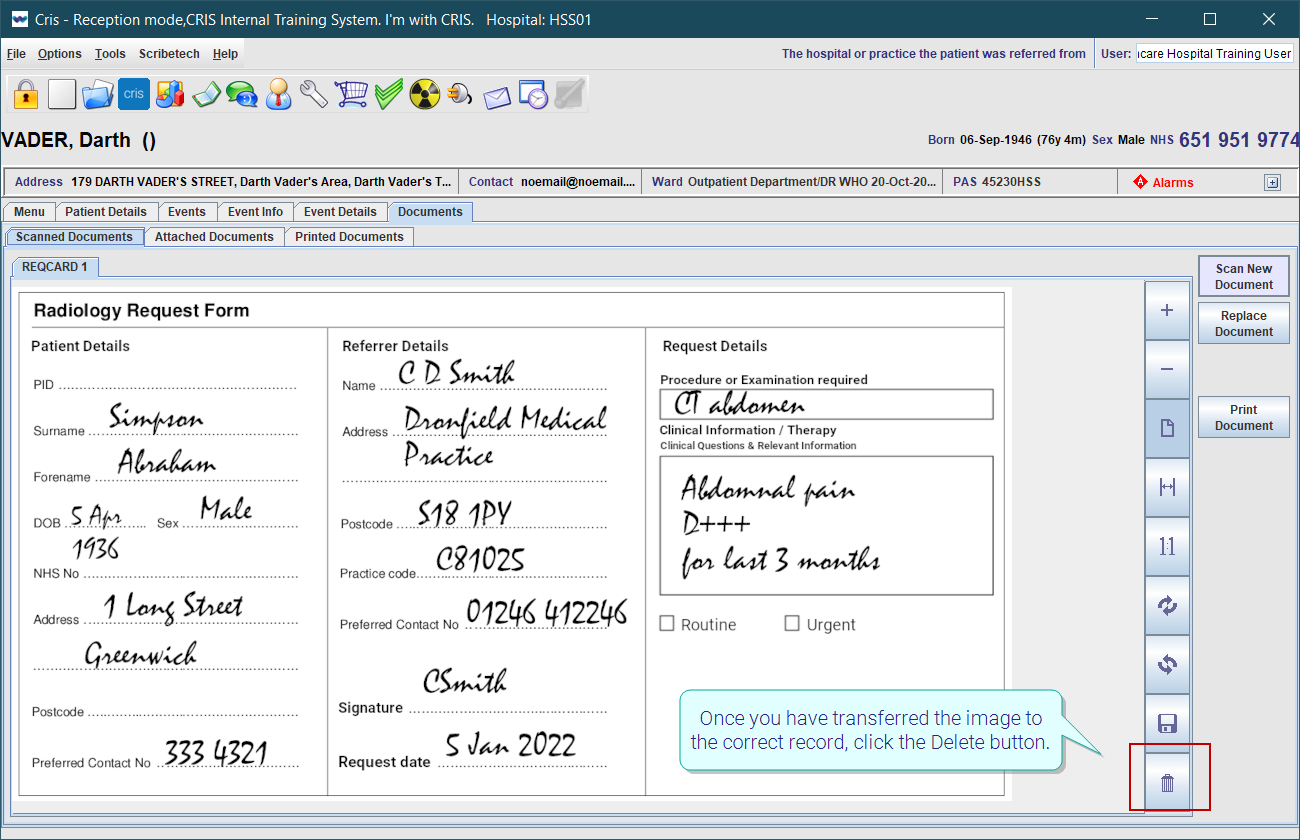
The (cancelled) event will remain on the incorrect record for audit purposes, but information about the other patient must not be kept on this record. Once you have transferred the image to the correct patient and event, delete the image from the incorrect patient record.
Import scanned images / documents
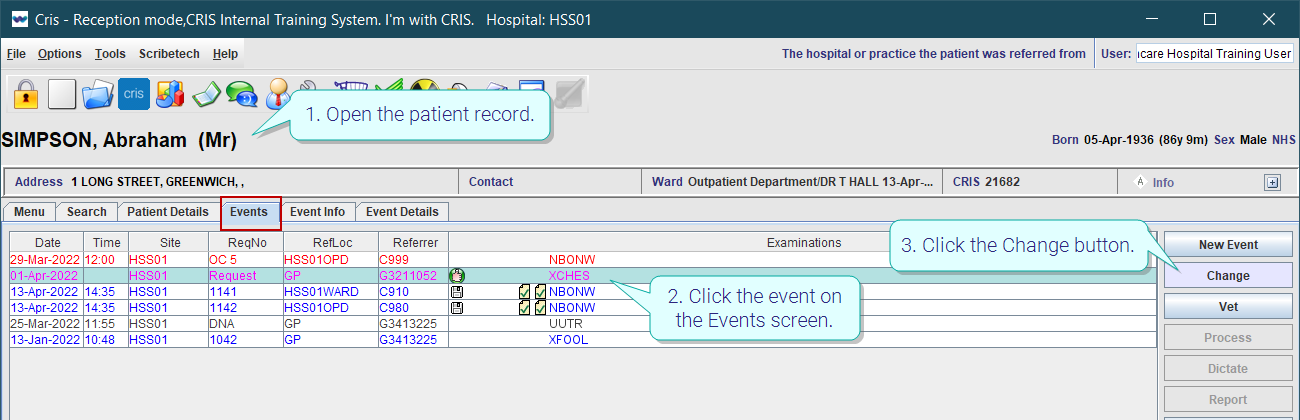
- Open the correct patient record.
- Click to select the event on the Events screen.
- Click the Change button.
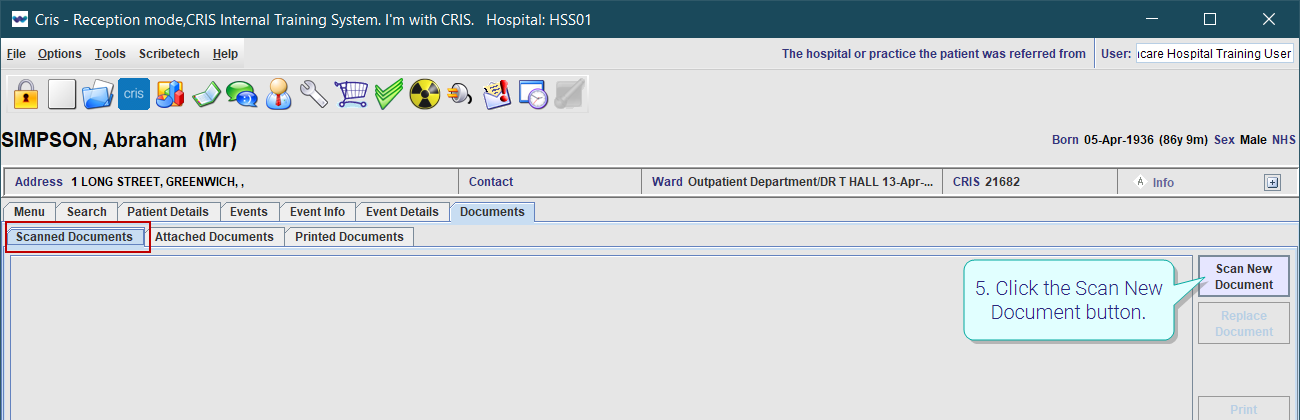
- Click the Documents button.
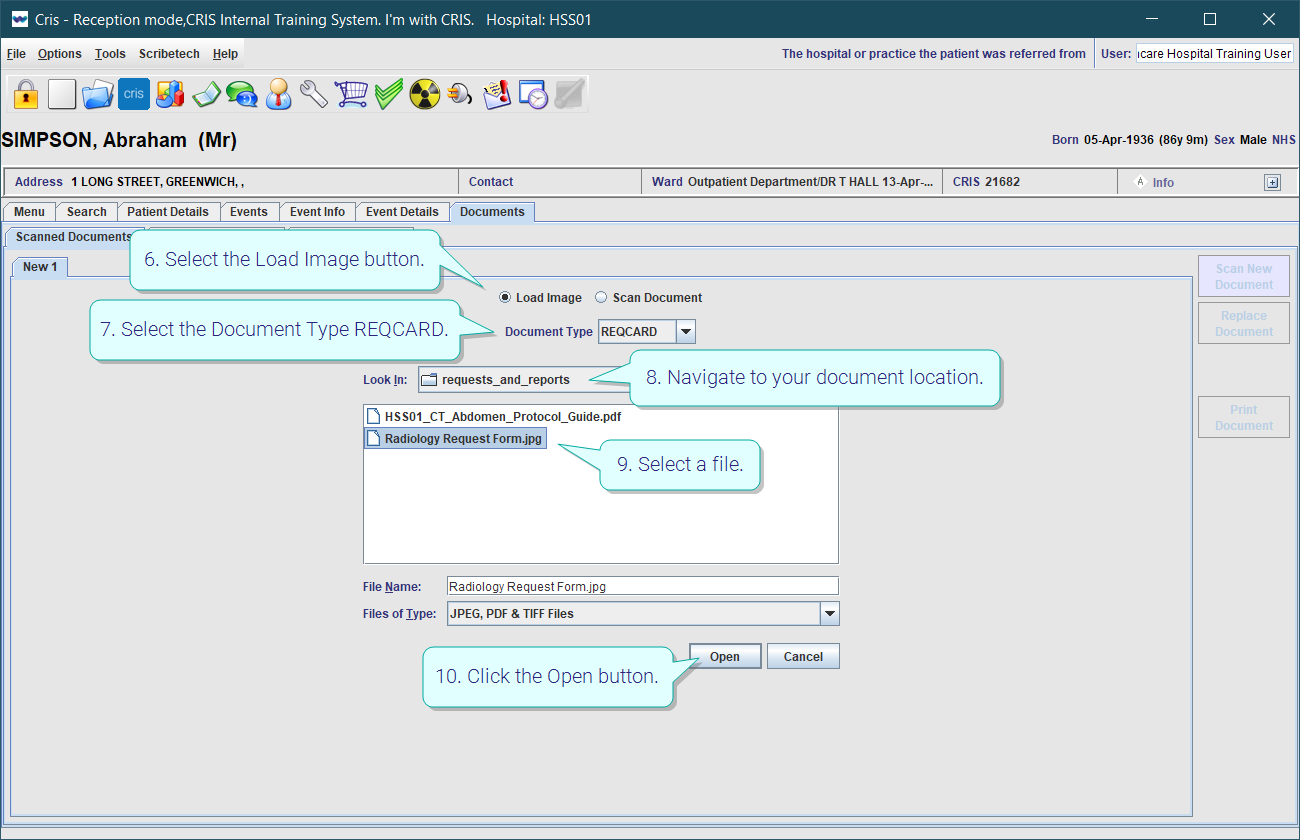
- Click the Scan New Document button.
- Select the Load Image button.
- Select the Document Type REQCARD.
- Navigate to your document location.
- Select a file.
- Click the Open button.

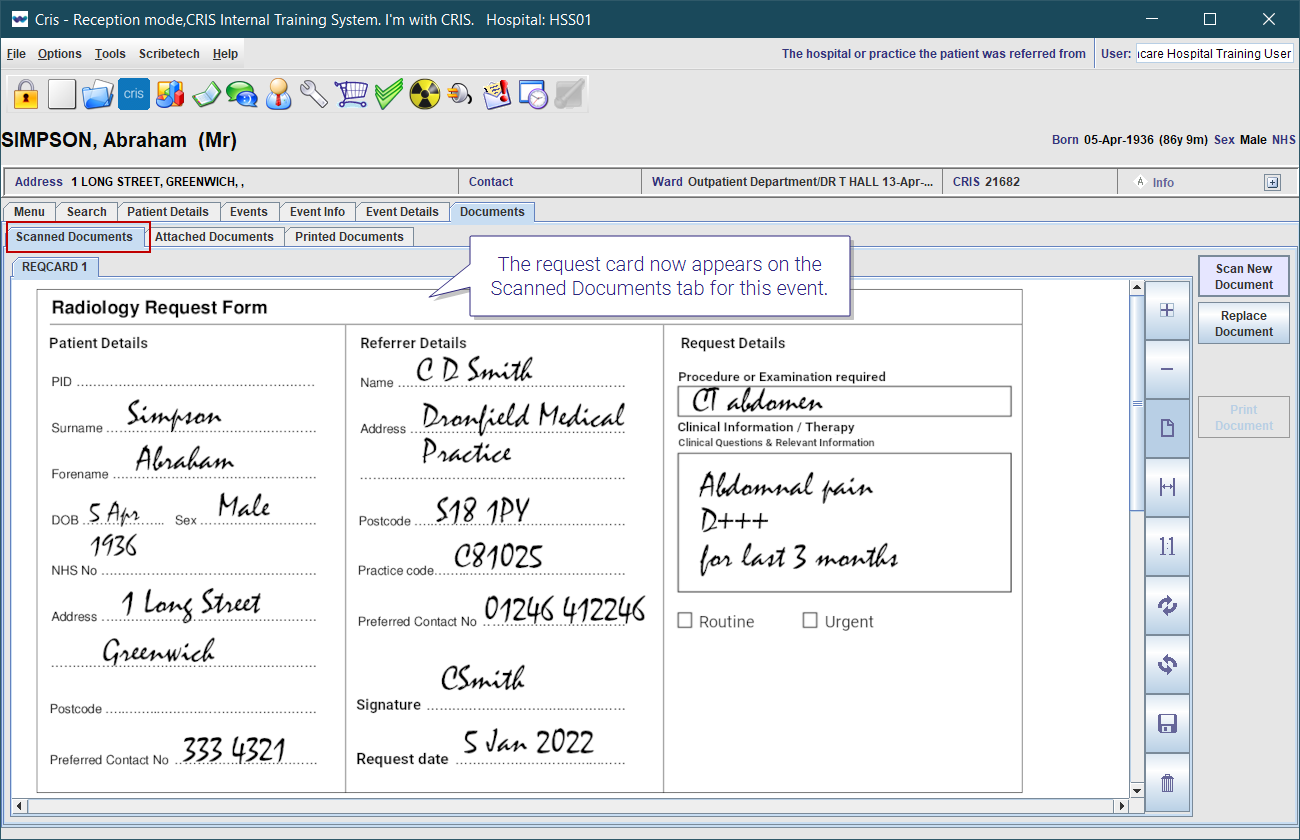
The request card now appears on the Scanned Documents tab for this event.
Warning:
The (cancelled) event will remain on the incorrect record for audit purposes, but information about the other patient must not be kept on this record. Once you have transferred the image to the correct patient and event, delete the image from the incorrect patient record.
System Administration: Event Correction
Copy request details.
Cancel incorrect request.
Create correct request.
Export and import request card.
Undo attend on the incorrect patient.
Create and attend the event on the correct patient.
Correct a Not Performed attendance
Re-attend the event on the correct date.
Ensure any images are reviewed and reported.
We do not recommend deleting events or reports.