Correct a reported event (wrong patient)
When a request is entered, attended, post processed, and reported on the wrong patient record:
STEP 1
Copy request details
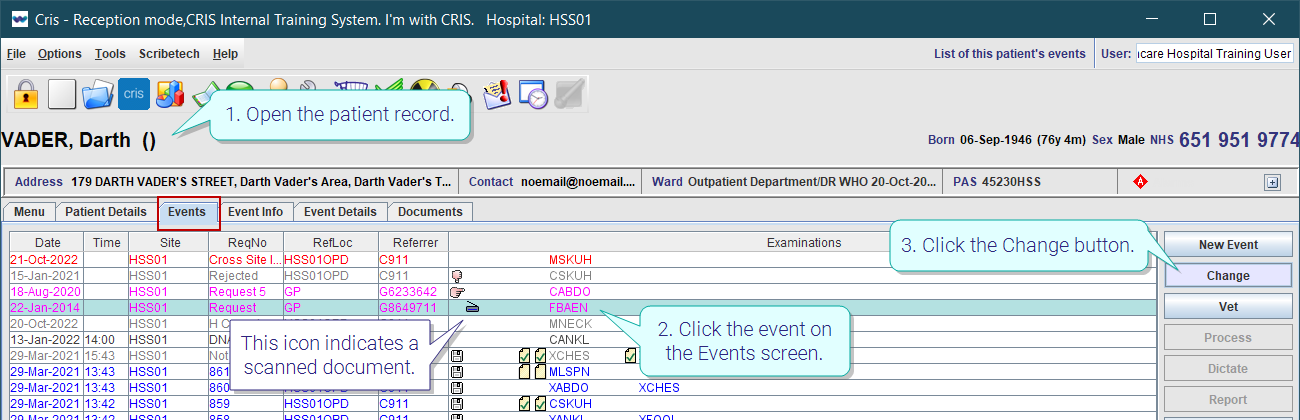
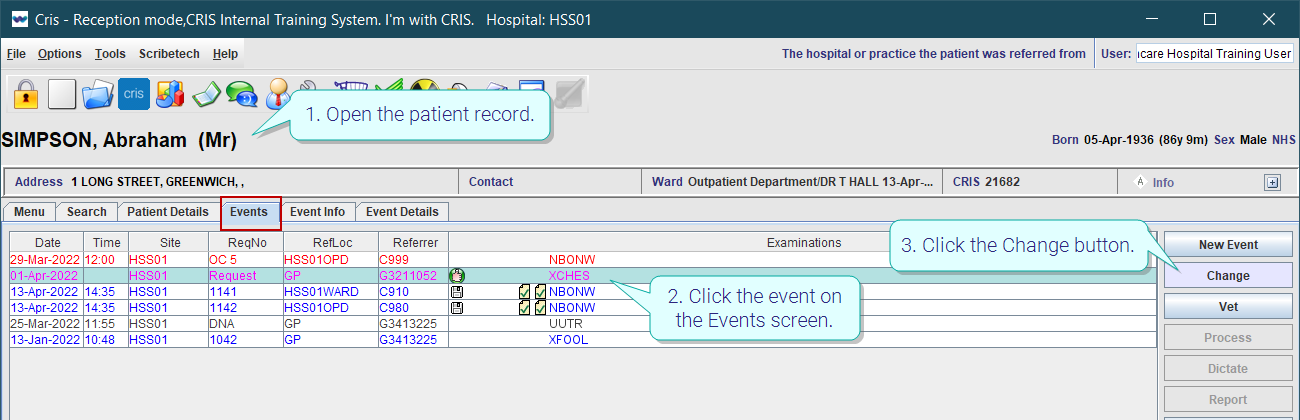
- Open the incorrect patient record.
- Click to select the event on the Events screen.
- Click the Change button.
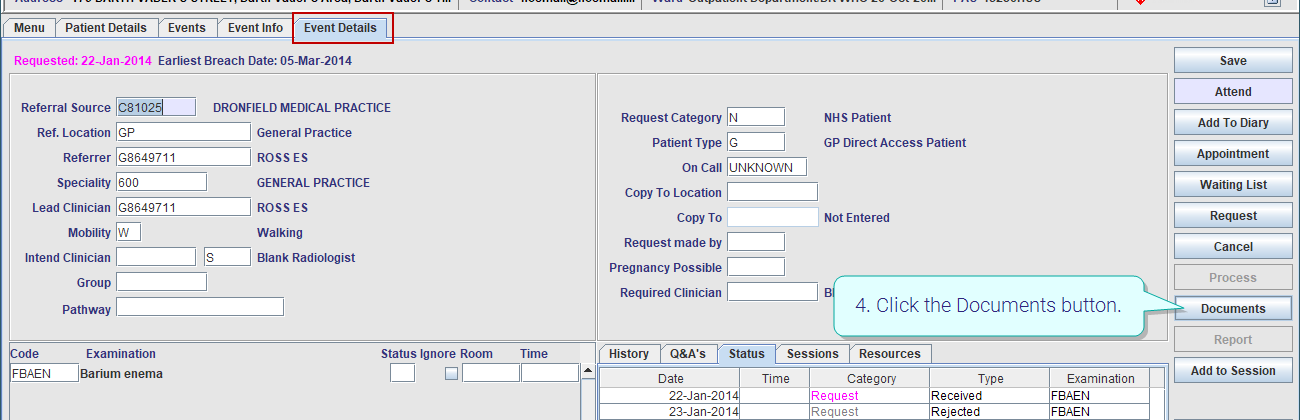
- Copy all the request information from the Event Details screen (referrer details, mobility, exam, clinical history, event comments).
The Event Details screen opens.
Important: Note the correct request date - if left blank on a new request, the system will default to the current day.
STEP 2
Copy post processing details
- Open the incorrect patient record.
- Click to select the event on the Events screen.
- Click the Process button.
- Copy all the procedure information from the Post Processing screen (room, time, practitioner, exams, dose, contrast, stock).
- Click Clear
 or press F5.
 - Click the Yes button to clear without saving.
The Post Processing screen opens.
A prompt message asks "Are you sure?".
STEP 3
Copy report
-
Open the incorrect patient record.
- Click to select the event on the Events screen.
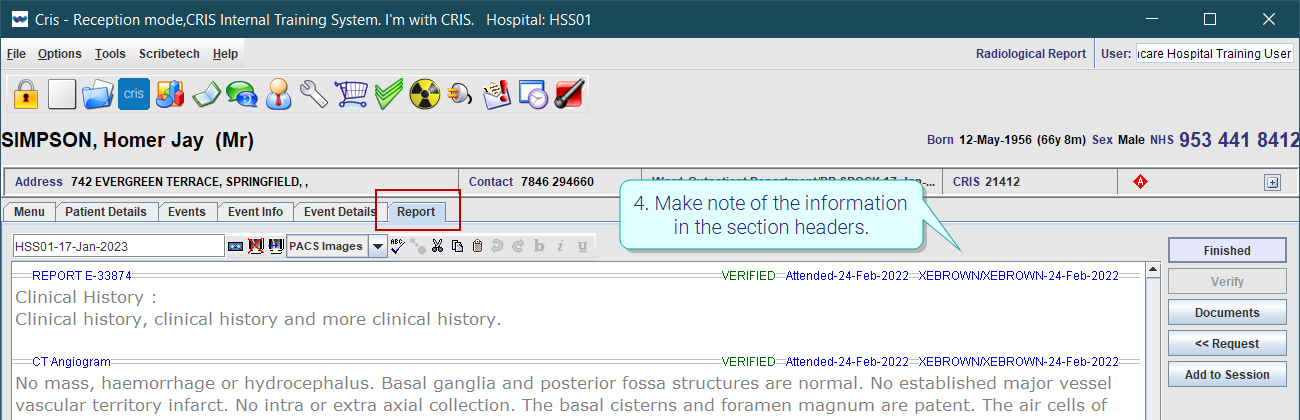
- Click the Report button.
- Make note of the information in the section headers (dates and clinician names).
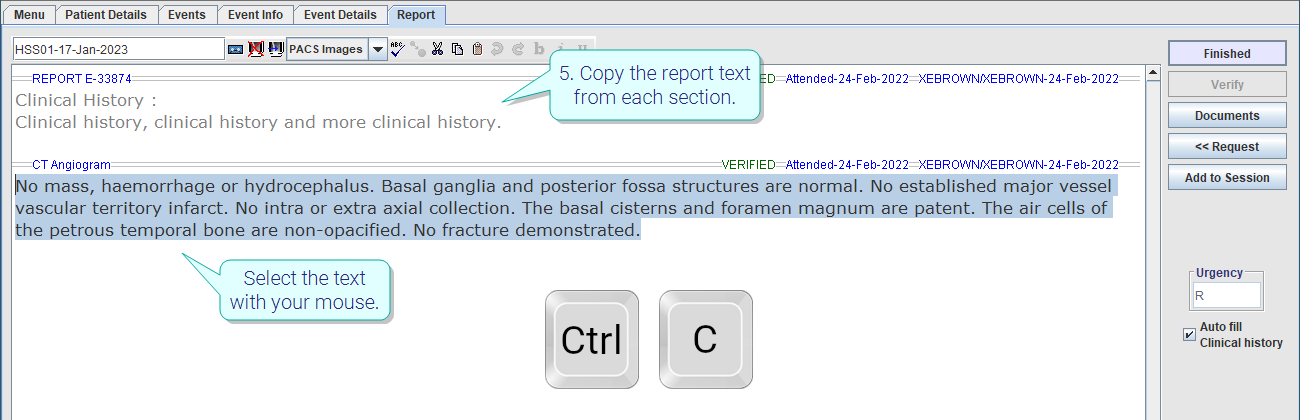
- Copy the report text from each section. Select the text with your mouse and press Ctrl + C
- Click Clear or press F5 to close without saving.
The Report screen opens.
STEP 4
Export request card
- Open the incorrect patient record.
- Click to select the event on the Events screen.
- Click the Change button.
- Click the Documents button.
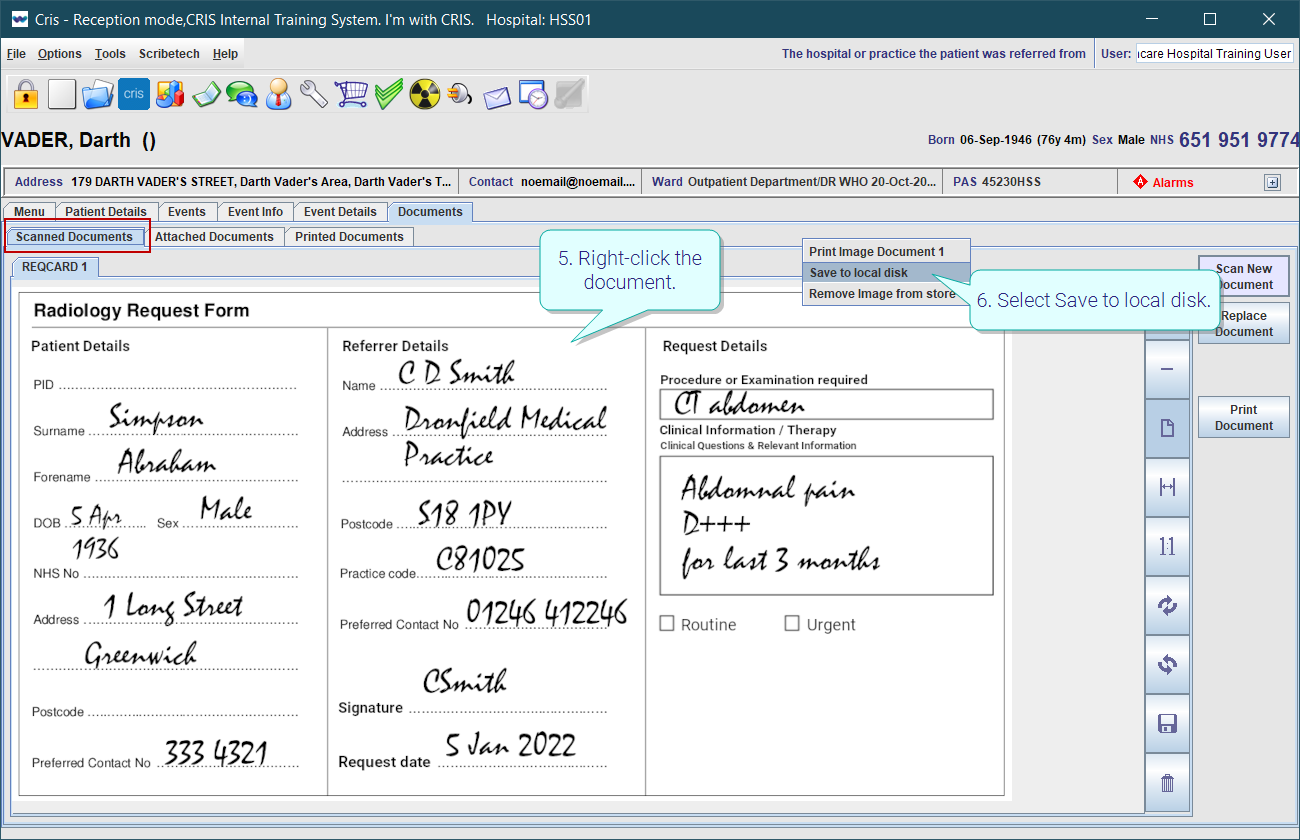
- Right-click the document.
- Select Save to local disk.
- Navigate to your save location.
- Enter a file name followed by .jpeg.
- Click the Save button.
This icon ![]() indicates a scanned document.
indicates a scanned document.
A file explorer window opens.
Cris supports jpeg, pdf, and tiff file types.
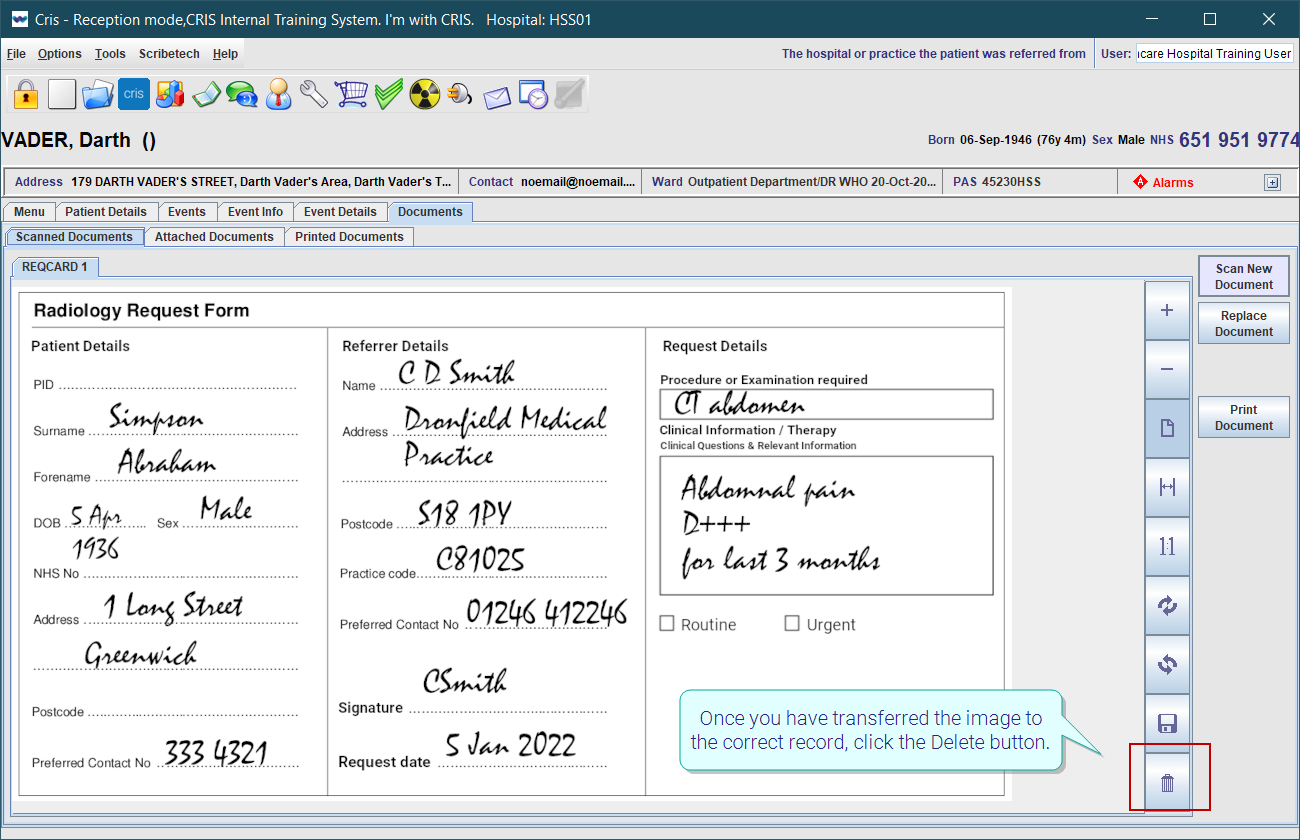
Warning:
The (cancelled) event will remain on the incorrect record for audit purposes, but information about the other patient must not be kept on this record. Once you have transferred the image to the correct patient and event, delete the image from the incorrect patient record.
STEP 5
Addend the report
This is for an attended event with imaging and a report which is on the wrong patient record.
-
Right-click the report and select Add Addendum.
-
Enter text “Please ignore this report. Entered in error on incorrect patient record”.
-
Click the Verify button.
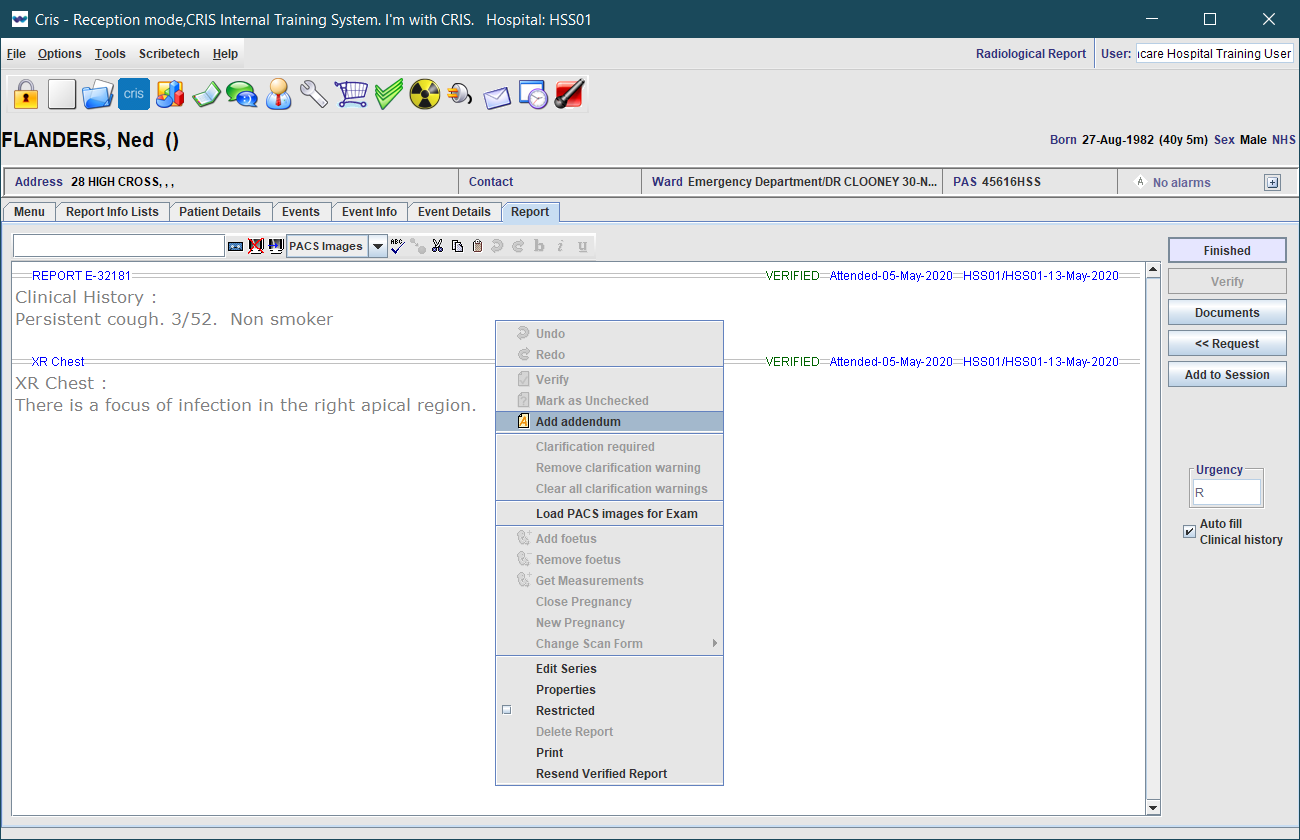
The addended report will be sent to OCS / PACS again.
STEP 6
Create the event on the correct patient record
- Open the correct patient record.
-
Use New Event and enter the request manually with the information from STEP 1.
Tip:
-
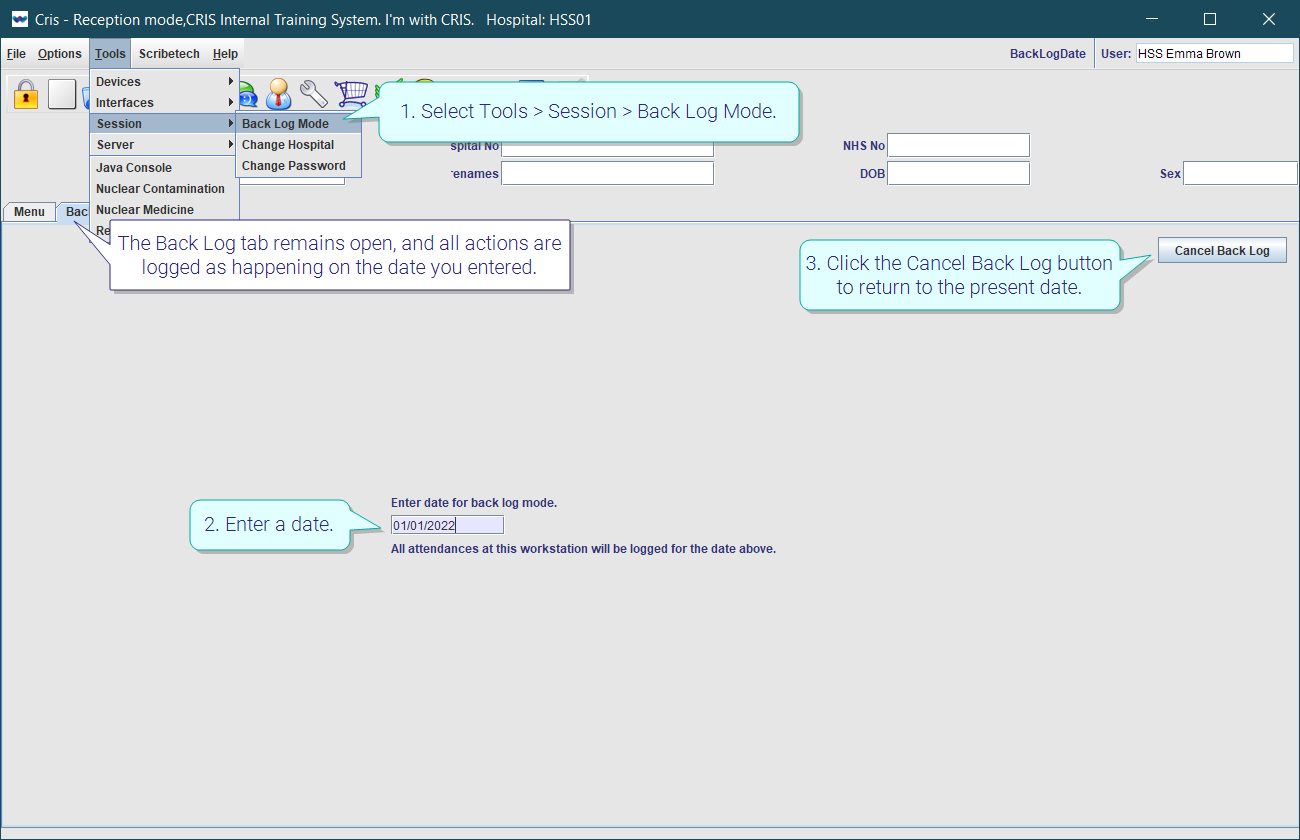
Select Tools > Session > Back Log Mode.
-
Enter a date.
-
Enter the required information.
-
Click the Cancel Back Log button to return to the present date.
The Back Log tab remains open, and all actions are logged as happening on the date you entered, until you cancel.
STEP 7
Attend the correct event
- Open the correct patient record.
- Click to select the request on the Events screen.
- Click the Change button.
- Click the Attend button.
- Click the Attend button.
The Event Details screen opens.
The Attend Event screen opens.
Tip:
-
Select Tools > Session > Back Log Mode.
-
Enter a date.
-
Enter the required information.
-
Click the Cancel Back Log button to return to the present date.
The Back Log tab remains open, and all actions are logged as happening on the date you entered, until you cancel.
STEP 8
Import request card
- Open the correct patient record.
- Click to select the event on the Events screen.
- Click the Change button.
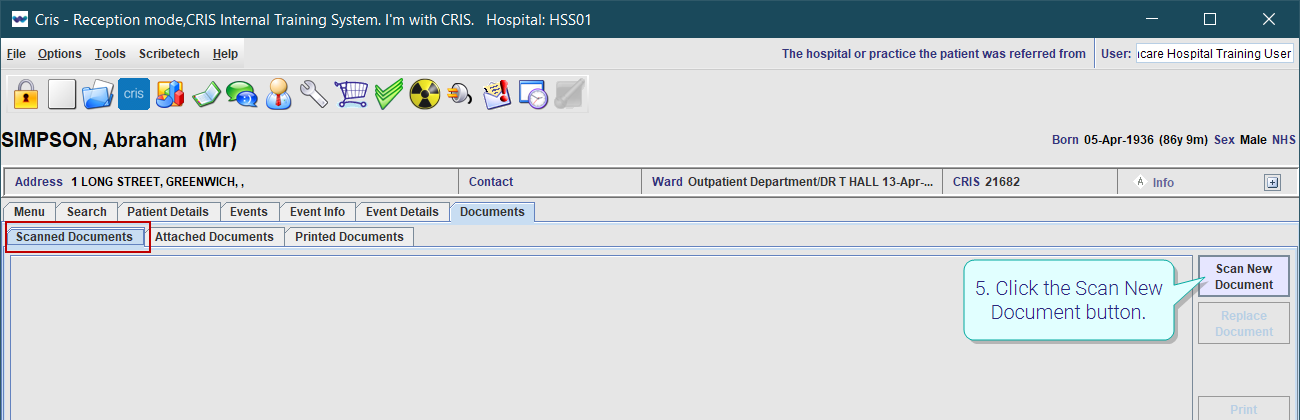
- Click the Documents button.
- Click the Scan New Document button.
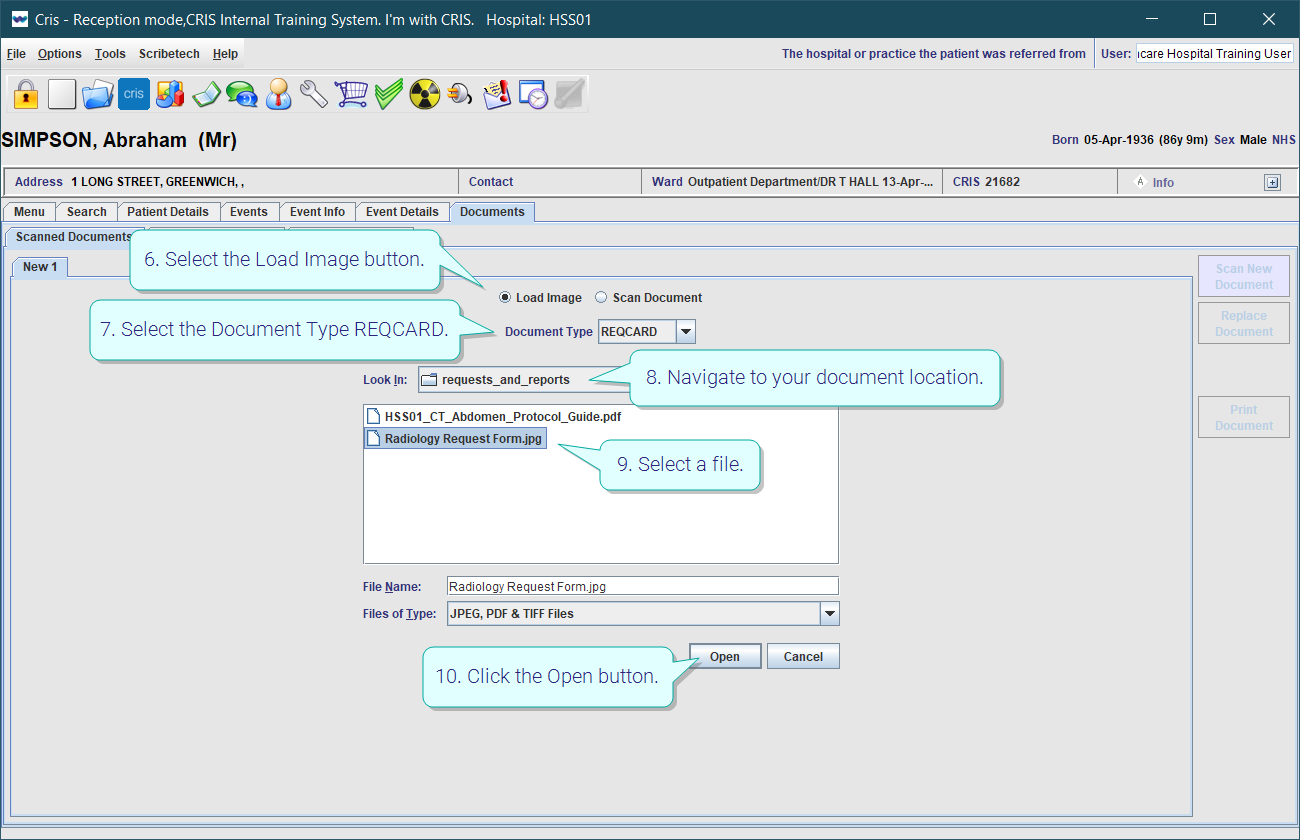
- Select the Load Image button.
- Select the Document Type REQCARD.
- Navigate to your document location.
- Select a file.
- Click the Open button.

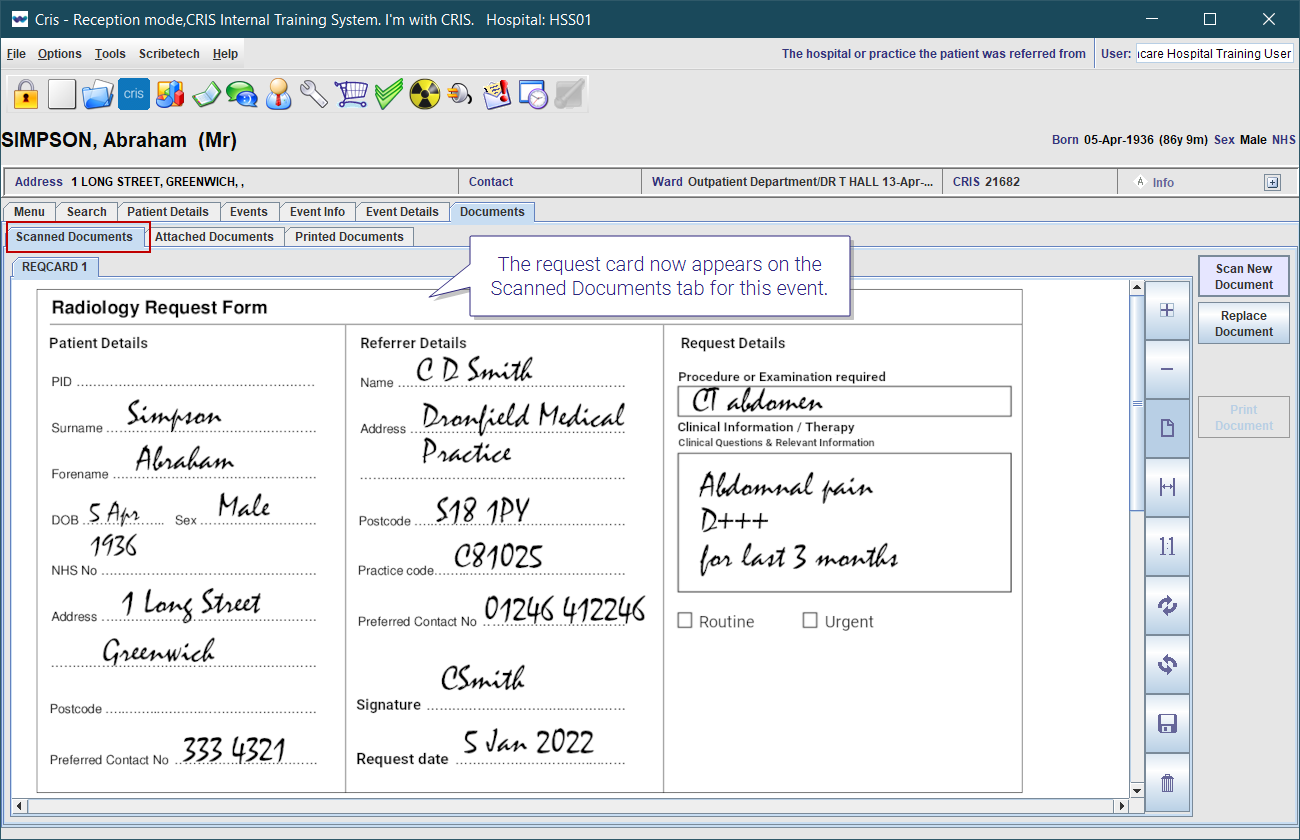
The request card now appears on the Scanned Documents tab for this event.
Warning:
The (cancelled) event will remain on the incorrect record for audit purposes, but information about the other patient must not be kept on this record. Once you have transferred the image to the correct patient and event, delete the image from the incorrect patient record.
STEP 9
Add post processing details to correct event
- Open the correct patient record.
- Click to select the attended event on the Events screen.
- Click the Process button.
-
Enter all the procedure information from STEP 2 (room, time, practitioner, exams, dose, contrast, stock).
- Click the Finished button.
- Click the Save button.
The Post Processing screen opens.
The Finished screen opens.
Tip:
-
Select Tools > Session > Back Log Mode.
-
Enter a date.
-
Enter the required information.
-
Click the Cancel Back Log button to return to the present date.
The Back Log tab remains open, and all actions are logged as happening on the date you entered, until you cancel.
STEP 10
Paste report to correct event
Paste text and edit report properties for each section individually.
-
Open the correct patient event.
- Click the Report button.
- Paste the report text into the correct sections.
- Click the Verify button.
- Press F9 to re-open the event.
- Click the Report button.
-
Right-click > select Properties.
-
Edit as applicable.
-
Click the Save button.
The Report screen opens.

STEP 11
Move images on PACS
Move images to the correct patient and event. Check with your PACS vendor if any other action is required.
Tip:
To find out who has participated in writing a report, check these three places:
-
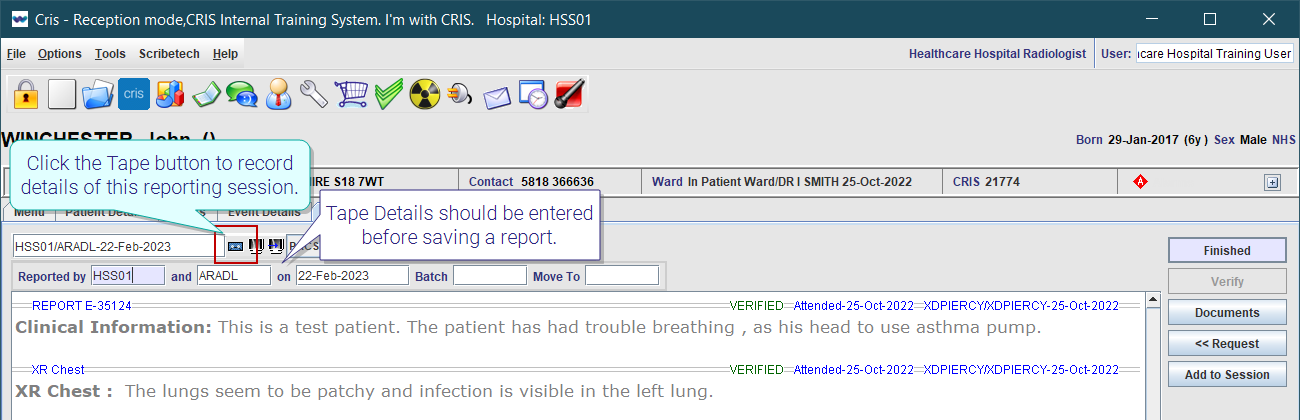
Click the Tape
 button to record details of this reporting session. Tape Details should be entered before saving a report.
 -
The section headers show REPORT STATUS; Attended date; Reported by / Verified by; and Verified date.
-
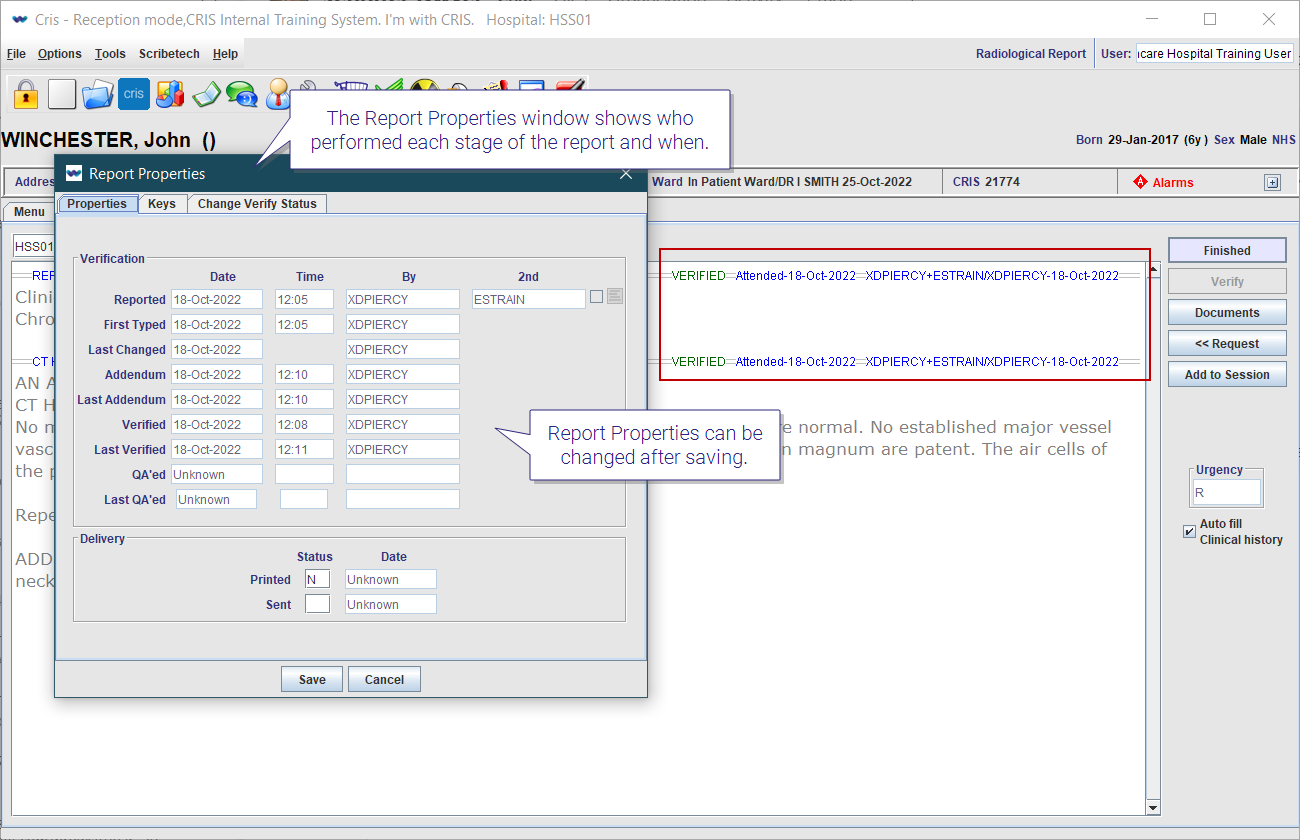
Right-click a report then select Properties. The Report Properties window shows who performed each stage of the report and when. Report Properties can be changed, by a permitted user, after saving a report.

Audit Report Properties changes via this log entry.
|
Type |
Category |
Sub Category |
Level |
|---|---|---|---|
|
REPORTPROPERTYCHANGE |
CRIS |
REPORT |
INFO |
Note:
You need these security setting to change reported events.
|
User Group |
Section |
Item |
Description |
|---|---|---|---|
|
SUPERU |
GENERAL |
CHANGE_VERIFIED |
Change reported and verified attendances. |
|
SUPERU |
REPORT |
CHANGE_STATUS |
Change report status. |
System Administration: Event Correction
Copy request details.
Cancel incorrect request.
Create correct request.
Export and import request card.
Undo attend on the incorrect patient.
Create and attend the event on the correct patient.
Correct a Not Performed attendance
Re-attend the event on the correct date.
Ensure any images are reviewed and reported.
We do not recommend deleting events or reports.