Restrict ordering by exam
To control which exams a referrer may request via the Cris Orders application, apply a restriction, in the form of a list of permitted exam codes, via core Cris. The referrer must be added to the Cris Staff table as well as the Referrers table.
Note:
These are the three steps to restrict ordering for NIMIS referrers:
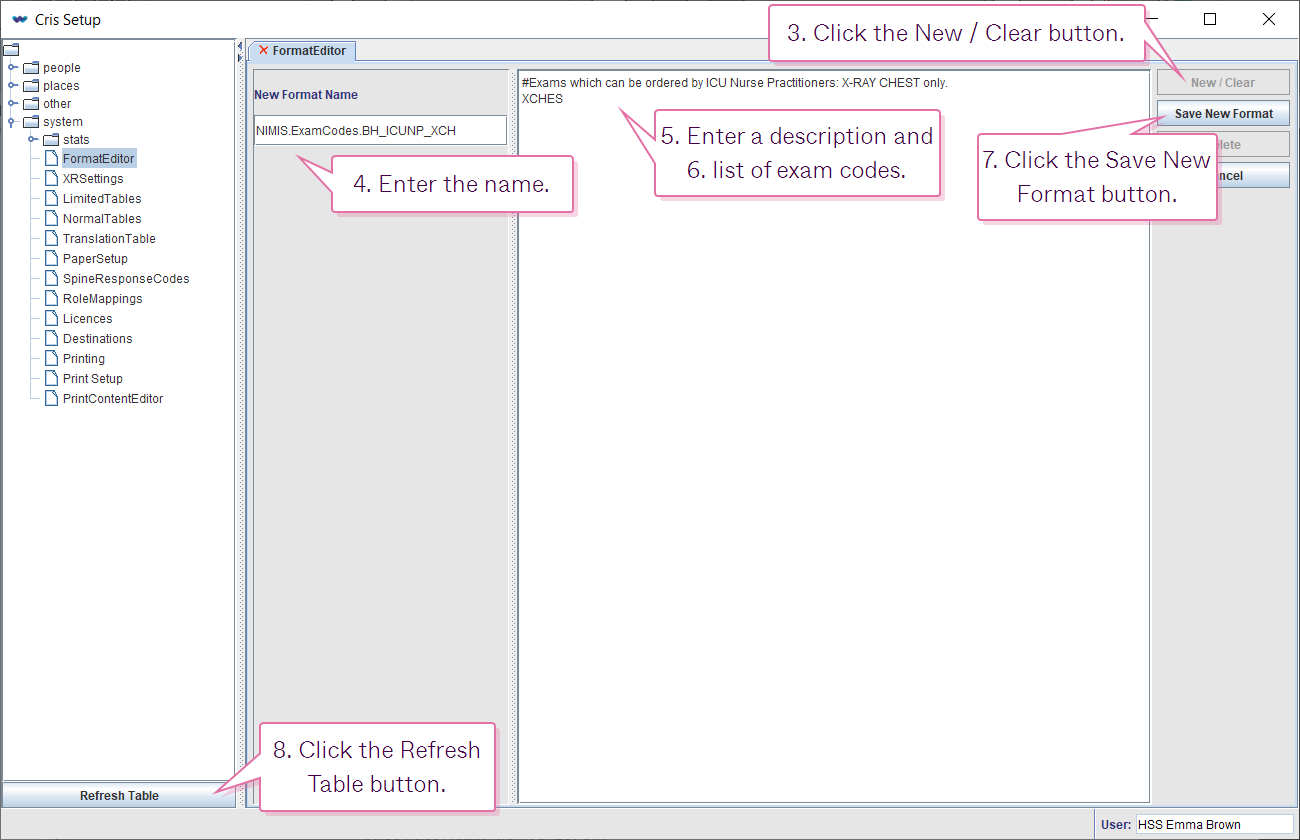
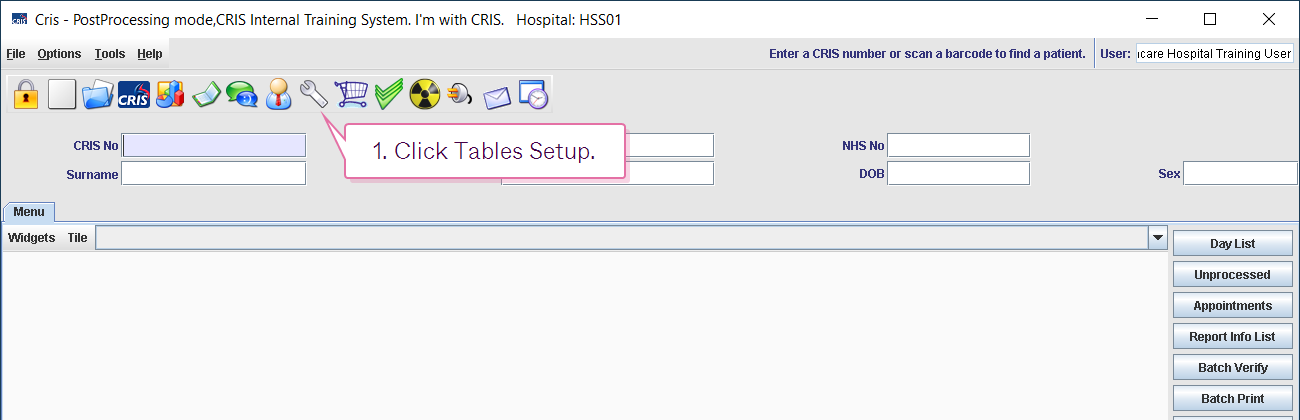
- Click Tables Setup.
- Select System > Format Editor.
- Click the New / Clear button.
- Enter the name (CATEGORY.PREFIX_ACTIVITYNAME) in the New Format Name field.
- Enter a descriptive comment, starting the line with #, in the Format field.
- Enter the list of exam codes in the Format field.
- Click the Save New Format button.
- Click the Refresh Table button.
Warning:
There is a character limit on activity names. Therefore a format name must be 10 characters or fewer if it is to be associated with an activity of the same name.
| Ordering module | Format category. | Format prefix_ | Format and activity name |
| New Cris | NIMIS.ExamCodes. | SITECODE_ | ACTIVITYNAME |
| Core Cris | NIMIS.USER. | SITECODE_ | ACTIVITYNAME |
Note:
New Cris format name = NIMIS.ExamCodes.SITECODE_ACTIVITYNAME
Core Cris format name = NIMIS.USER.SITECODE_ACTIVITYNAME
You can restrict ordering at exam or modality level in core Cris.
Note:
Format names are case-sensitive.
Tip
Use # to add a descriptive comment at the top of a format.
#Exams which can be ordered by ICU Nurse Practitioners: X-RAY CHEST only.
XCHES

Activities can be given to individual users (in this case, Cris users who request imaging). This activity refers to a list of exams which are permitted and restricts the user accordingly.
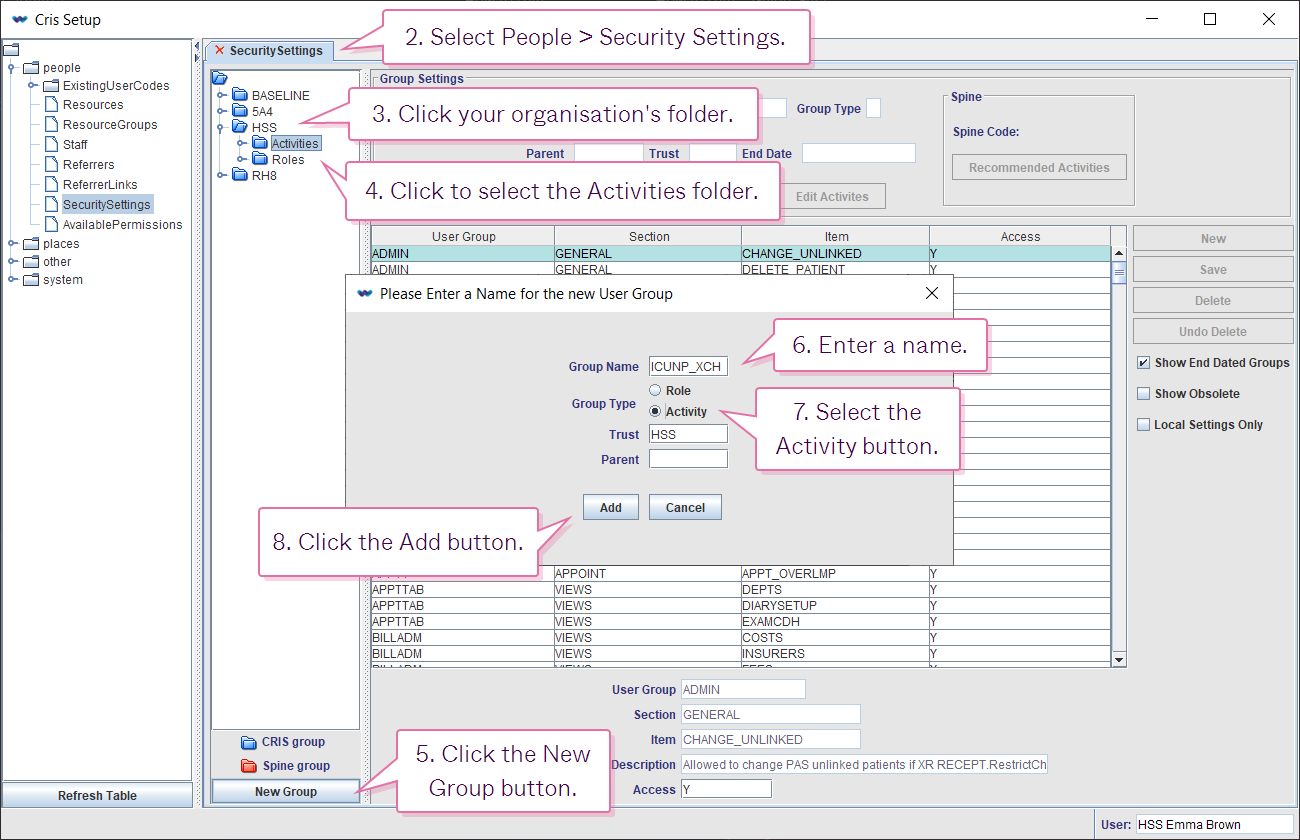
- Click Tables Setup.

- Select People > Security Settings.
- Click your organisation's folder.
- Click to select the Activities folder.
- Click the New Group button.
- Enter a name (up to 10 characters) in the Group Name field.
- Select the Activity button.
- Click the Add button.
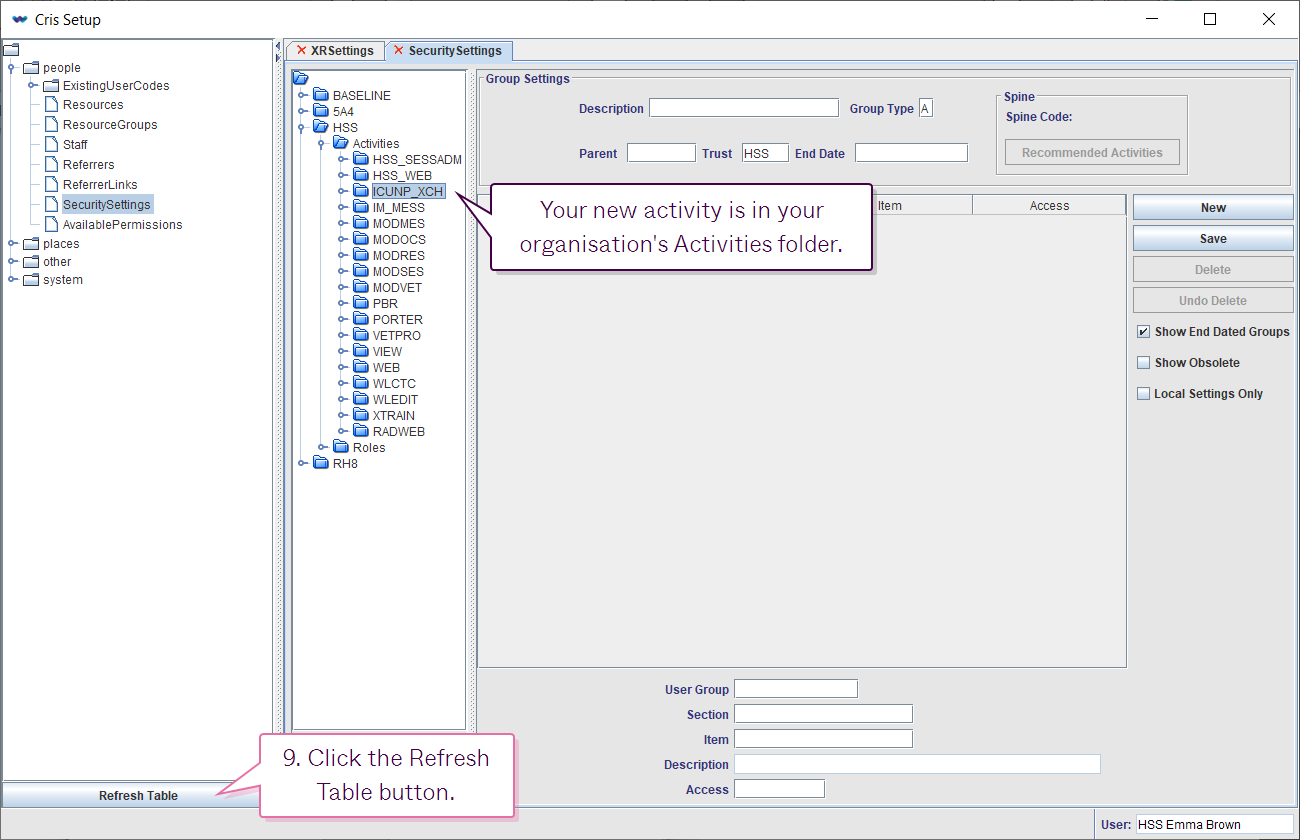
- Click the Refresh Table button.
The name must match the associated format (case-sensitive). For example, ICUNP_XCH.
Your new activity is in your organisation's Activities folder.
Add permissions
This activity does not need any configuration here because the associated format will apply the restriction.
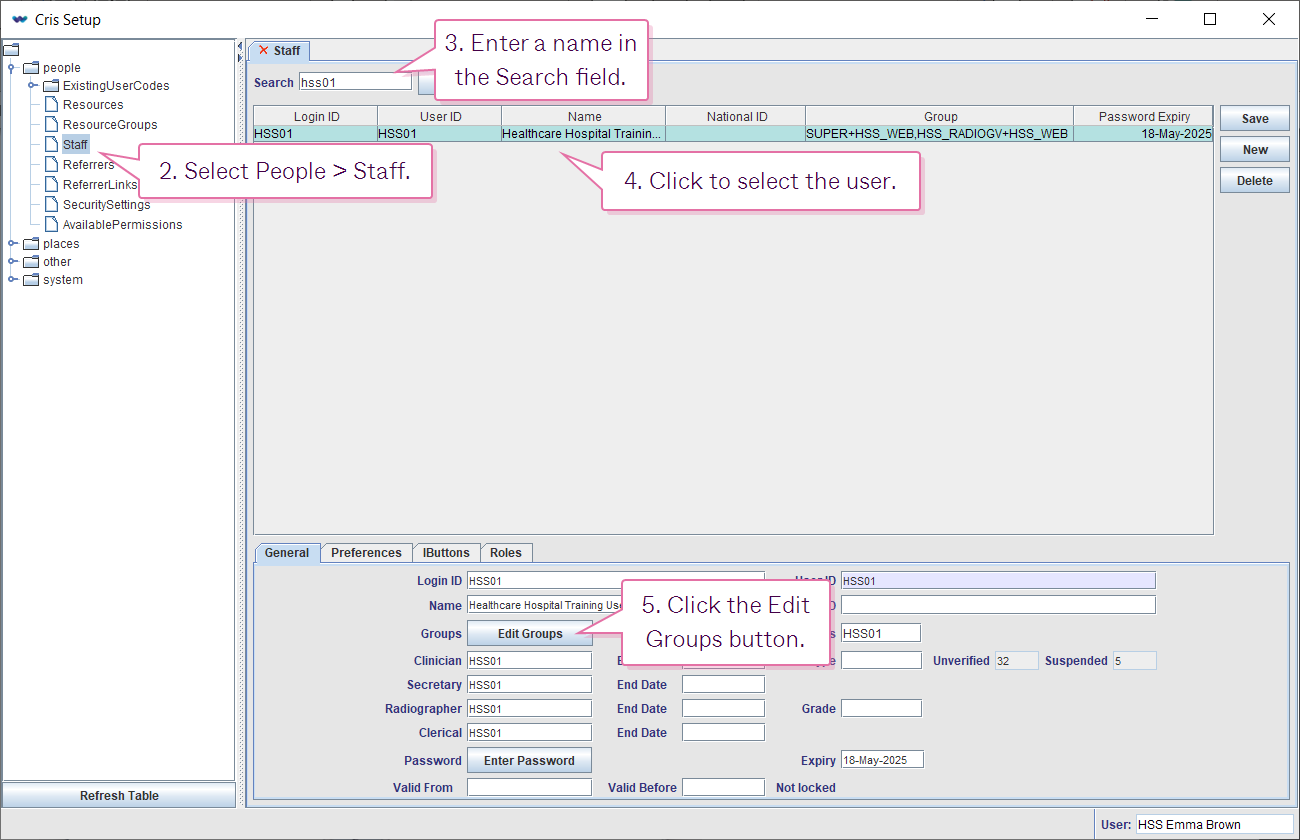
- Click Tables Setup.
- Select People > Staff.
- Enter a name in the Search field.
- Click to select the user.
- Click the Edit Groups button.
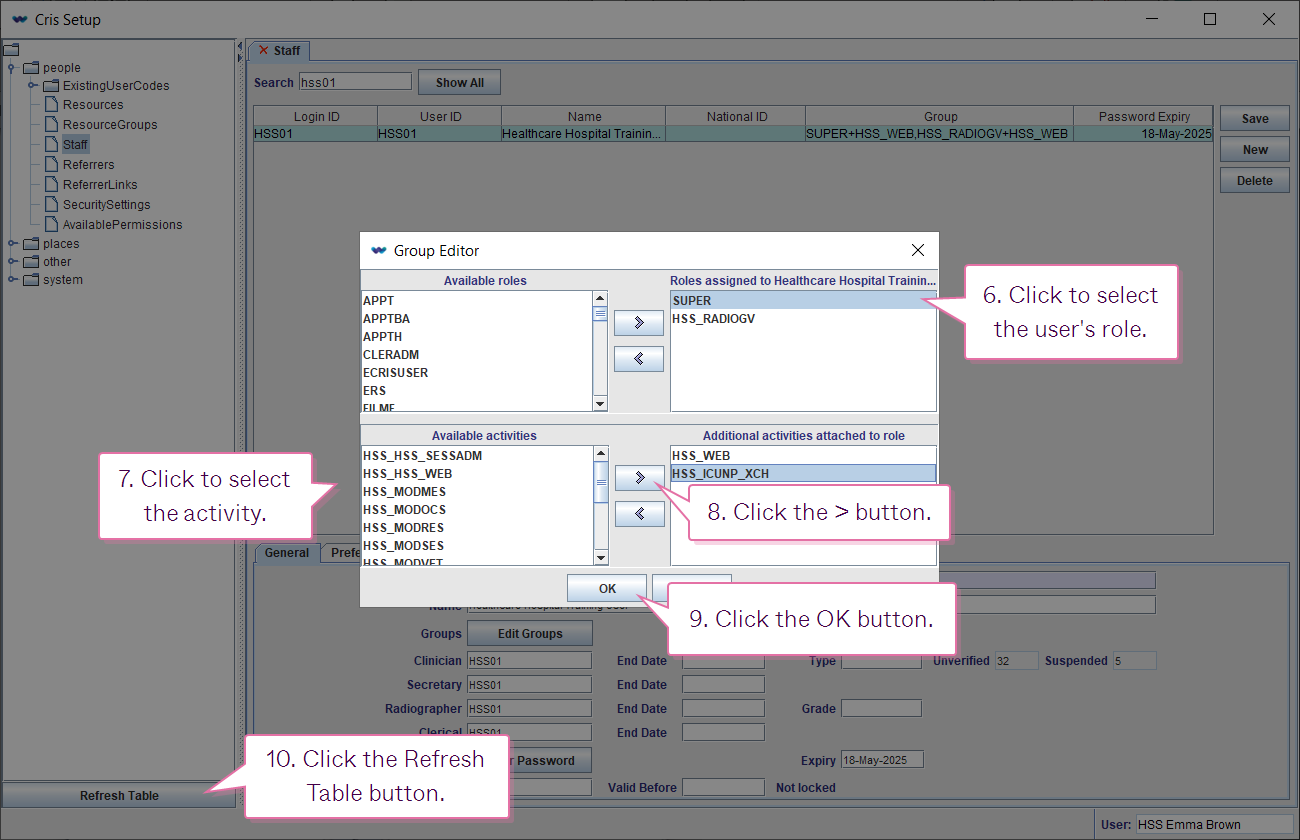
- Click to select the user's role in the Roles assigned... field.
- Click to select the activity in the Available activities field.
- Click the right arrow > button.
- Click the OK button.
- Click the Refresh Table button.
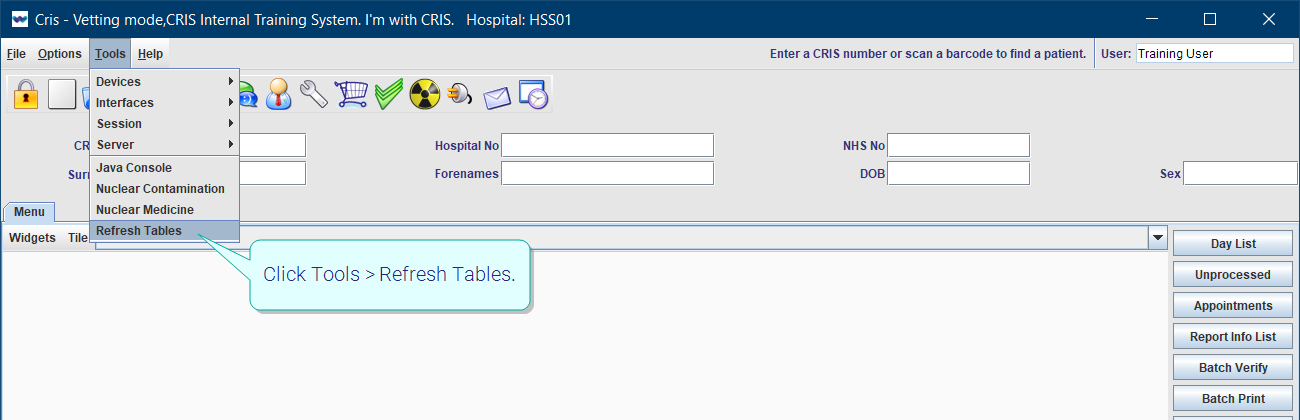
Tip:
We recommend clicking Tools > Refresh Tables after editing system settings / tables to ensure that all changes are applied.
 .
.
System Administration: NIMIS
Separate linked orders.