Formats
Formats are short pieces of code or text which are referred to by other Cris settings. For example, the format Message of the Day can show a different message on the front page depending on the logged-in user.
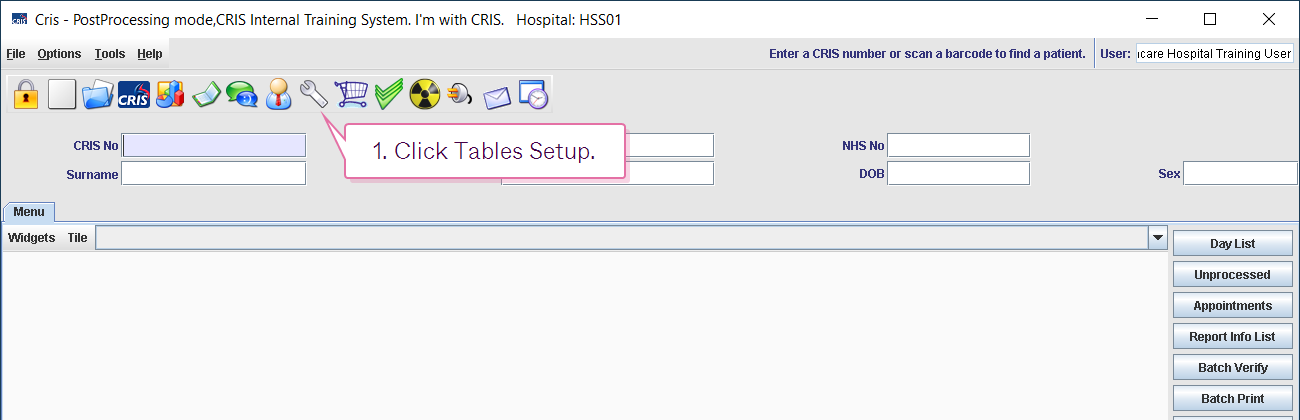
- Click Tables Setup.

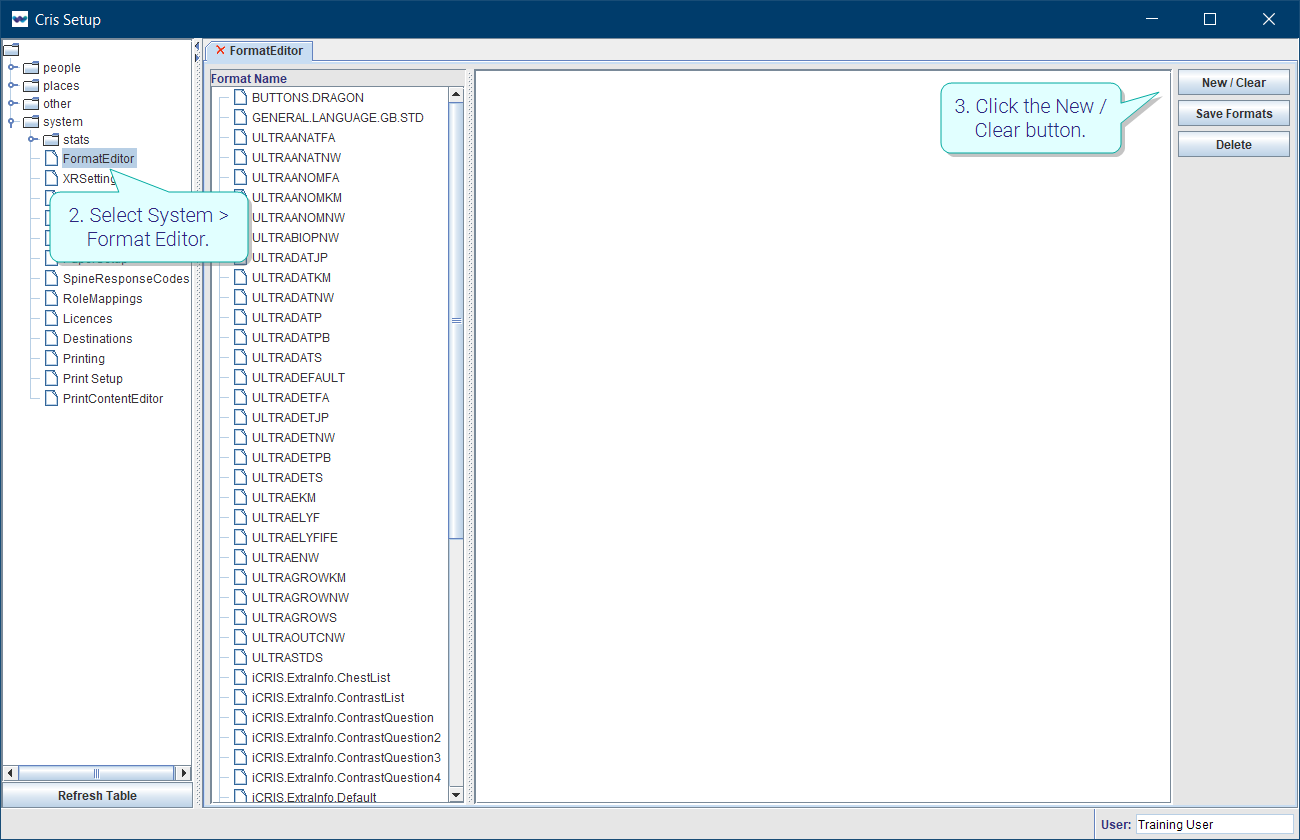
- Select System > Format Editor.

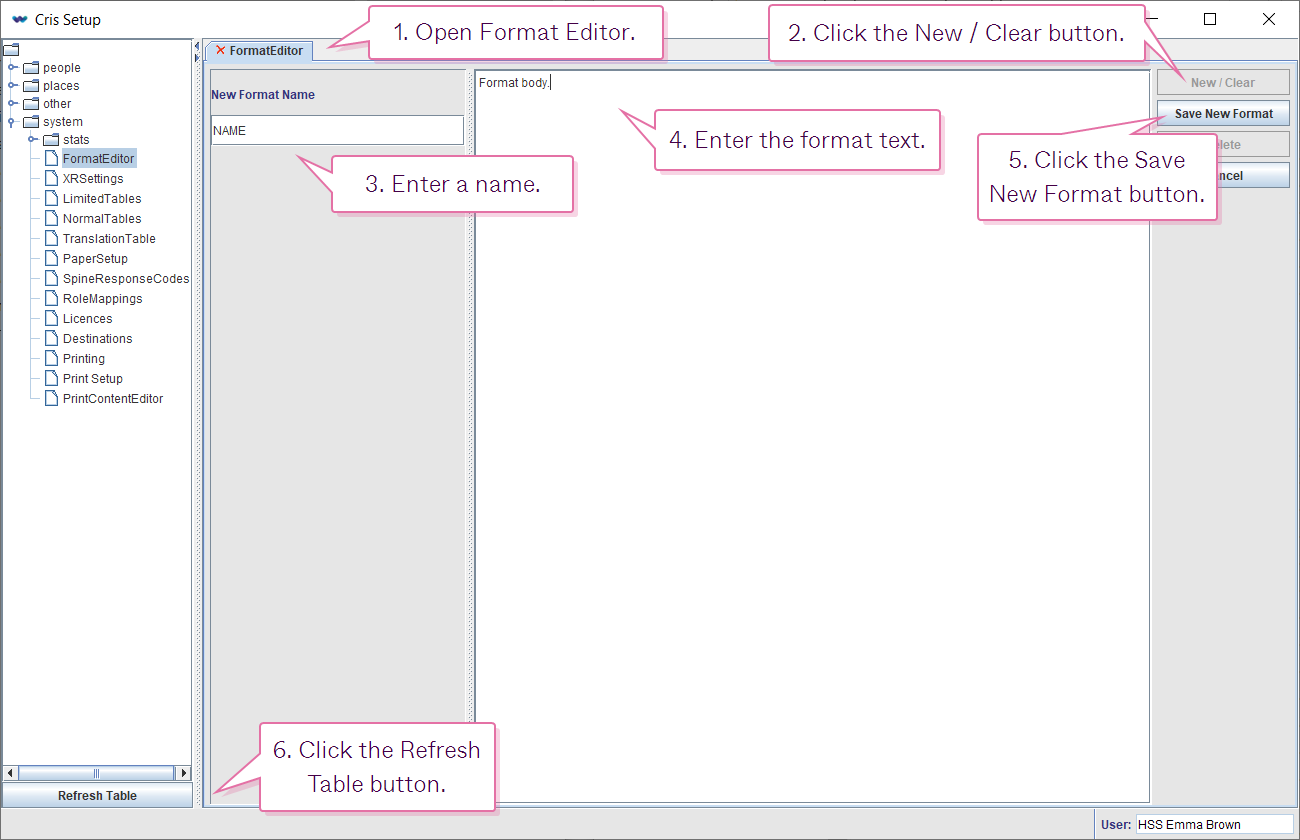
- Open Format Editor.
- Click the New / Clear button.
- Enter a name in the New Format Name field.
- Enter the format text in the Format field.
- Click the Save New Format button.
- Click the Refresh Table button.
- Click Tables Setup.
- Select System > Format Editor.
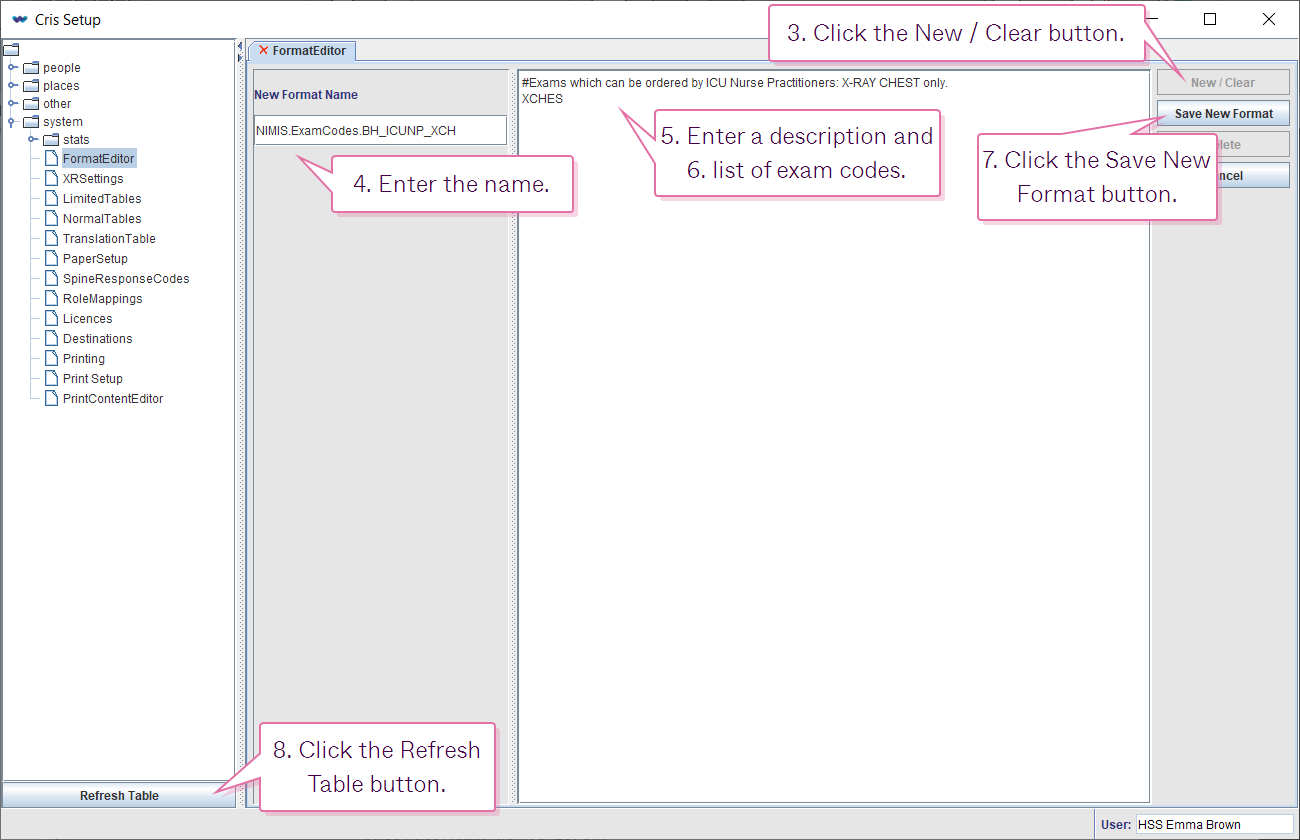
- Click the New / Clear button.
- Enter the name (CATEGORY.PREFIX_ACTIVITYNAME) in the New Format Name field.
- Enter a descriptive comment, starting the line with #, in the Format field.
- Enter the list of exam codes in the Format field.
- Click the Save New Format button.
- Click the Refresh Table button.
Warning:
There is a character limit on activity names. Therefore a format name must be 10 characters or fewer if it is to be associated with an activity of the same name.
| Ordering module | Format category. | Format prefix_ | Format and activity name |
| New Cris | NIMIS.ExamCodes. | SITECODE_ | ACTIVITYNAME |
| Core Cris | NIMIS.USER. | SITECODE_ | ACTIVITYNAME |
Note:
New Cris format name = NIMIS.ExamCodes.SITECODE_ACTIVITYNAME
Core Cris format name = NIMIS.USER.SITECODE_ACTIVITYNAME
You can restrict ordering at exam or modality level in core Cris.
Note:
Format names are case-sensitive.
Tip
Use # to add a descriptive comment at the top of a format.
#Exams which can be ordered by ICU Nurse Practitioners: X-RAY CHEST only.
XCHES

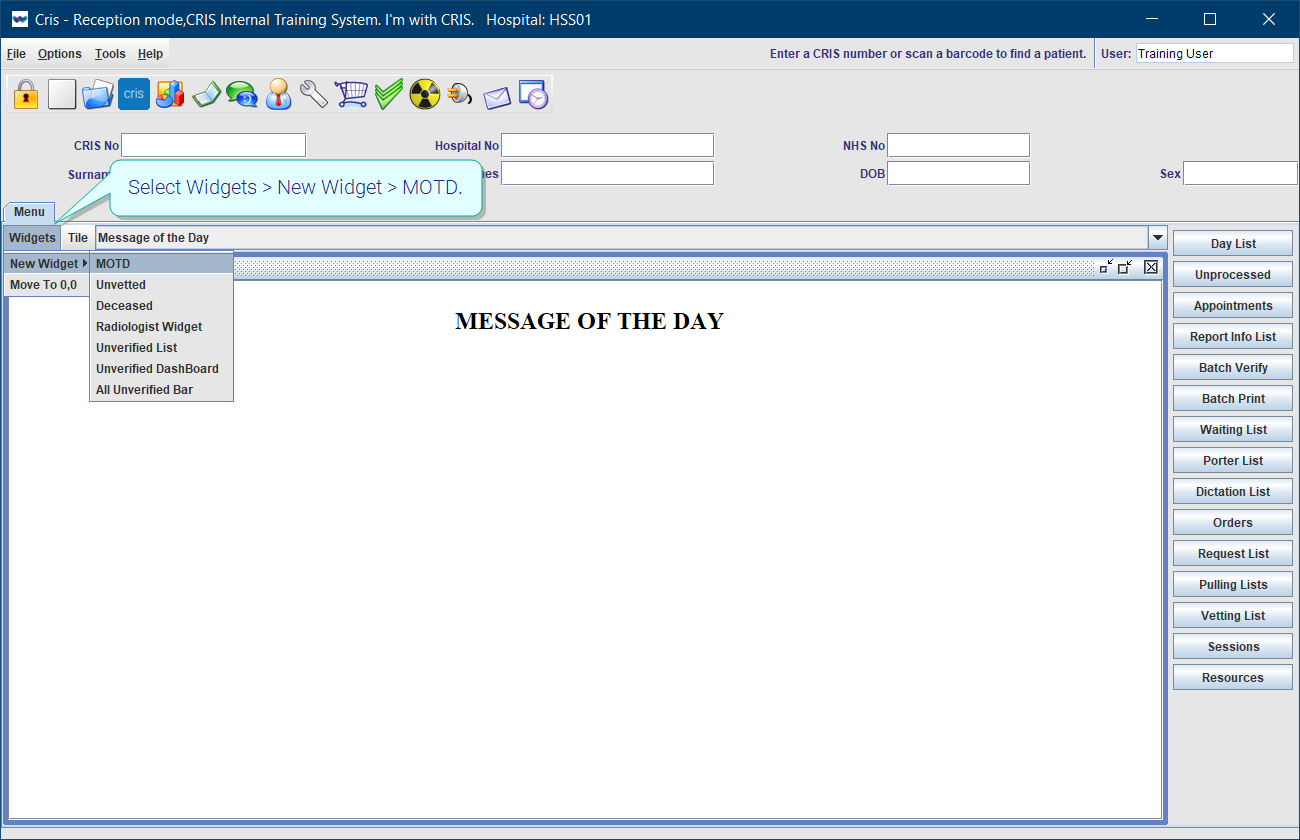
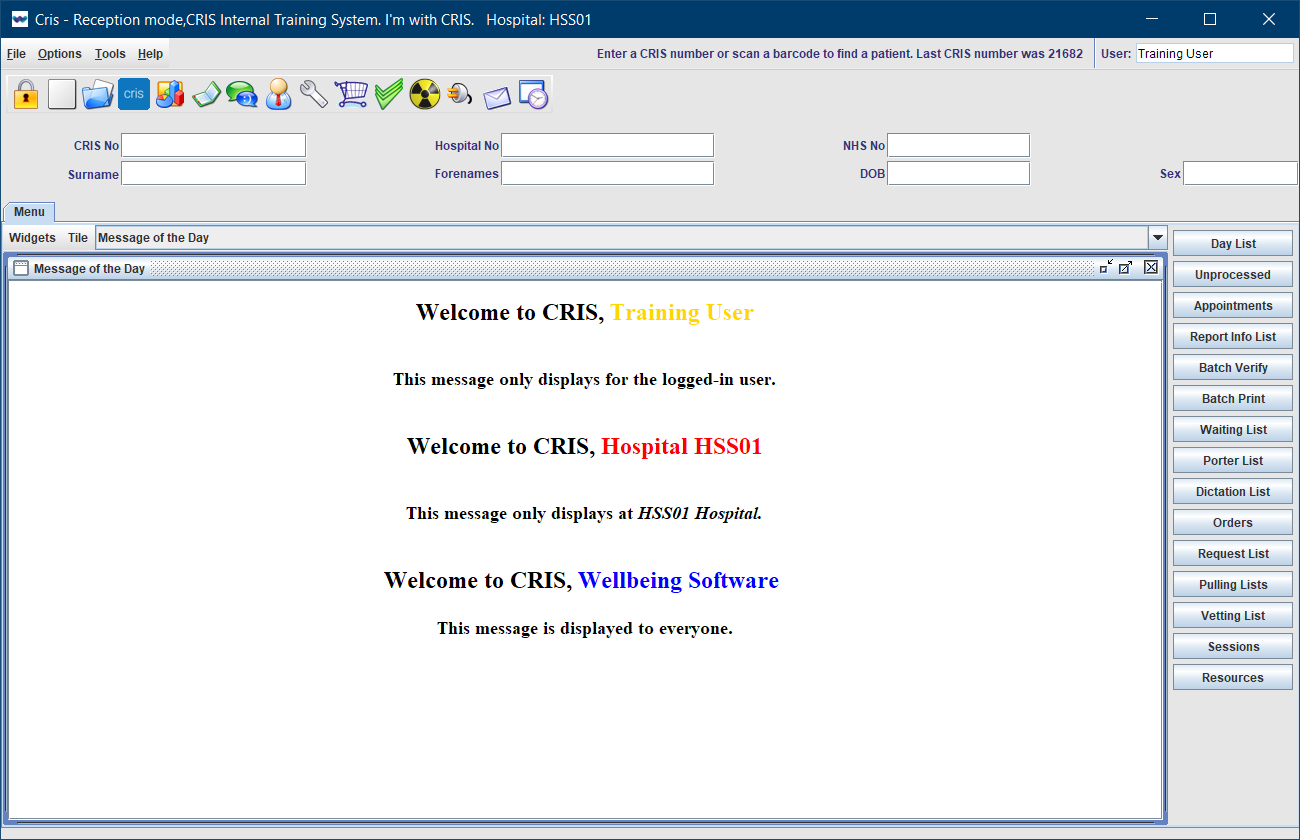
A Message of the Day (MOTD) can be displayed on the front page of Cris. Select Widgets > New Widget > MOTD.
Create a system message
This message will be displayed to the entire Cris system across all connected trusts.
- Click Tables Setup.
- Select System > Format Editor.
- Click the New / Clear button.
- Enter the name MOD_JAVA.
- Enter the text below in the centre panel, adding your own message title and body.
- Click the Save New Format button.
- Click the Refresh Table button.
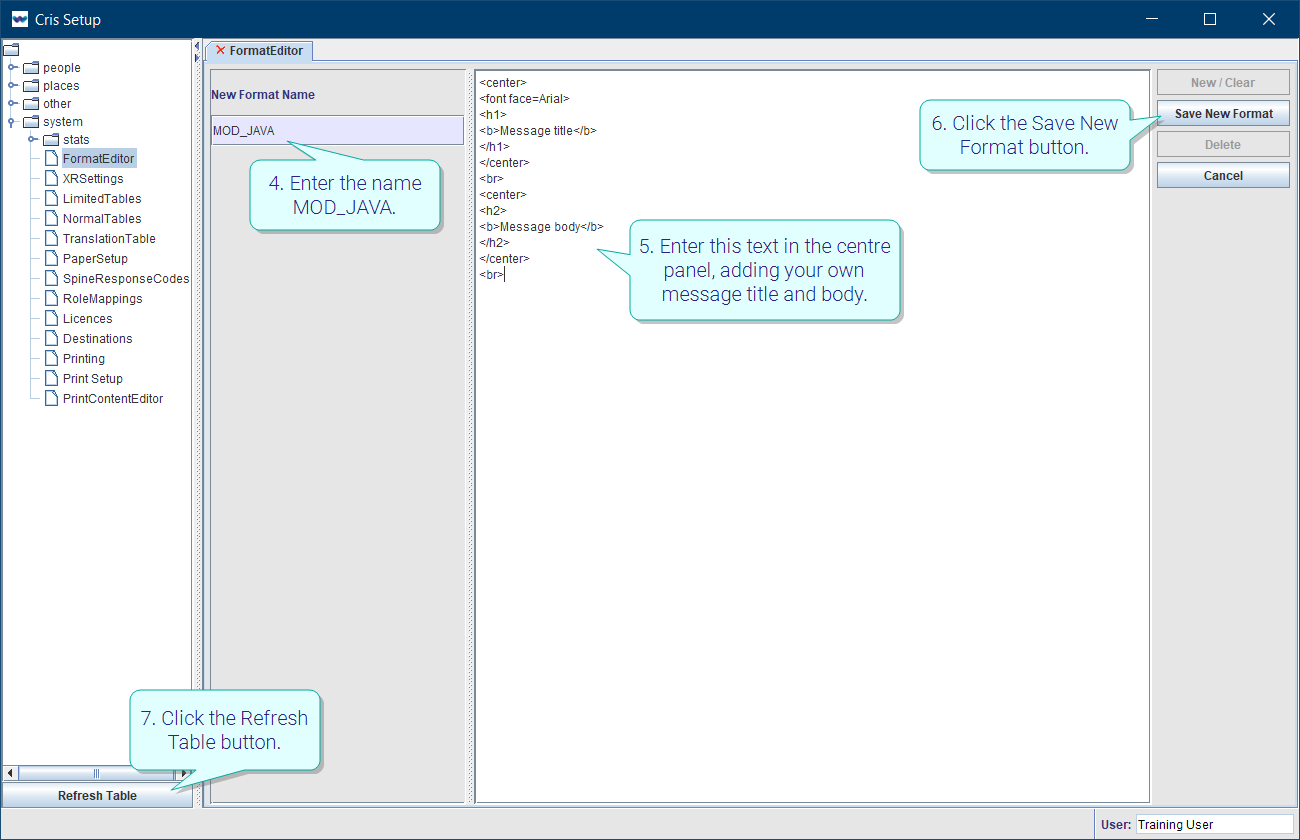
<center>
<font face=Arial>
<h1>
<b>Message title</b>
</h1>
</center>
<br>
<center>
<h2>
<b>Message body</b>
</h2>
</center>
<br>
Create a bespoke message
You can create messages that will be shown to the whole system, one site, or an individual user.
Create formats with these names, substituting [SITECODE] and [LOGINID] with the actual values (no brackets).
| Format name | Description | |
|---|---|---|
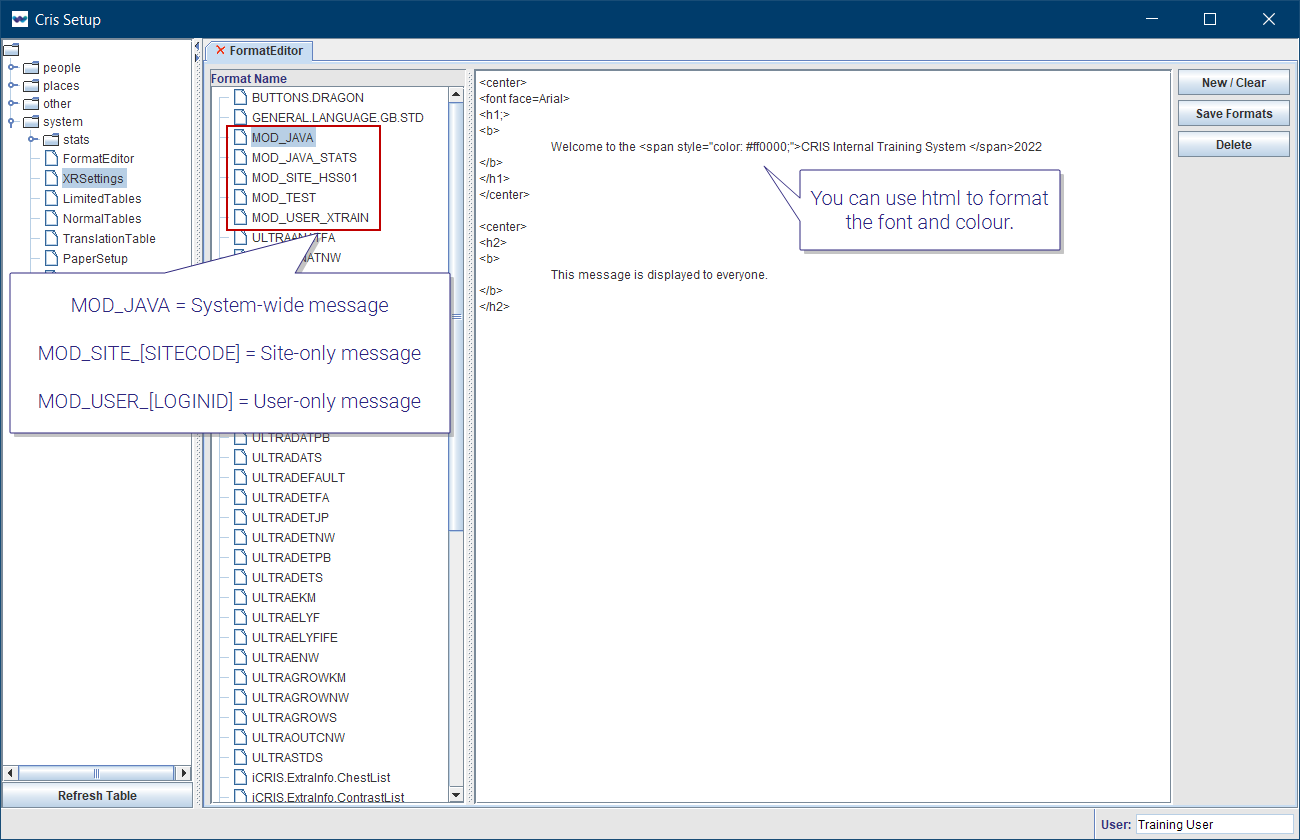
|
MOD_USER_[LOGINID] | Displays a message to the specified user. |
| MOD_TERMINAL_[TERMINALID] | Displays a message to the specified terminal / workstation. | |
| MOD_SITE_[SITECODE] | Displays a message to the specified hospital / site. | |
| MOD_JAVA | Displays a message to the entire Cris system across all connected trusts. |
Note:
A Message of the Day can be created for a user, site, and system. Messages will appear in that order.
Tip:
You can use html to format your message, for example change font and colour.
Edit XR settings for a pop-up message
This is the option to have the MOTD open in a pop-up window when you log in to Cris.
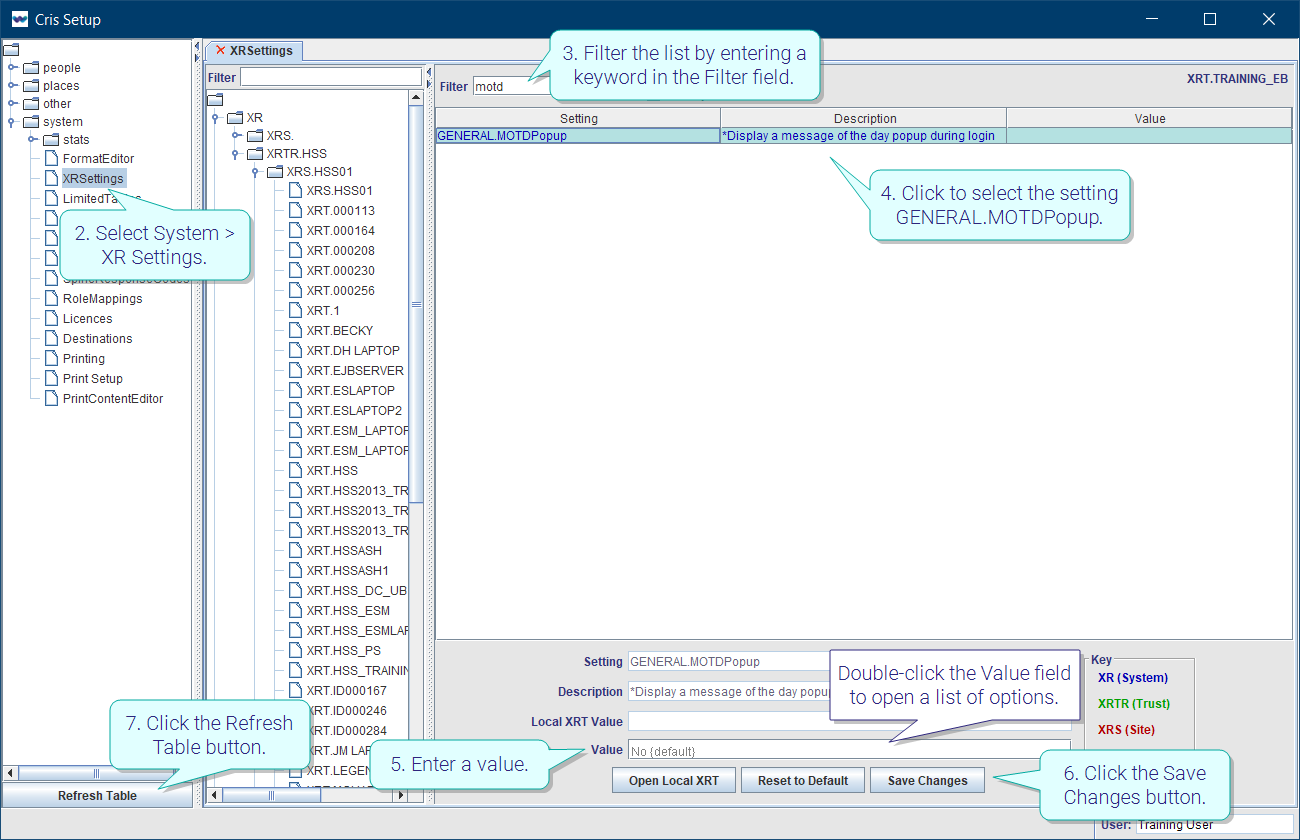
- Click Tables Setup.
- Select System > XR Settings.
- Filter the list by entering a keyword in the Filter field.
- Click to select the setting GENERAL.MOTDPopup.
- Enter a value in the Value field.
- Click the Save Changes button.
- Click the Refresh Table button.
OR
Double-click the Value field then double-click to select a value from the options (Yes or No).
Note:
These are the three steps to restrict ordering for NIMIS referrers:
Tip:
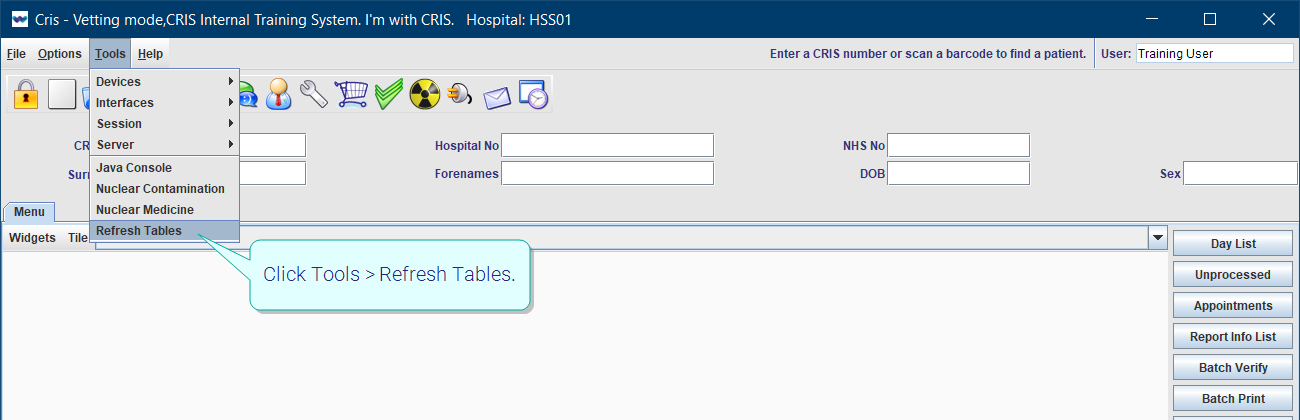
We recommend clicking Tools > Refresh Tables after editing system settings / tables to ensure that all changes are applied.
 .
.
System Administration: System settings
Reference field to configure MOTD, restrict ordering.
Configure letters, printing. We recommend Letters training before amending these settings.
Define menus with more options - dose types, modalities, foetal presentation.
Define menus with finite options - alarm types, Yes / No fields.
Configure Licences for additional modules and Destinations for sending events or reports.