Single Sign-on
Configuration of single sign-on entails:
- Activating via an XR setting.
- Changing user Login IDs to the format DOMAIN/FirstName.Surname.
Edit XR settings for single sign-on
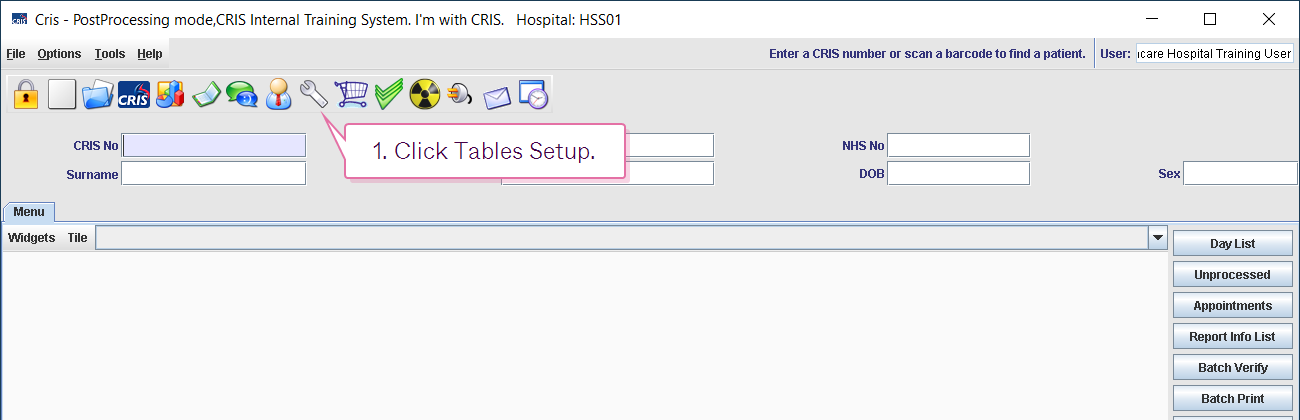
- Click Tables Setup.

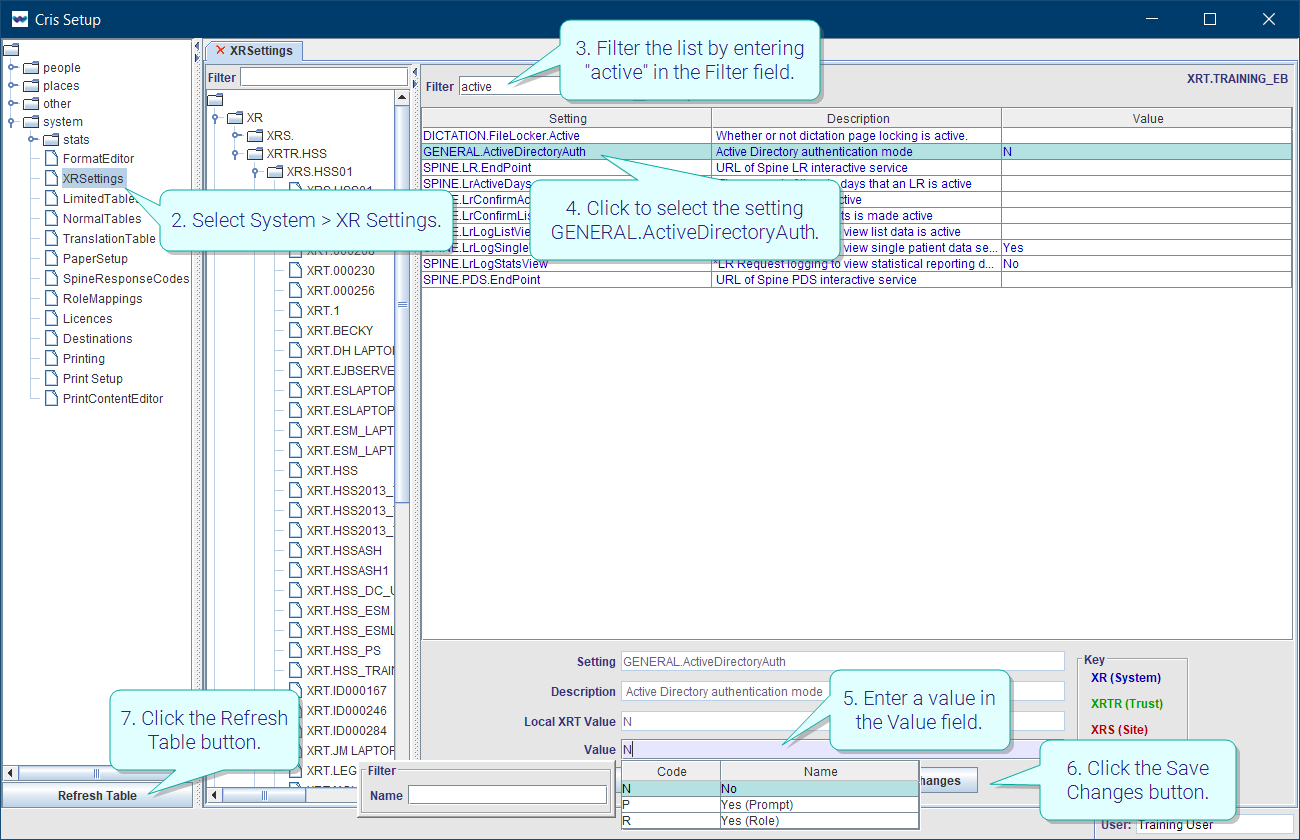
- Select System > XR Settings.
- Filter the list by entering "active" in the Filter field.
- Click to select the setting GENERAL.ActiveDirectoryAuth.
- Enter a value in the Value field.
- Click the Save Changes button.
- Click the Refresh Table button.
OR
Double-click the Value field then double-click to select a value from the options.
Edit user settings for single sign-on
- Click Tables Setup.
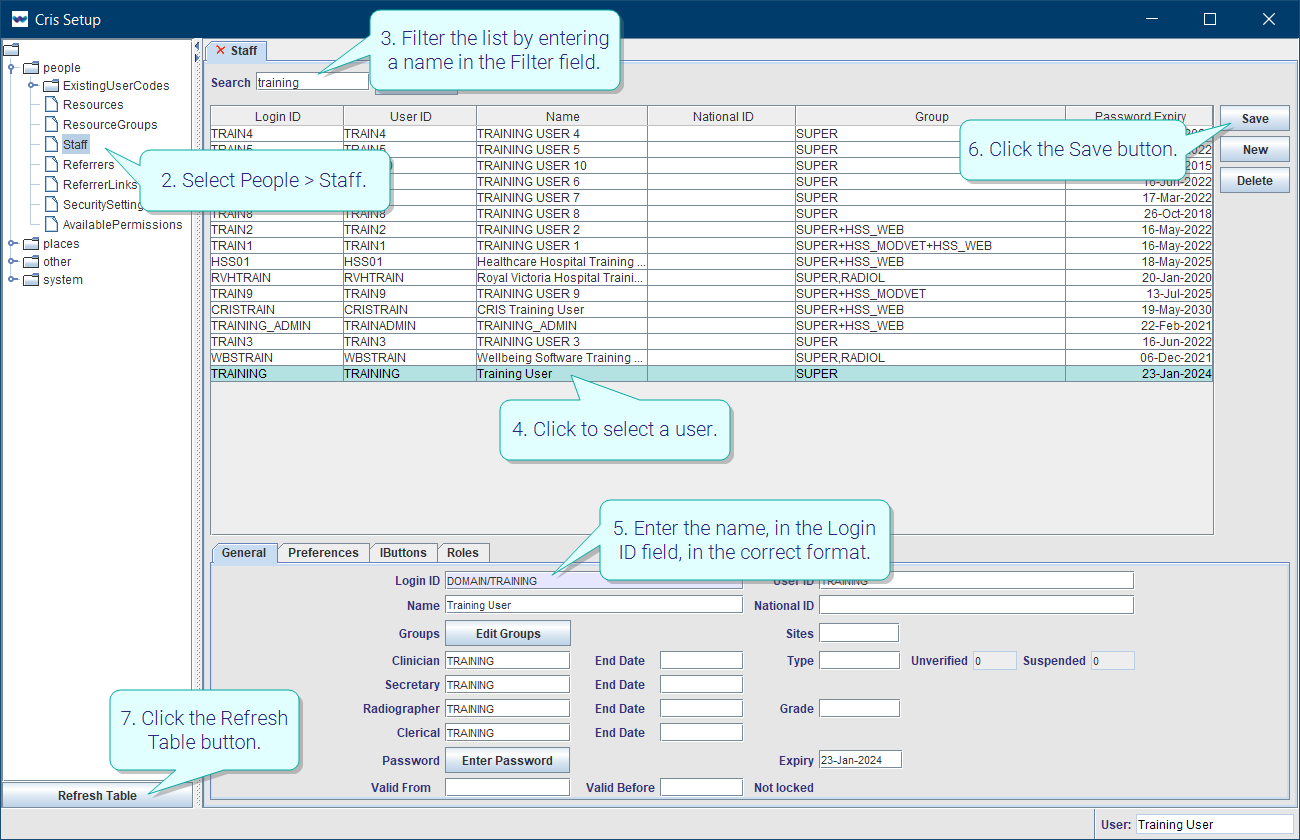
- Select People > Staff.
- Filter the list by entering a name in the Filter field.
- Click to select a user.
- Enter the name, in the Login ID field, in the correct format: DOMAIN/FirstName.Surname.
- Click the Save button.
- Click the Refresh Table button.
Note:
XR setting for Active Directory single sign-on.
| Level | Setting | Value | Name | Description | |
|---|---|---|---|---|---|

|
XR |
GENERAL.ActiveDirectoryAuth |
N |
No |
Active Directory is not installed. |
| P | Yes (Prompt) |
Cris will log in automatically if the (Windows) user is in the People > Staff table. If this fails, the Login window will appear. |
|||
| R | Yes (Role) |
The Login window will appear. The user should enter their Cris username (Login ID), password, and domain. |
Tip:
Your Client Manager or our service desk can provide your domain name and assist you with activating single sign-on.
Tip:
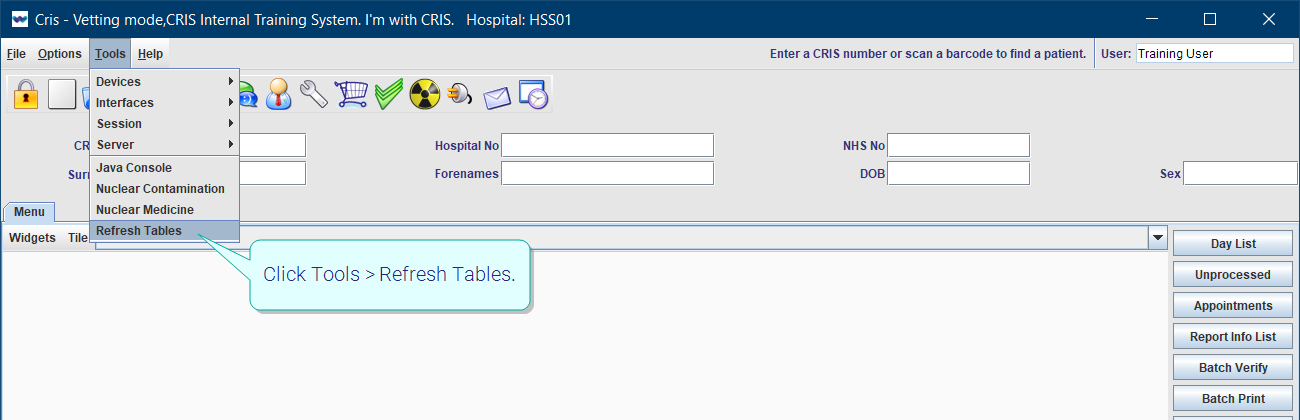
We recommend clicking Tools > Refresh Tables after editing system settings / tables to ensure that all changes are applied.
 .
.
System Administration: Basics
Enter a licence key for new modules.
Configure front page messages for users, sites, or the whole system.
Use Back Log Mode to enter data as if it was a different day.
Use Change Hospital to view and enter information as if you were at another site.