Check settings
Before creating a new diary, check that the room exists and does not already have a diary.
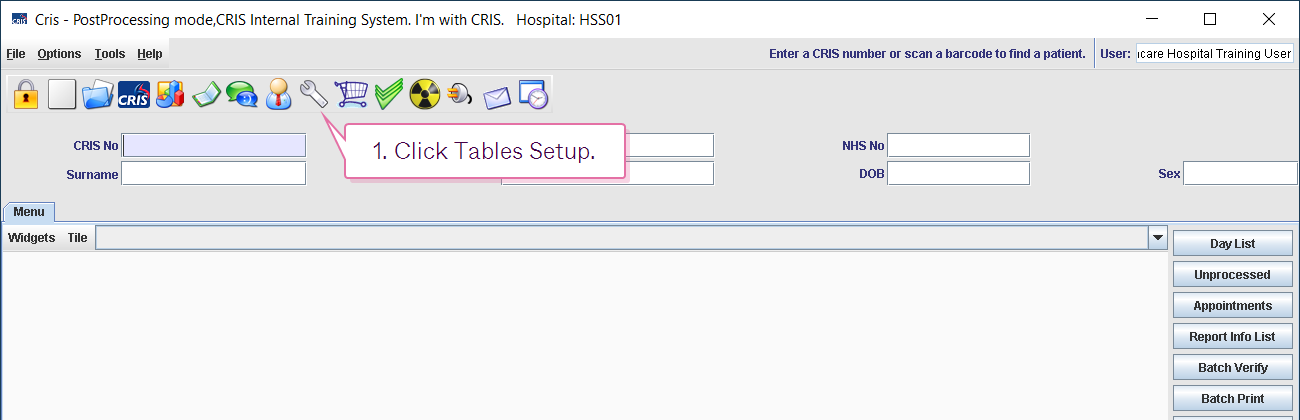
- Click Tables Setup.

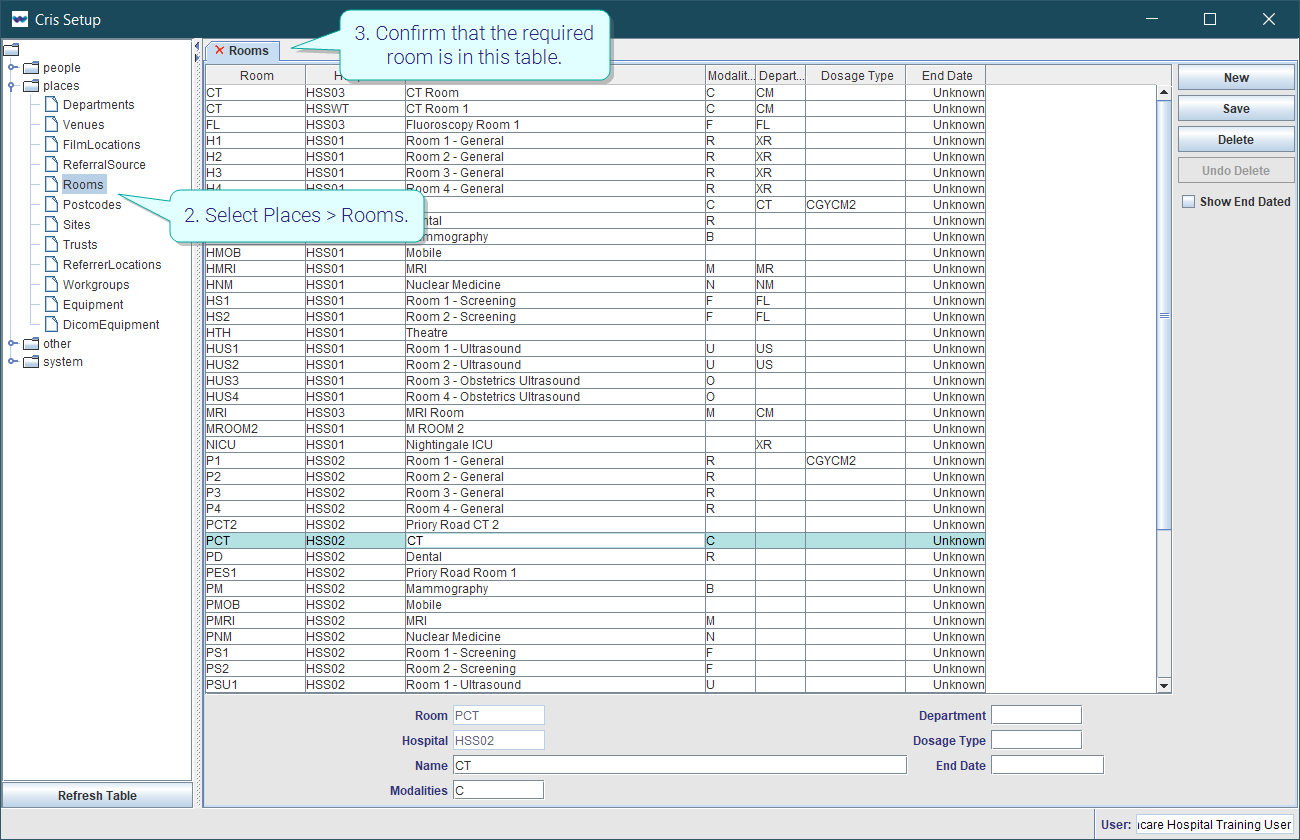
- Select Places > Rooms.
- Confirm that the required room is in this table.
- Select Other > Appointments > Diary Setup.
- Select a site code via the Site Code field.
- Select a room code via the Room field.
- Press the [Enter] key.
If a diary exists for this room, it will be shown.
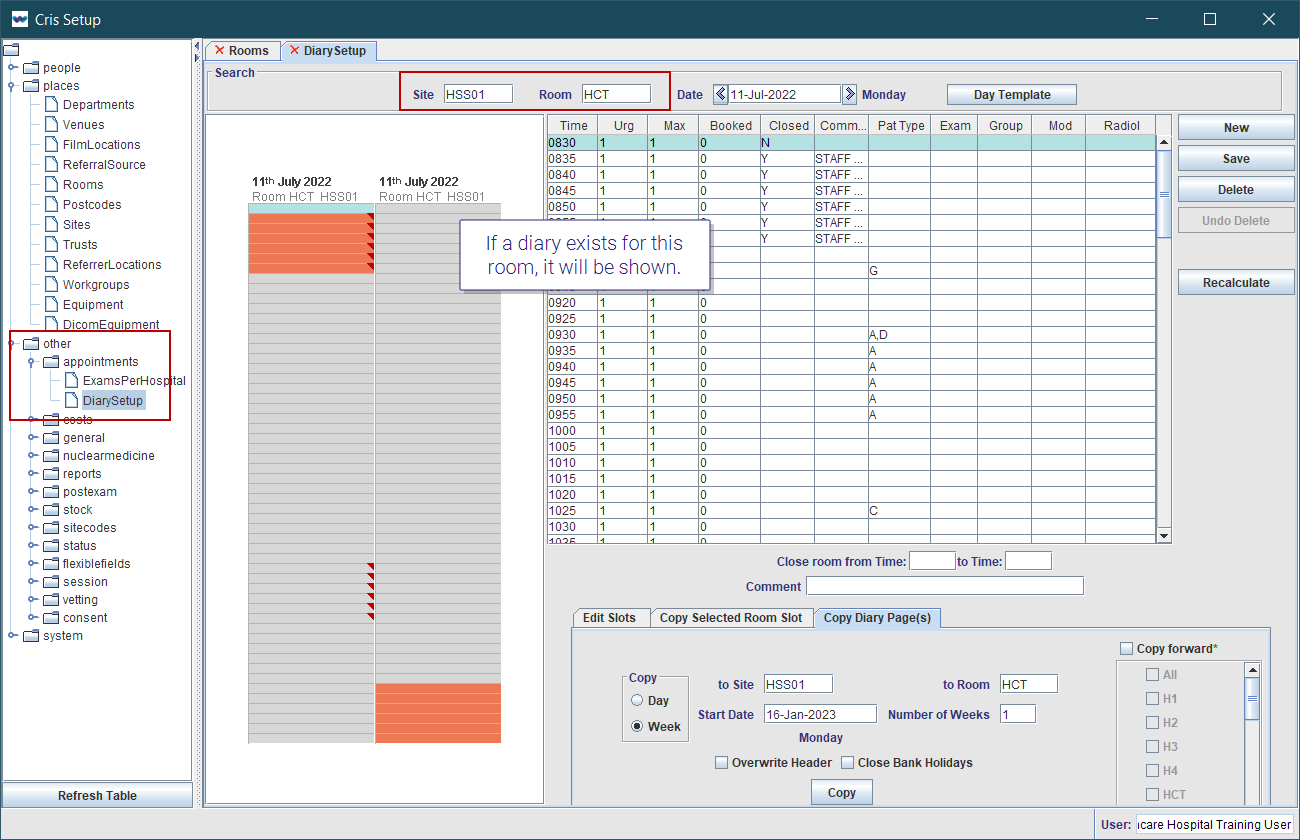
If a diary does not exist for this room, the tab will be blank.
![]()
Tip:
To add a new trust, site, department, or room, see Places.
System Administration: Diary Set Up
Before creating a new diary, check that the room exists and does not already have a diary.
Create slots to build your day template.
Restrict slots (via the template)
Use the Edit Slots tab to select slot restrictions, then the Copy Selected Room Slots tab to apply those restrictions to a time range.
Close slots (via the template)
Use the Edit Slots tab to close a slot, then the Copy Selected Room Slots tab to apply the closure to a time range.
Once you have configured each day of your working week, you can copy the week template to a number of future weeks (for this room).
Cpy a week template to a room other than the one in which you created it.
Extend the time range for a single room.
A week template must exist for the room before using Copy.
Extend the time range for multiple rooms.
A week template must exist for each room before using Copy Forward.
Restrict slots (via the Diary)
If you want to restrict a room for a one-off occasion, restrict the slots individually via the Diary.
If you want to close a room for a one-off occasion (such as maintenance or staff absence), close the slots individually via the Diary.