User roles and activities
Assign a role (group) via the Groups dialog
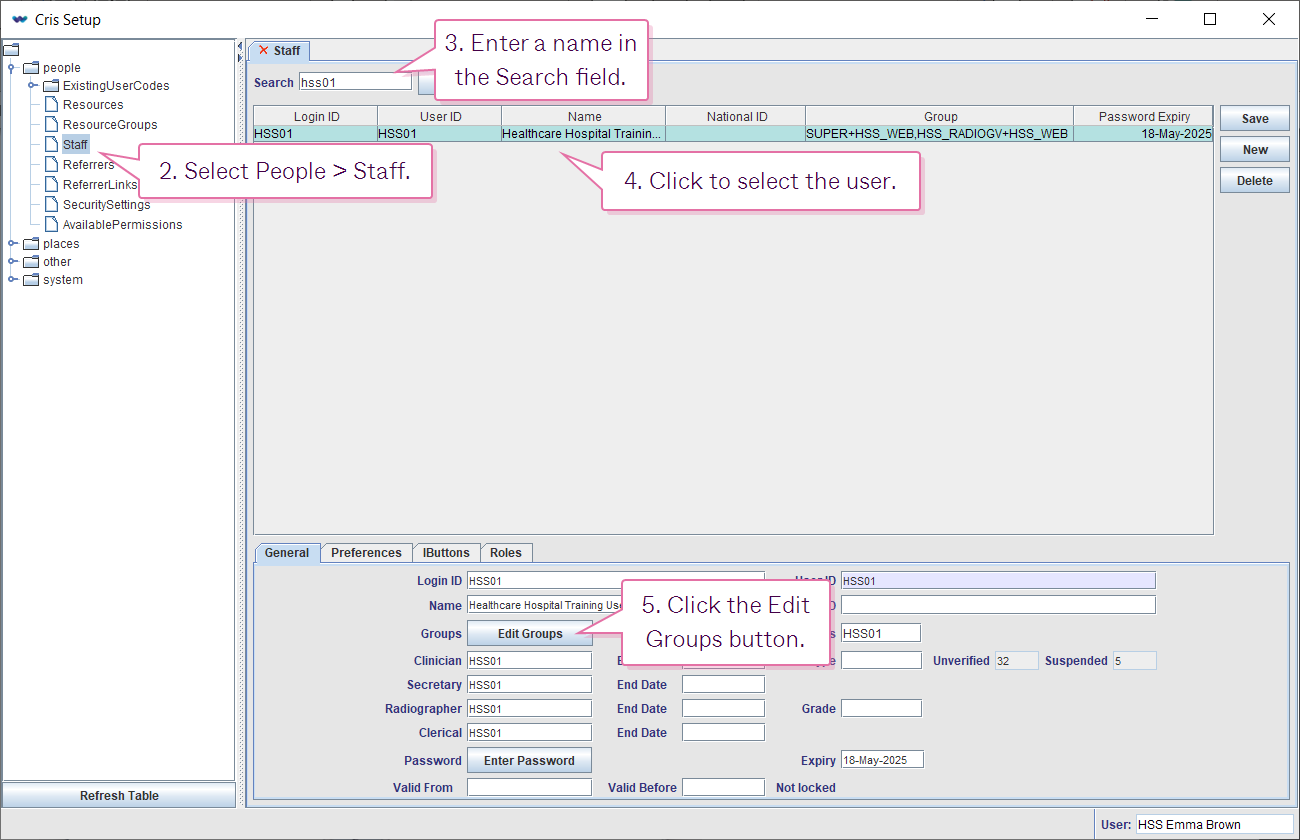
Use this method to assign a role (as defined in People > Security Settings).
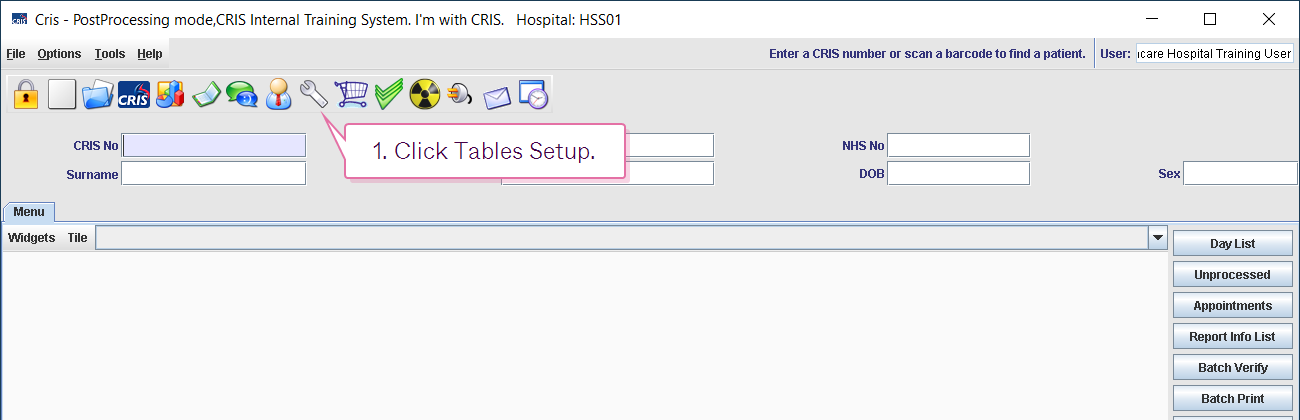
- Click Tables Setup.

- Select People > Staff.
- Select the user's name in the list.
- Click the Edit Groups button.
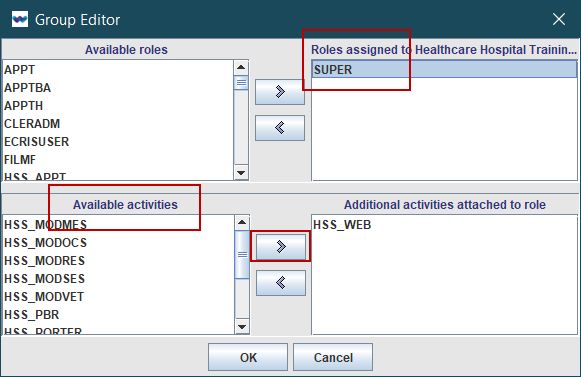
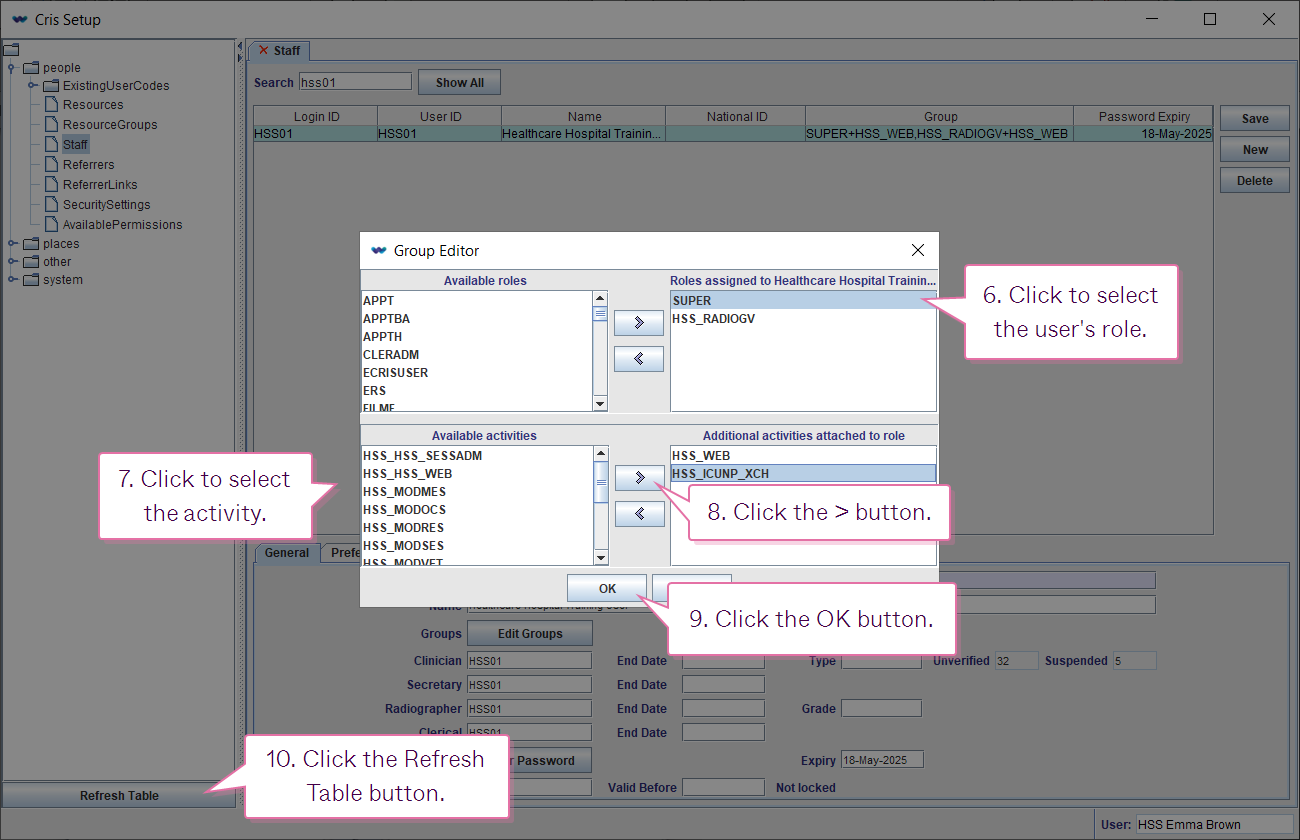
- Click to highlight a role at the top left.
- Click the arrow
 to attach the activity to this person's role.
 - Click the OK button.
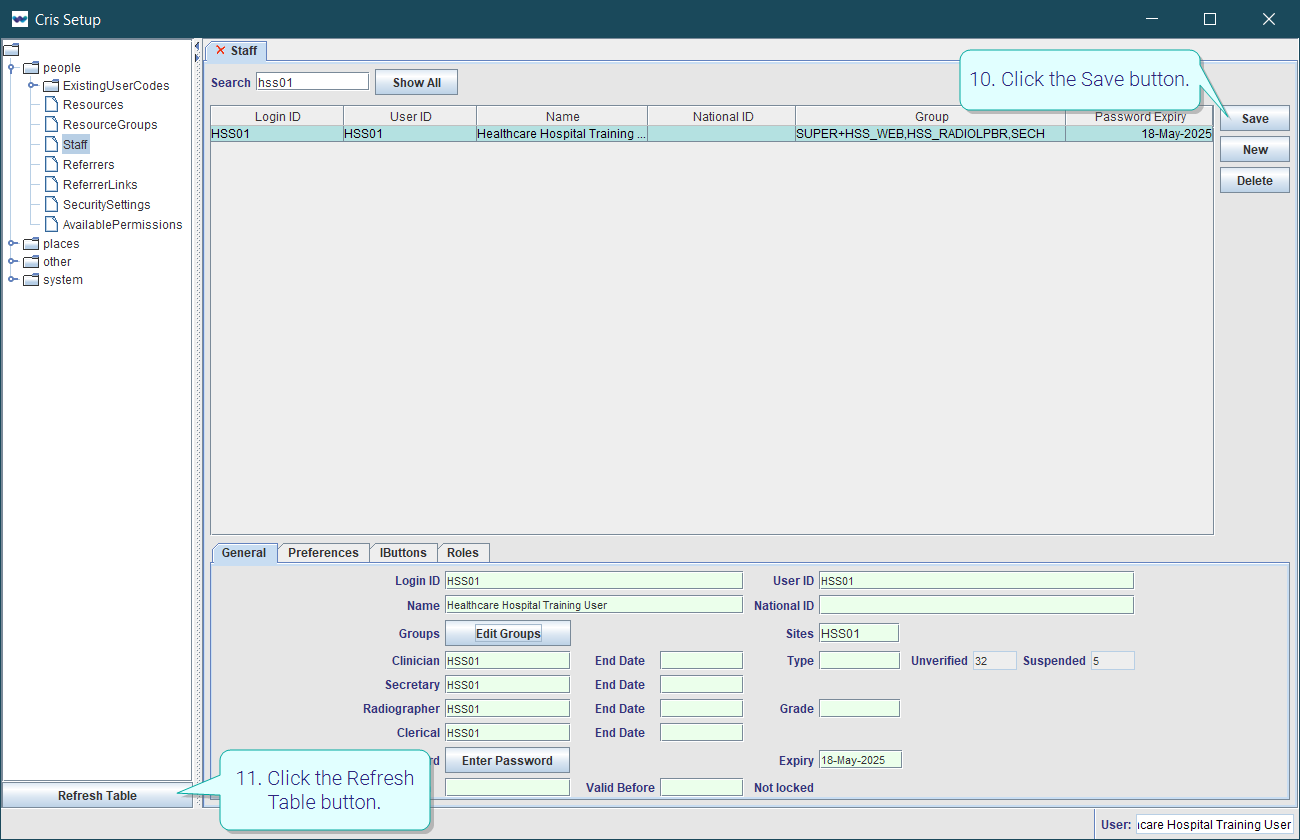
- Click the Save button.
- Click the Refresh Table button.
Note:
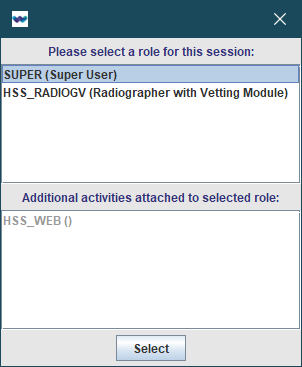
A user can have more than one role assigned via the Staff table, however, each time they log in they will be prompted to select a role.
Assign an activity via the Groups dialog
Use this method to assign extra activities, outside of the already-assigned role.
- Click Tables Setup.
- Select People > Staff.
-
Filter by user name or code.
-
Click to select the user.
- Click the Edit Groups button.
- Click to highlight the role at the top right.
- Select an activity.
- Click the arrow to attach the activity to this person's role.
- Click the OK button.
- Click the Save button.
- Click the Refresh Table button.
Available activities are shown at the bottom left.
Tip:
Add the activity [SITE CODE]_WEB to allow a user access to new Cris web applications (such as Vetting and Reporting).
Assign an activity to restrict ordering by exam
- Click Tables Setup.
- Select People > Staff.
- Enter a name in the Search field.
- Click to select the user.
- Click the Edit Groups button.
- Click to select the user's role in the Roles assigned... field.
- Click to select the activity in the Available activities field.
- Click the right arrow > button.
- Click the OK button.
- Click the Refresh Table button.
Note:
These are the three steps to restrict ordering for NIMIS referrers:
See also Security Settings.
Assign a role via the Roles tab
The Roles tab is used to give extra functionality to Nuclear Medicine and Portering staff. They must also have a role assigned via Groups.
-
Click Tables Setup.
-
Select People > Staff.
-
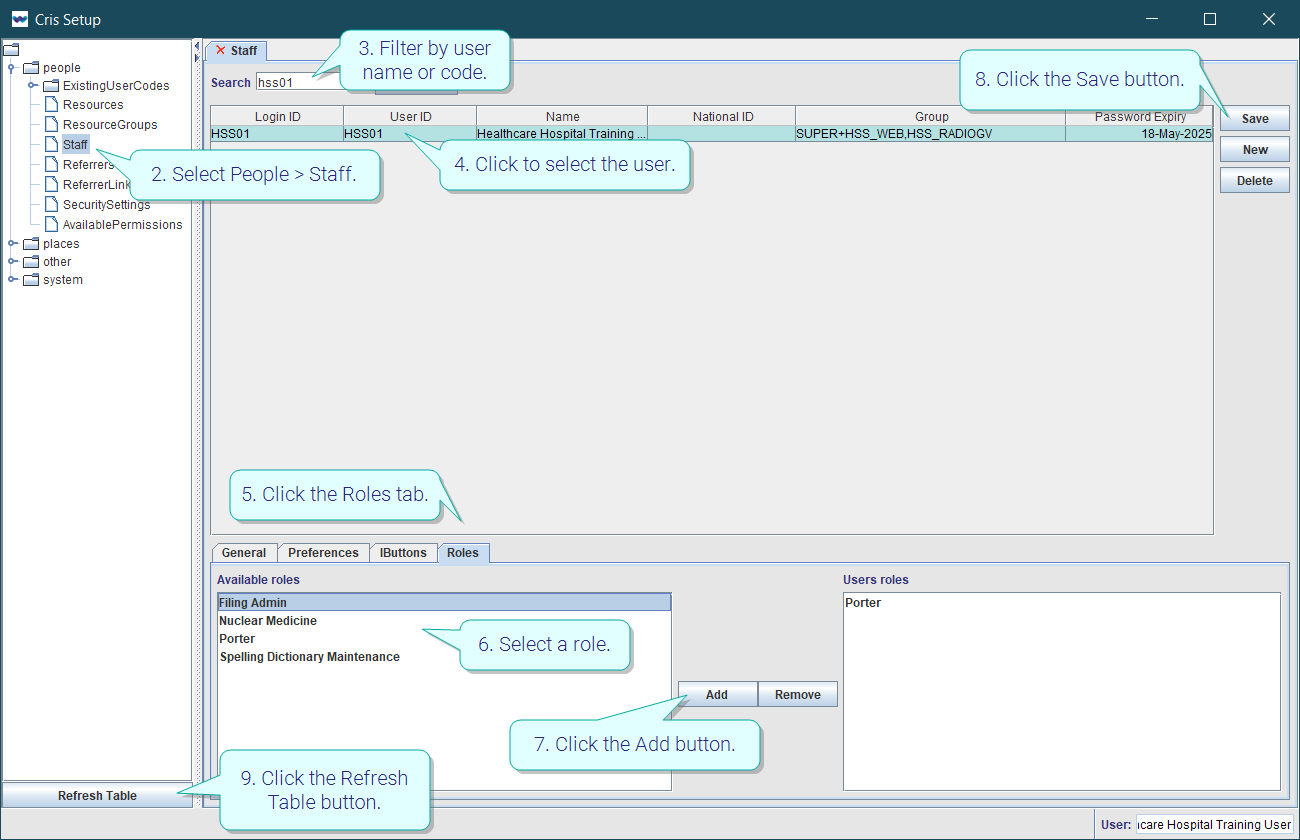
Filter by user name or code.
-
Click to select the user.
-
Click the Roles tab.
Available roles are shown at the bottom left.
Nuclear Medicine
Give a user access to the Nuclear Medicine module and include the user in the Nuclear Medicine Injectors table.
6. Select a role.
7. Click the Add button.
8. Click the Save button.
9. Click the Refresh Table button.
Portering
Include the user in the Porters selection list to enable Portering managers to allocate porters to patients.
Note:
Filing Admin and Spelling Dictionary Maintenance roles are legacy functionality and no longer active.
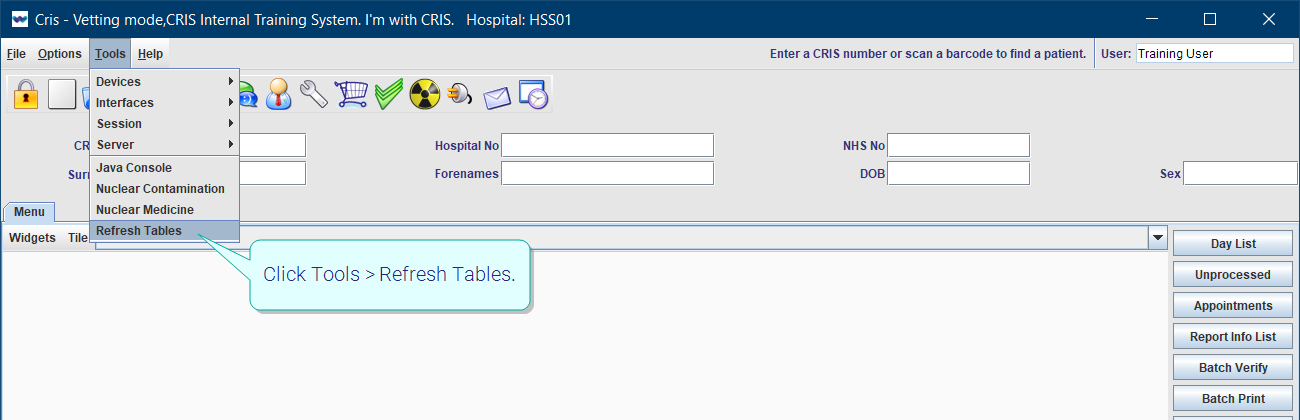
Tip:
We recommend clicking Tools > Refresh Tables after editing system settings / tables to ensure that all changes are applied.
 .
.
System Administration: Staff (Cris users)
Post process examinations.
Add users to people tables - Clerical, Clinicians, Radiographers, and Secretaries - so they appear for selection in Cris fields.